How to Remove Spare Tire: Clear Instructions and Common Mistakes
How to remove spare tire? A flat tire on the roadside becomes much easier to handle when you know exactly where the spare tire is stored and how its retaining system works. On one vehicle, the spare may sit beneath the cargo floor. On another, it may hang under the rear bumper on a steel cable, stand upright in a side compartment, or be mounted on the outside of a rear door. Removing it is usually straightforward, but rushing the job can lead to a damaged wheel, a stuck winch, or an unsafe vehicle.
How to Remove Spare Tire: Clear Instructions and Common Mistakes
This guide explains how to remove spare tire systems found on cars, SUVs, pickup trucks, and vans. It covers the tools you need, the safest preparation, step-by-step removal methods, common designs, stuck mechanisms, and mistakes to avoid. It also explains what to check before installing the spare so you can change a flat without creating a second problem.
What Does Removing a Spare Tire Involve?
Removing a spare tire means releasing it from its factory storage location and taking it out so it can be installed on the vehicle. The process depends mainly on the spare-tire carrier design:
- Trunk or cargo-floor spare: The wheel rests in a recessed well below a carpeted floor panel.
- Underbody spare: A threaded hoist, cable, or winch lowers the wheel from beneath the vehicle.
- Side-compartment spare: The wheel is stored vertically behind an interior panel, often in an SUV or van.
- External rear-mounted spare: The wheel is attached to a swing-out carrier or rear door.
- Pickup-bed spare: The tire is lowered through an access hole near the rear bumper using a long crank tool.
In most cases, you are not “taking apart” the spare-tire system. You are opening the storage compartment, removing a retainer, or lowering the wheel until it can be slid out. The important safety principle is to keep the vehicle stable and avoid putting any part of your body underneath a vehicle supported only by a jack.
What Should You Do Before Removing the Spare Tire?
Park safely, secure the vehicle, and gather every tool before releasing the spare. A spare tire can be heavy and awkward, particularly a full-size truck tire stored under the vehicle. Preparing first prevents unnecessary movement and lets you focus on the carrier rather than searching for equipment beside a road.
Choose a safe location
If you have a flat tire, move as far away from traffic as possible without driving on a completely deflated tire for an extended distance. A level, firm surface is best. Avoid soft shoulders, steep hills, loose gravel, or locations where passing vehicles could strike you.
Turn on the hazard warning lights. If available, set out warning triangles or road flares at an appropriate distance behind the vehicle. Follow local safety rules and never stand on the traffic side of the vehicle when another position is available.
Secure the vehicle
- Put an automatic transmission in Park. Put a manual transmission in first gear or reverse, according to the vehicle manufacturer’s recommendation.
- Apply the parking brake firmly.
- Turn off the engine and remove the key or keep the key fob away from the vehicle if necessary.
- Place wheel chocks in front of and behind a tire that will remain on the ground. If you do not have purpose-made chocks, solid wooden blocks can work temporarily, but never use loose rocks that could roll.
- Ask passengers to exit on the side away from traffic and keep everyone clear of the work area.
Before lifting the vehicle, loosen the wheel nuts on the flat tire slightly if the replacement will be installed immediately. Do not remove the nuts yet. A wheel that is still on the ground provides resistance, making the first break of the nut easier and safer.
What Tools Are Needed to Remove a Spare Tire?
The exact equipment varies by vehicle, but the factory spare-tire kit usually includes most of what you need. Check the owner’s manual and inspect the storage compartment before an emergency. Some vehicles hide the jack handle or lug wrench in separate pieces that must be assembled.
- Owner’s manual: It identifies the spare location, hoist access point, lifting points, and correct removal procedure.
- Lug wrench: Used to loosen and tighten wheel nuts.
- Jack handle or extension rods: Often used to operate an underbody spare-tire winch.
- Vehicle jack: Needed only if you are also changing the wheel. It is not a substitute for a jack stand during repairs.
- Wheel chocks: Help prevent the vehicle from rolling.
- Work gloves: Protect your hands from dirt, sharp edges, and rusty hardware.
- Flashlight: Particularly useful for locating an underbody cable, access hole, or locking retainer.
- Penetrating lubricant: Helpful for exposed, corroded threads, but keep it away from brake components and tire tread.
- Small flat screwdriver or trim tool: May help remove a plastic access cover. Use care to avoid breaking clips.
- Portable tire inflator or pressure gauge: Useful for checking the spare before installation.
Do not replace the factory jack with a random bottle jack or scissor jack unless you understand the vehicle’s approved lifting points and weight capacity. A jack that is too short, too weak, or placed incorrectly can slip or damage the vehicle.

How to Remove a Spare Tire From the Trunk or Cargo Area
Open the trunk or liftgate, remove the floor panels, and release the center retainer holding the wheel in the spare-tire well. This is the simplest design and is common on sedans, hatchbacks, crossovers, and many SUVs.
- Open the trunk, hatch, or liftgate.
- Remove loose cargo, the cargo mat, and any removable floor panel covering the spare.
- Look for a foam tool tray, storage bin, or molded cover. Lift it out if it blocks the wheel.
- Identify the center retaining device. It may be a plastic hand knob, threaded bolt, wing nut, metal clamp, or quick-release strap.
- Turn the knob or nut counterclockwise. If a threaded bolt is present, use the supplied wrench or a correctly sized socket rather than an oversized adjustable wrench.
- Set the retainer aside in a clean location. Do not leave it loose inside the tire well where it could rattle or disappear.
- Lift the wheel straight up if there is enough clearance. If the tire is heavy, pull it toward you first and then rotate it out of the well.
- Remove the jack, lug wrench, and any wheel chock stored below the spare.
Some compact spare tires fit tightly in the molded well. Avoid prying against painted bodywork or wiring. Hold the tire by the tread or wheel openings, not by a sharp metal edge. If the wheel appears stuck, check for a second retaining strap or a foam insert still attached to it.
When the cargo floor will not lift
A floor panel may be held by a latch, a fabric pull tab, a quarter-turn fastener, or the rear seatback. Do not force it upward before checking the edges. Fold the rear seats only if the vehicle’s design requires additional clearance. If the panel is hinged, support it so that it does not fall against the liftgate or trim.
How to Remove an Underbody Spare Tire
Insert the factory jack handle or crank tool into the access point and turn it in the direction specified by the manual until the cable lowers the wheel to the ground. This system is common on pickup trucks, full-size SUVs, and some vans.
Locate the hoist access point
The access point is usually inside the rear bumper, behind a small plastic cover, or in the cargo area near the rear threshold. It may look like a small square or hexagonal opening. Use a flashlight if the cover is dirty or the vehicle is parked in low light.
Remove the cover carefully. A plastic trim tool is safer than a screwdriver, although the factory tool may include a flat end designed for this purpose. Keep the cover where you will find it later.
Lower the wheel
- Assemble the jack handle and extension rods according to the manual.
- Insert the end into the hoist access opening until it engages the winch.
- Turn the handle slowly in the lowering direction. Most systems require counterclockwise rotation, but confirm this before applying force.
- Continue lowering until the spare rests on the ground and the cable has enough slack.
- Reach under the edge of the vehicle only as far as necessary to access the retainer. Keep your body out from beneath the vehicle.
- Rotate or tilt the retaining plate so it can pass through the wheel’s center opening.
- Pull the spare tire out from under the vehicle.
The retaining plate may be shaped like a small metal disc or a hook attached to the cable. It often releases only when the wheel is lying flat and the cable has substantial slack. Do not pull hard on the cable while it is still under tension.
Why does the underbody tire not come down?
The hoist may be locked, corroded, overloaded, or engaged in the wrong direction. First, verify that the crank tool is fully seated and that the transmission is in Park or gear with the parking brake applied. Turn the tool slowly in both directions only enough to determine which direction releases the cable.
If the cable will not move, look for dirt or rust around the access shaft. Apply a small amount of penetrating lubricant to the exposed mechanism if it can be reached safely, then wait several minutes. Do not spray lubricant onto the brake rotor, drum, tire, or exhaust system.
If the handle turns but the tire does not lower, the cable may be broken or the winch may be stripped. If the handle will not turn at all, the hoist may be seized. Avoid using a long pipe or cheater bar that could twist the factory extension rods or damage the winch. Roadside assistance is usually safer than crawling beneath the vehicle to cut a loaded cable.
How to Remove a Spare Tire From a Pickup Truck
Use the access hole near the rear bumper to lower the spare, then remove the cable retainer through the wheel’s center opening. Pickup trucks generally use the underbody hoist described above, but the exact crank-tool arrangement differs by manufacturer.
Check the following areas for the tool and access point:
- Behind a small cover in the rear bumper
- Below the tailgate handle
- Inside a rear license-plate recess
- Behind the rear seat or under the passenger seat
- In a jack storage compartment near the cab or cargo box
Open the tailgate if doing so provides more room, but do not stand directly behind the truck on a roadway. Once the tire is lowered, slide it toward the rear of the truck by the tread. Full-size spare tires are heavy enough to strain your back, so squat, keep your back straight, and use another person if available.
Some trucks use a lockable spare-tire hoist. The ignition key, a separate tubular key, or a security adapter may be required before the crank tool can engage. Do not attempt to bypass a locking hoist with improvised tools, as the locking head and bumper access can be damaged easily.
How to Remove a Side-Mounted Spare Tire
Open the interior side panel or rear door compartment, remove the retaining knob or strap, and lift the wheel out through the available opening. Side-mounted spares are common in vans, older SUVs, and vehicles with limited space beneath the body.
- Open the rear hatch, cargo door, or side access door.
- Locate a removable trim panel, carpet flap, or access cover.
- Release the panel without pulling sharply on electrical wiring or speaker cables.
- Unscrew the center retainer or release the strap holding the wheel upright.
- Support the tire with one hand while removing the final part of the retainer.
- Tilt the wheel toward the opening and slide it out carefully.
The wheel may be wedged tightly against the interior trim. Rotate it slowly rather than forcing it sideways. If the vehicle has a rear-mounted jack or tool tray, remove that equipment first to create more clearance.
How to Remove an Externally Mounted Spare Tire
Unlock or open the carrier, remove the wheel nuts or center retainer, and support the tire before pulling it away from the rear door or swing-out bracket. External spare tires are common on off-road SUVs, older utility vehicles, and some vans.
Rear-door-mounted wheel
- Unlock the rear door or carrier using the vehicle key.
- Open the carrier or rear door only as far as the design permits.
- Locate the wheel nuts, bolts, or central retaining cap.
- Support the lower part of the tire with your knee or one hand.
- Loosen and remove the retaining hardware in a crisscross pattern if several nuts are used.
- Pull the wheel straight toward you, then lower it carefully.
Do not remove the final nut while allowing the full tire weight to hang from the studs. A full-size off-road tire can weigh more than expected and may pull the door downward or damage the studs.
Swing-out carrier
A swing-out carrier normally has a latch, a safety pin, and sometimes a separate wheel-retaining plate. Release the latch and support the carrier as it opens. On uneven ground, the carrier may swing unexpectedly. Keep hands away from pinch points between the carrier and bodywork.
After removing the wheel, inspect the carrier hinges, latch, and rubber bump stops. A loose latch or bent bracket should be repaired before the spare is returned to service.
How Do You Remove a Stuck Spare Tire?
Identify whether the problem is a seized retainer, a jammed cable, corrosion, or an overloaded tire before applying force. The safest repair depends on the cause. Never place yourself beneath a vehicle merely to reach a stubborn spare.
Stuck trunk retainer
Clear dirt from the threads and apply a small amount of penetrating lubricant. Let it work before trying again. Use the correct-size socket or wrench and turn steadily rather than jerking the tool. If the plastic knob is stripped, grip the metal threaded section only if doing so will not damage the wheel or trim.
Corroded underbody hoist
Rust can bind the threaded shaft, cable drum, or retaining plate. Tap the outside of the hoist lightly with a small hammer if it can be reached from a safe standing position. Avoid striking the cable, fuel tank, brake lines, exhaust, or bumper supports.
For a temporary roadside solution, professional roadside service is preferable. A technician may be able to lower or cut the mechanism using equipment while keeping clear of the vehicle’s underside. Afterward, replace the hoist or cable rather than relying on a visibly damaged carrier.
Wheel frozen to the carrier
Moisture and road salt can bond the wheel to a metal bracket. Once the retainer is fully loose and the wheel is supported, rock the tire gently from side to side. A rubber mallet can help separate a stuck wheel without damaging the rim. Do not strike an aluminum wheel with a steel hammer, and do not pry against brake lines or painted body panels.
Broken cable or missing crank tool
A broken cable means the tire may be resting on the hoist but no longer connected correctly. A missing crank tool may be replaceable through a parts department, but improvised rods can slip and injure your hand. If the vehicle must be moved, contact roadside assistance. Once home, replace missing tools and repair the carrier before storing the spare again.
What Should You Check Before Installing the Spare?
Removing the spare is only half the job. Inspecting it before installation prevents you from replacing one flat tire with another unsafe tire.
- Inflation pressure: Check the sidewall or owner’s manual for the correct pressure. The compact spare may require a much higher pressure than a normal tire.
- Tread and sidewalls: Look for cracks, cuts, bulges, exposed cords, and damage from the storage location.
- Age and condition: A spare that has spent years under a vehicle may be weather-cracked even if it has never been driven.
- Wheel compatibility: Confirm that the bolt pattern, center bore, wheel diameter, and offset are suitable for the vehicle.
- Directional requirements: Some temporary spares have a specified rotation direction or a maximum speed marking.
- Clearance: Make sure the spare does not interfere with brake calipers, suspension components, or four-wheel-drive hardware.
- Speed and distance limits: A compact temporary spare is generally intended only for limited speed and distance. Follow the exact label on the tire.
Many modern vehicles use a tire-pressure monitoring system, or TPMS. The spare may not contain a sensor, or the system may display a warning after installation. That warning does not necessarily mean the spare is unsafe, but the tire pressure must still be checked manually and the system should be reset or relearned according to the vehicle instructions.
How to Prepare the Wheel Change After Removing the Spare
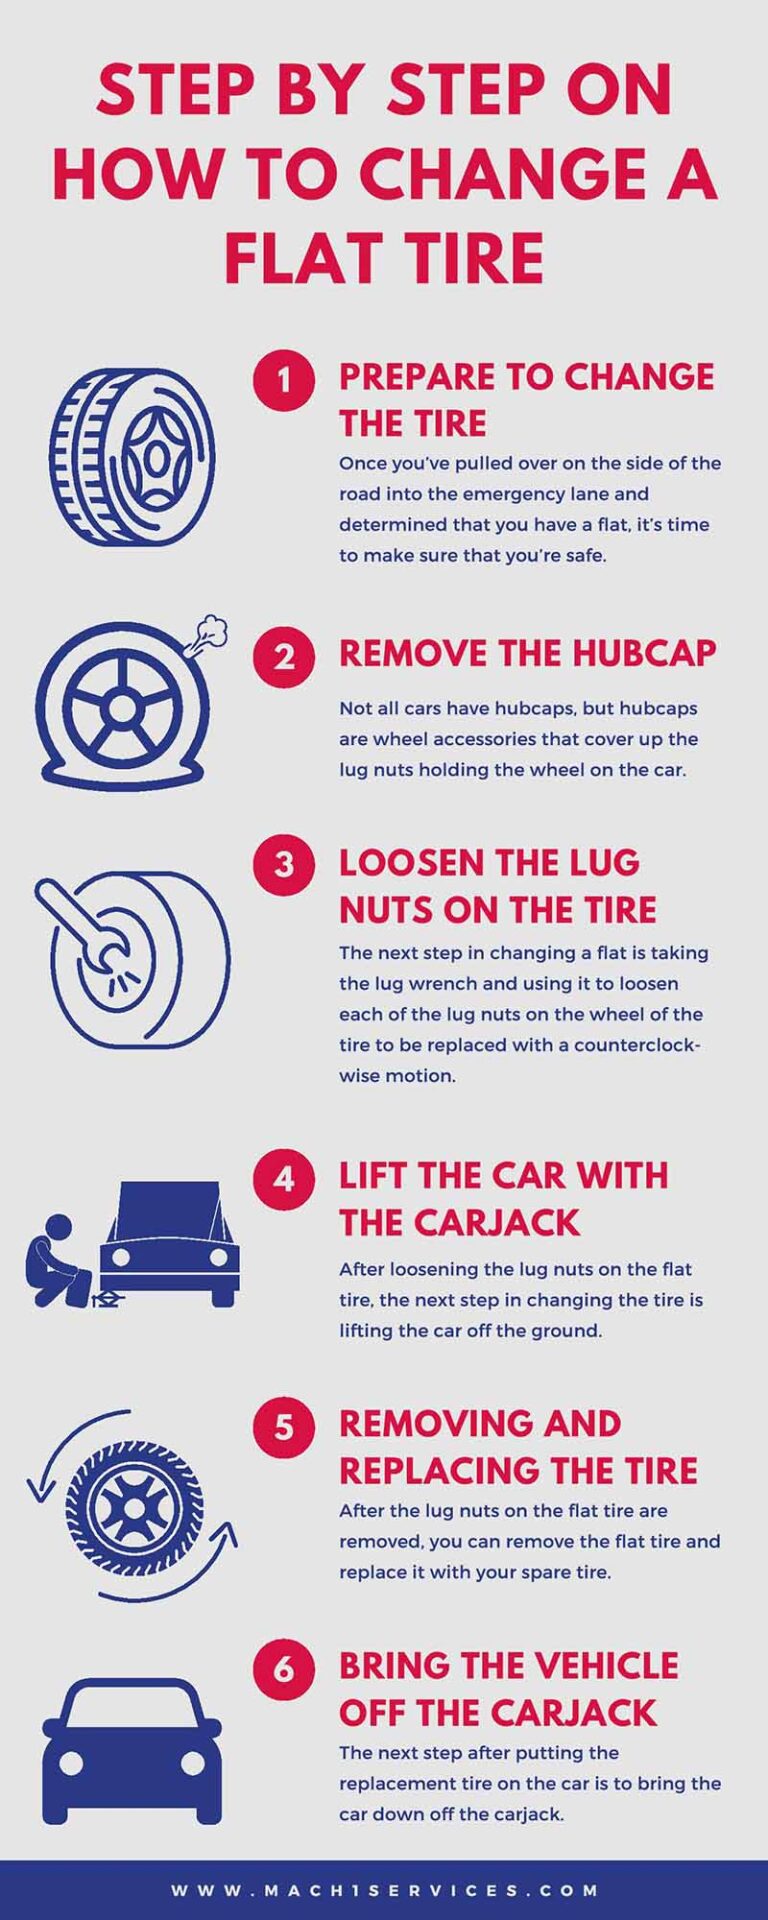
Once the spare is out, place it near the flat tire and keep the lug nuts in a container or pocket where they cannot roll into traffic. Follow the vehicle’s designated jack point; it is usually marked by a notch, reinforced seam, or symbol on the rocker panel.
- Remove the hubcap or wheel cover if it blocks the lug nuts.
- Loosen each lug nut about one turn while the flat tire remains on the ground.
- Position the jack at the specified lifting point.
- Raise the vehicle only until the flat tire clears the ground.
- Remove the lug nuts and place them face up so dirt does not enter the threads.
- Pull the flat wheel straight toward you. If it sticks to the hub, rock it gently rather than striking the wheel.
- Install the spare and hand-tighten the lug nuts.
- Lower the vehicle until the tire touches the ground but does not carry the full vehicle weight.
- Tighten the lug nuts in a star or crisscross sequence.
- Lower the vehicle completely and perform a final torque check with a torque wrench as soon as possible.
Do not use the jack to support the vehicle while you work beneath it. Do not place any part of your body under a vehicle supported only by the emergency jack. If the ground is soft, the jack can sink or tilt; stop and seek a safer location or professional assistance.
How Should You Store the Flat Tire?
After installing the spare, secure the flat wheel in the original storage location if it fits. A full-size replacement tire may not fit in a compact spare well, so use the cargo area temporarily and secure it with a strap or cargo net. An unsecured wheel can become a dangerous projectile during sudden braking.
For an underbody carrier, reinstall the flat tire only if it is safe and the carrier can support its size and weight. Guide the retaining plate through the center opening, operate the winch until the wheel is snug against the vehicle, and confirm that it cannot swing or rattle. Do not overtighten the winch cable; excessive force can damage the hoist.
Return the jack, handle, lug wrench, access cover, and retainer to their proper positions. Check the cargo floor and rear doors before driving. A missing access cover can allow water and road debris into the hoist mechanism.
Common Mistakes to Avoid
Ignoring traffic and roadside hazards
The most serious mistake is concentrating on the tire while standing too close to moving traffic. Turn on hazard lights, move to a safer position when possible, and call for assistance if visibility, weather, or traffic makes the job dangerous.
Using the wrong lifting point
Placing a jack under a floor pan, suspension arm, fuel tank, or thin body panel can cause structural damage or a sudden fall. The correct lifting points are shown in the owner’s manual and may be marked on the vehicle.
Removing lug nuts before the tire is supported
The wheel can shift when the final lug nut is removed. Loosen the nuts before lifting, but do not remove them until the tire is off the ground and the vehicle is stable.
Forcing a winch in the wrong direction
Some drivers assume every hoist lowers counterclockwise, but designs differ. Turning a mechanism aggressively in the wrong direction can strip gears or jam the cable. Confirm the direction and use slow, controlled movements.
Getting under the vehicle to reach the tire
An underbody spare is designed to be lowered without placing your torso beneath the vehicle. If the tire cannot be released from the side after it reaches the ground, stop and request help rather than crawling under an unsupported vehicle.
Forgetting the spare-tire pressure
A spare can lose air while sitting unused. Check its pressure at every oil change or at least several times a year. The recommended pressure may be printed on the spare’s sidewall, the placard, or in the manual, and it may differ from the pressure of the regular tires.
Driving too fast on a compact spare
Temporary spares are not designed for normal long-distance driving. Follow the speed warning printed on the tire, avoid abrupt steering and braking, and repair or replace the original tire promptly.
Failing to retorque the wheel
A wheel installed with an ordinary lug wrench may not have the manufacturer’s required torque. Over-tightening can damage studs, while under-tightening can allow the wheel to loosen. Use a calibrated torque wrench as soon as practical and recheck after driving the distance specified by the vehicle manufacturer.
Advanced Recommendations for Spare-Tire Maintenance
Inspect the storage system routinely
During a service visit, inspect the retainer, cable, winch, threaded shaft, and access cover. Look for rust, fraying, bent brackets, missing hardware, or a mechanism that feels unusually rough. Underbody components are exposed to salt, mud, water, and impact from road debris.
Clean and protect exposed hardware
Remove loose dirt from a hoist and apply a manufacturer-approved corrosion protectant where appropriate. Avoid coating moving brake parts, tire tread, electrical connectors, or hot exhaust components. Some owners use a light rust-inhibiting spray on exposed steel, but the product should be compatible with rubber and plastic nearby.
Mark the location of the emergency tools
If several people drive the vehicle, make sure everyone knows where the jack, handle, wheel wrench, locking-key adapter, and warning equipment are stored. A missing lock adapter can prevent removal of a wheel even when the spare itself is accessible.
Verify compatibility after changing wheels or tires
After installing larger wheels, aftermarket suspension parts, or different brake components, check that the factory spare still fits. A spare that clears the suspension but does not clear the brake caliper is not a usable emergency wheel. Four-wheel-drive and all-wheel-drive vehicles may have additional diameter restrictions; consult the vehicle manufacturer before using a temporary spare.
Consider a full-size spare for demanding use
If the vehicle is used for towing, long-distance travel, remote driving, or off-road trips, a full-size matching spare may be more practical than a compact temporary tire. It adds weight and takes more storage space, but it can reduce speed and distance limitations. The carrier, wheel well, suspension, and tire-pressure monitoring system must all be suitable for the larger wheel.
When Should You Call for Roadside Assistance?
Call for professional help when the vehicle is in an unsafe traffic position, the ground is unstable, the spare is inaccessible, the carrier is badly corroded, or the wheel cannot be released without getting beneath the vehicle. Assistance is also wise if you lack a working jack, the locking-wheel-nut key is missing, or the spare is visibly damaged.
A flat tire is inconvenient, but it is not worth risking a crush injury or roadside collision. If the tire is on a large truck or heavy SUV and you cannot lift it safely, ask for help. Professional technicians have lifting equipment, replacement hoist parts, and the correct tools for seized hardware.
FAQ: How to Remove Spare Tire Safely
Where is the spare tire usually located?
It is usually under the cargo floor, beneath the rear of the vehicle, inside a side compartment, or mounted on an external rear carrier. The owner’s manual identifies the exact location and explains how its retainer or winch operates.
How do you remove a spare tire from under a car?
Insert the factory crank tool into the hoist access point and lower the tire until it rests on the ground. Then create slack in the cable, release the retaining plate through the wheel center, and slide the tire out from the side. Never crawl beneath a vehicle supported only by a jack.
Why will my spare tire winch not lower?
The winch may be corroded, locked, jammed, or engaged incorrectly. Confirm that the crank tool is fully inserted and that you are turning it in the specified direction. Use penetrating lubricant on accessible exposed threads, but do not force a seized winch with a long lever. Roadside assistance is safer if the mechanism remains stuck.
Do I need to remove the spare tire before changing a flat?
Yes, if the spare is stored in a location that blocks the jack or tools, but not every vehicle requires it to be removed first. Trunk-mounted spares generally need to come out so you can access the jack. An underbody spare can usually remain lowered near the vehicle while you prepare the wheel change.
Can I drive with the spare tire under the vehicle?
Only when it is fully secured in its hoist and does not hang below the vehicle. A loose or partially raised spare can fall onto the road, damage the cable, or strike other components. After returning it to storage, pull down gently on the tire to confirm that the carrier is holding it firmly.
How often should I check the spare tire?
Check it several times a year and whenever you service the vehicle. Inspect air pressure, tread, sidewalls, wheel condition, and the storage hardware. A spare that has been ignored for years may be flat, cracked, or impossible to lower when needed.
Can I use the spare tire on any wheel position?
Not always. Some temporary spares are restricted to a particular axle or side, especially when they are smaller than the regular tires or have directional markings. Follow the arrows, labels, and instructions printed on the spare and in the owner’s manual.
Final Checklist Before Driving
Before leaving the location, confirm each of the following:
- The spare is inflated to the specified pressure.
- The wheel nuts are installed and tightened in the correct sequence.
- The jack is fully lowered and removed from beneath the vehicle.
- The flat tire, tools, and loose hardware are secured.
- The underbody carrier is fully raised and latched if the spare was lowered.
- The parking brake is released only when you are ready to move.
- The compact-spare speed and distance limits are understood.
- The damaged tire will be repaired or replaced promptly.
For official tire, wheel, and roadside safety information, review the National Highway Traffic Safety Administration tire safety guidance.
Conclusion
Learning how to remove spare tire equipment is mainly a matter of identifying the storage design and releasing it in the correct way. A trunk-mounted wheel usually needs only its center retainer removed, while an underbody tire must be lowered with the factory winch before its cable plate can be released. External and side-mounted systems require extra attention to carrier latches, wheel weight, and pinch points.
Work on firm ground, secure the vehicle, keep clear of unsupported areas, and never force a corroded mechanism beyond what your tools can safely handle. Check the spare’s pressure and condition before relying on it, then repair the original tire and inspect the storage carrier when the emergency is over. A few minutes of preparation can make the next flat-tire situation safer, faster, and far less stressful.