How Long Does a Tire Patch Take to Dry: Complete Guide and Tips
A tire patch usually needs 10–30 minutes to set, but the complete repair may take 30–60 minutes before the tire is ready for normal driving.
The surprising part is that a patch can look firmly attached long before the repair has reached its full strength A smooth secure-looking surface does not prove that.
That distinction matters because a rushed repair can slowly leak lift at the edges or fail under heat and highway flexing In this guide you will learn how. This guide examines “how long does a tire patch take to dry” and explains the details that matter in practice.
- ✓A tire patch commonly sets in 10–30 minutes, but a complete repair often takes 30–60 minutes from preparation through inspection.
- ✓Cold temperatures, humidity, thick adhesive, poor cleaning, and inflated pressure can lengthen the curing process.
- ✓A patch should be installed from inside the tire after the damage is inspected; an exterior plug alone is not the same repair.
- ✓Do not drive on a repair that leaks, has lifted edges, sits in a sidewall, or involves a puncture too large or irregular to repair safely.
How Long Does a Tire Patch Take to Dry?
For a properly prepared puncture the adhesive or vulcanizing cement may become tack-free in about 5 15 minutes and reach a usable initial bond in roughly 10 30.
There is no single universal drying time. Some patches use a chemical-curing process, while others depend more heavily on pressure, heat, or a specific adhesive system. The instructions supplied with the patch kit or repair material take priority over a general estimate.
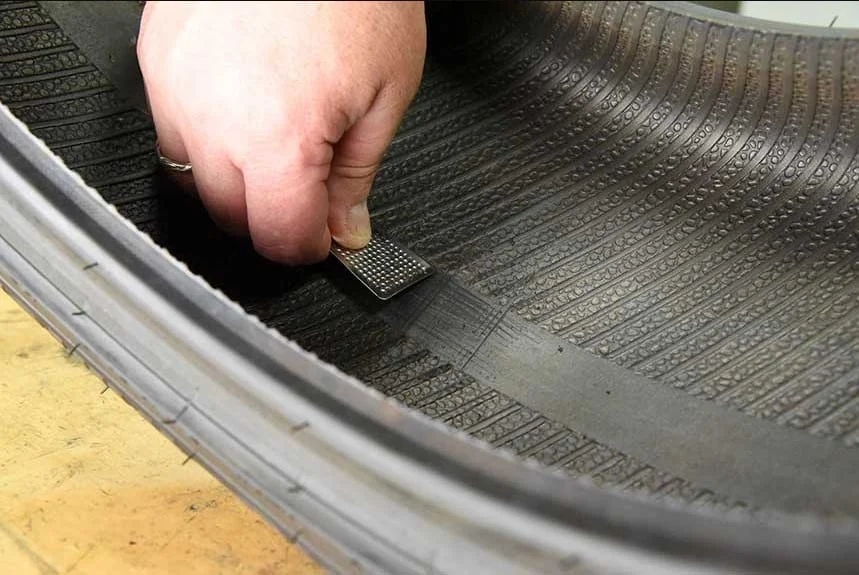
- Set time: The surface may stop feeling wet after several minutes, but that does not mean the bond is fully cured.
- Repair time: A professional repair includes demounting the tire and checking the inside, so it takes longer than applying material to the outside.
- Drive time: The tire should not be returned to service until the recommended cure period has passed and the repair has passed a leak test.
Drying, curing, and bonding are not identical
Drying usually describes the evaporation of solvents from a liquid adhesive. Curing describes the chemical or physical process that gives the repair its final strength. A patch can feel dry but remain vulnerable if the adhesive has not finished curing.
Bonding also depends on contact between clean, properly prepared rubber surfaces. If mold-release residue, dirt, moisture, tire lubricant, or loose rubber remains beneath the patch, waiting longer will not correct the underlying problem. Time cannot compensate for poor preparation.
Typical time ranges
| Repair situation | Typical wait before testing | What can change the timing |
|---|---|---|
| Small internal patch | About 10–30 minutes | Adhesive type, temperature, and patch instructions |
| Combination plug-patch repair | About 15–30 minutes after installation | Material thickness, pressure, and preparation quality |
| Cold or damp conditions | Often longer than the standard interval | Slow solvent evaporation and moisture contamination |
| Full shop service | About 30–60 minutes total | Inspection, demounting, mounting, balancing, and workload |
These are practical ranges, not guarantees. If a product label specifies a longer wait, follow the label. If the repair still bubbles during a leak test after the stated curing period, it is not ready, regardless of the clock.
What Determines Tire Patch Drying Time?
The material may be designed to cure quickly, but the surrounding conditions determine how consistently it reaches that point. The most important factors are temperature, humidity, adhesive thickness, surface preparation, and the pressure placed on the patch while it bonds.
The tire s condition matters as much as the adhesive A puncture that has been driven while underinflated may have internal abrasion or heat damage that cannot be.
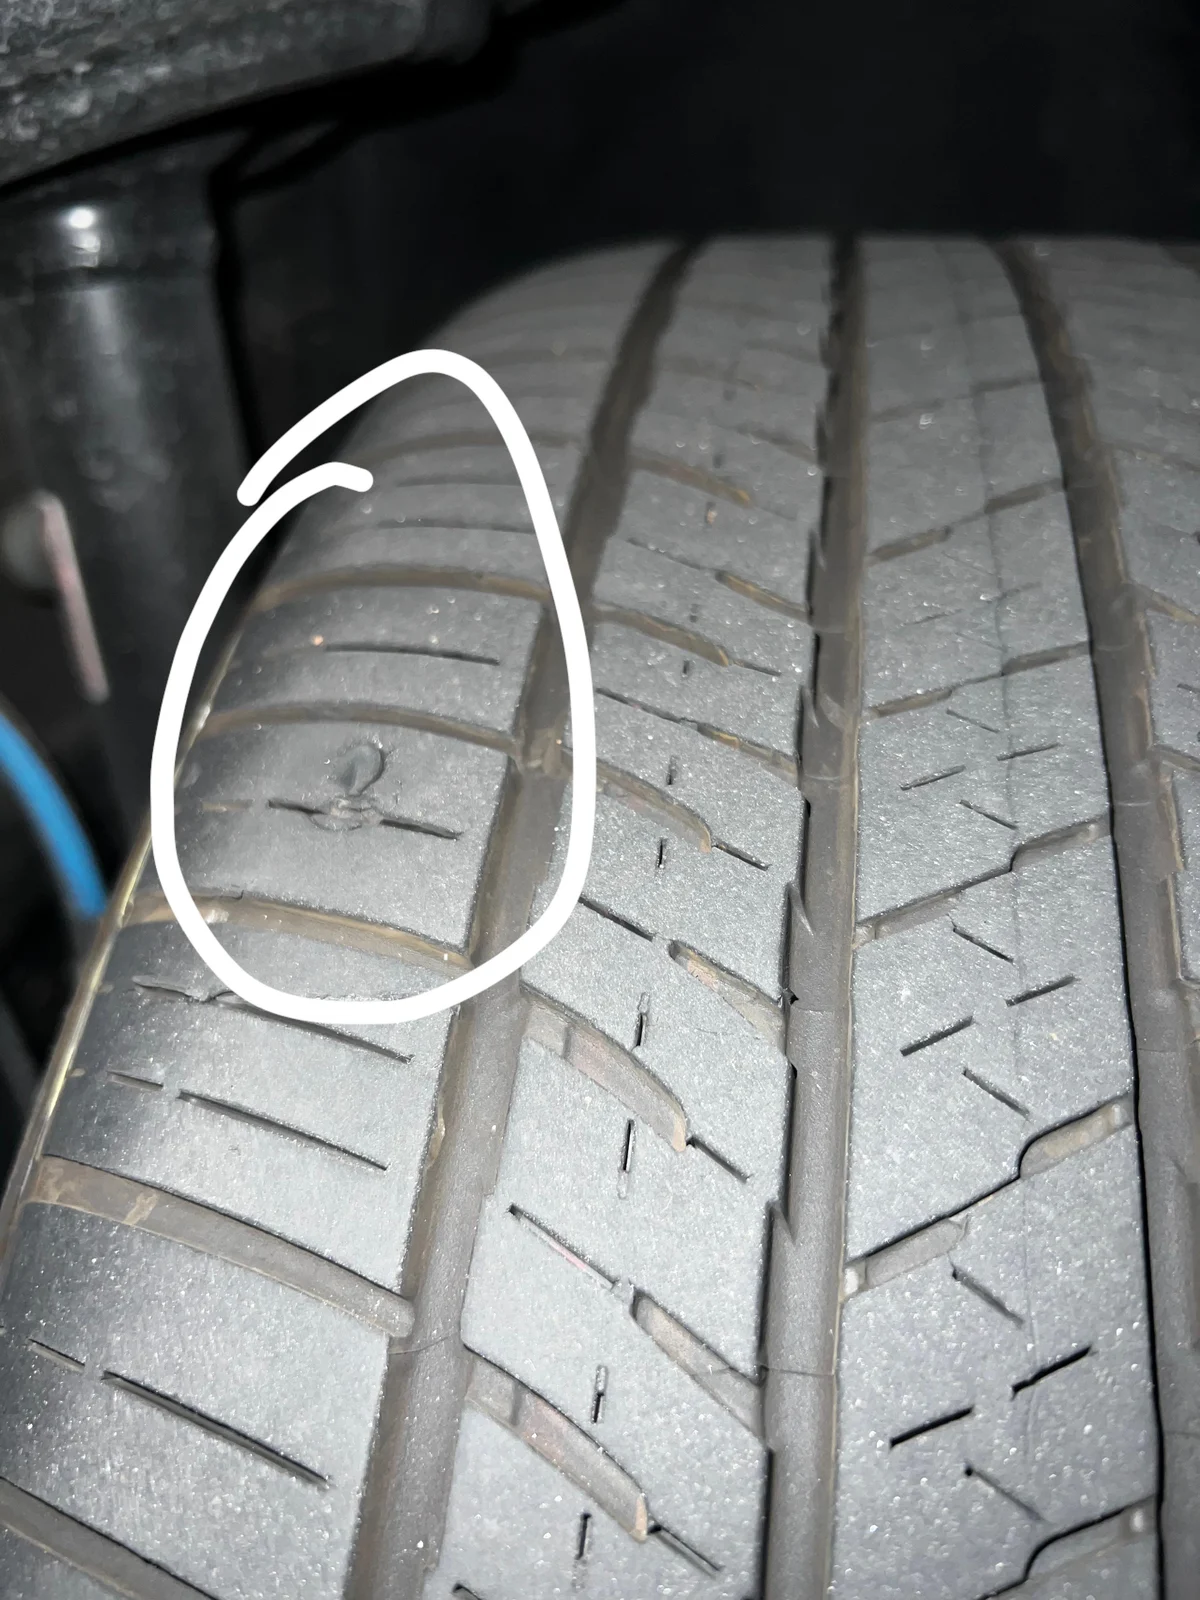
- Temperature: Adhesives generally cure more slowly in a cold garage or on a frozen tire.
- Surface condition: Moisture, silicone products, tire shine, dust, or unrepaired contamination can prevent a lasting bond.
- Adhesive layer: Too much cement can remain soft underneath; too little may not cover the prepared area evenly.
- Pressure and rolling: Correct pressure helps seat the patch, but driving immediately can flex and heat an unfinished repair.
Temperature and humidity
Most tire repair materials work best at moderate room temperatures on a dry tire In cold conditions solvent evaporation slows and the rubber becomes less flexible making it.
Do not use an open flame heat gun or high-temperature tool to speed up curing Excessive heat can damage the tire liner distort the patch or create a.
Surface preparation
Preparation often has more influence than the nominal dry time The technician normally locates the puncture removes the tire from the rim marks the area cleans it and.
Buffing should remove the appropriate surface sheen without cutting deeply into the tire If the liner is gouged excessively thin or damaged by a previous repair the tire.
Patch design and adhesive type
Some patches are intended for chemical vulcanization with a specific cement. Others have an integrated stem for a combination repair, while certain emergency products are designed only for temporary use. Their instructions, application pressure, and cure times can differ substantially.
Never assume that any rubber cement is suitable for a tire patch Household adhesive general-purpose glue or an incompatible cement may not tolerate the tire s heat flexing.
How a Proper Tire Patch Is Installed
A reliable repair is more than placing a sticky disk over a puncture The tire should be removed from the wheel so the inner liner casing and puncture. This distinction matters when answering “how long does a tire patch take to dry”.
Many industry repair practices use a combination repair often called a plug-patch for a puncture in the repairable tread area The stem fills the puncture channel while the.
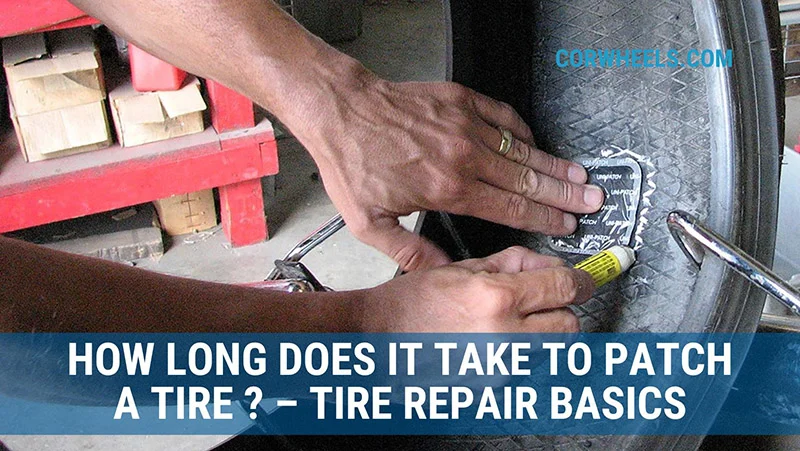
- Inspect first: Confirm that the damage is in the tread area and that the casing has not been compromised.
- Prepare carefully: Clean and texture the inner liner only as directed for the repair system.
- Apply the correct material: Use a patch or combination repair designed for passenger tires and the size of the injury.
- Test afterward: Inflate to the recommended pressure and check for leaks before returning the tire to service.
- Remove the wheel and deflate the tire safely before breaking the bead.
- Inspect the inside and outside for the puncture, internal scuffing, exposed cords, sidewall injury, and prior repairs.
- Measure and evaluate the puncture according to the repair material’s limits.
- Prepare the inner liner and puncture channel with the specified cleaning and buffing process.
- Apply the appropriate cement or repair compound, allowing it to reach the instructed tack or cure stage.
- Install the patch, stem, or combination repair with firm, even pressure.
- Trim material if the instructions require it, then allow the repair to cure for the stated period.
- Inflate, inspect the bead, and perform a leak test at the repaired area and valve.
- Remount the wheel, torque the lug nuts correctly, and verify pressure before driving.
Why an outside plug is different
An exterior plug can be useful as a temporary roadside measure but it is not automatically equivalent to an internal patch or combination repair The outside method may.
Some plug products are marketed for permanent use when installed within their stated limits but the exact product directions still matter If the tire has been driven flat has.
Why professional shops may take longer
A shop’s quoted time includes more than adhesive curing. The technician may need to remove the wheel, dismount the tire, inspect it, repair it, allow the material to set, inflate it, check for leaks, rebalance the assembly, and reinstall it.
Scheduling, tire pressure monitoring sensors, stuck beads, corrosion, and a tire that requires replacement can add time. A longer visit does not necessarily mean the patch itself is taking hours to dry; it may reflect the safety checks surrounding the repair.
How to Tell Whether a Tire Patch Is Ready
Do not judge readiness by touching the patch once or looking at its edge. A finished repair should be firmly bonded, correctly seated, and free of air loss when tested. The tire should also hold its specified pressure after it is inflated.
The best practical check is a leak test using an approved soapy solution or a commercial leak-detection method around the repair Escaping air creates bubbles A slow leak.
- Edge seal: The patch edge should lie flat without curling, lifting, or visible gaps.
- Air retention: The tire should hold the correct pressure during the test and after a short observation period.
- Surface condition: There should be no wet, soft, sliding, or visibly contaminated adhesive around the repair.
- Valve and bead: Check these areas too, because a leak blamed on the patch may come from another point.
Signs the repair is not cured or sealed
A continuing bubble stream is the clearest warning sign. Other concerns include a patch that shifts under pressure, a raised edge, a visible channel at the puncture, or pressure that drops noticeably after inflation.
A strong chemical smell alone does not prove failure but a soft or gummy repair surface can indicate that the product has not cured or that too much.
Pressure and first-drive checks
Inflate the repaired tire to the vehicle manufacturer’s recommended cold pressure, not the maximum pressure molded into the sidewall unless that is also the vehicle specification. Confirm the pressure with a reliable gauge and reinstall the wheel using the correct lug-nut torque.
For the first drive avoid aggressive cornering heavy loads and high speeds until you have confirmed that the tire remains stable and properly inflated After driving a short.
When a Tire Should Not Be Patched
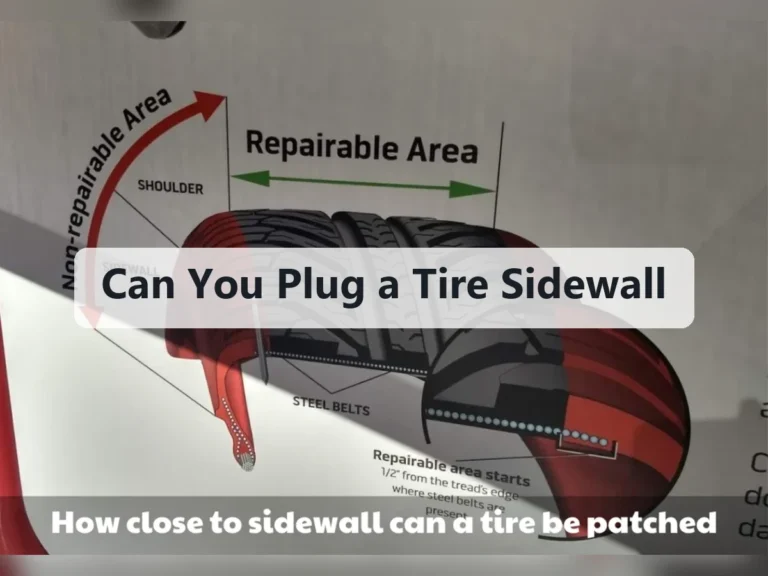
Drying time is irrelevant when the tire is outside safe repair limits. A patch cannot restore strength to a damaged sidewall, repair exposed cords, or reverse internal deterioration caused by driving with little or no air.
Repairability depends on the puncture’s location, size, angle, condition, and the tire’s overall history. The final decision should be made after an internal inspection by a qualified tire professional, especially if the vehicle was driven after the pressure warning appeared.
- Sidewall or shoulder damage: These flexible areas generally are not treated like the central tread and may require tire replacement.
- Large or irregular punctures: A torn, jagged, or oversized injury may remove too much casing material for a dependable repair.
- Internal run-flat damage: Driving while underinflated can create hidden abrasion and heat damage.
- Weak or aged tire: Severe cracking, bulges, exposed cords, or extensive wear can make repair inappropriate.
Location matters
The central tread area is generally the most favorable location for a repair because it experiences less sidewall flex. Damage near the shoulder transitions into a curved, heavily flexing region and may not be safely repairable, even if it looks small from outside. Keep these limitations in mind when considering “how long does a tire patch take to dry”.
A puncture in the sidewall is particularly serious. The sidewall carries and flexes under the vehicle’s load, and a patch cannot reliably restore the structure in the same way it can seal a limited tread puncture.
Previous repairs and run-flat driving
Multiple repairs close together, overlapping repairs, or a previous plug that has enlarged the injury can reduce the remaining strength of the tire. The technician must evaluate the entire area, not just the newest leak.
If the tire was driven while flat or nearly flat inspect it before attempting a repair Internal abrasion may appear as a dark rough or powdered area on.
Common Mistakes That Make a Patch Fail
Most patch failures are not caused by waiting a few minutes less than the ideal time alone. They usually involve an unsuitable repair, inadequate preparation, contamination, incorrect pressure, or damage that should have led to replacement.
Understanding these mistakes helps explain why a repair that looks neat can still leak. It also helps you evaluate a DIY kit realistically: convenience does not remove the need for inspection and proper technique.
- Repairing from outside only: This can leave internal damage undiscovered and may not seal the full puncture path.
- Skipping buffing: A slick inner liner gives adhesive less opportunity to bond securely.
- Touching the prepared area: Skin oils and dirt can contaminate the surface before the patch is applied.
- Inflating too soon: Pressure and flexing can pull an incompletely bonded patch away from the liner.
Using too much or too little cement
A heavy layer of cement may remain soft underneath the patch and extend the cure time. It can also make the patch slide during installation. An insufficient layer may leave dry areas or fail to cover the prepared bonding zone.
Use the amount and application method specified for the product. If the cement must become tacky before the patch is placed, do not install the patch while the surface is still visibly wet unless the instructions specifically require a wet application.
Ignoring the original cause of the leak
Not every pressure loss comes from the puncture. A leaking valve core, damaged valve stem, corroded wheel, bead leak, or second puncture can remain after the visible injury is patched. A proper leak test checks the complete tire and wheel assembly.
Repeatedly adding air without finding the cause can allow the tire to run underinflated. That creates heat and flexing that may damage the casing, turning a repairable puncture into a replacement situation.
DIY Tire Patch Timing and Professional Repair
A DIY repair kit may appear faster because it avoids scheduling and wheel removal In practice a safe internal repair requires specialized tools bead handling inspection and a.
A professional shop is usually the better choice when the tire has been driven underinflated the puncture location is uncertain the vehicle uses a tire-pressure sensor or you.
| Consideration | DIY kit | Professional service |
|---|---|---|
| Initial convenience | Available immediately if tools and materials are on hand | Requires a shop visit or appointment |
| Internal inspection | Often limited or unavailable | Technician can inspect the casing and liner |
| Leak testing | Depends on the tools you have | Usually included in the repair process |
| Repair decision | Greater risk of using a kit outside its limits | Based on the tire’s condition and injury |
| Total time | May be short for an emergency exterior repair | Often 30–60 minutes for a standard service |
When a temporary repair may be appropriate
An exterior plug may help you reach a repair facility when a suitable spare is unavailable and the injury is in the tread. It should be treated according to the product’s limitations, with reduced speed and close pressure monitoring as appropriate.
Do not use a temporary repair to justify a long trip on a tire that is losing air, damaged outside the tread, or showing signs of internal failure. If the tire cannot maintain pressure, stop driving and arrange roadside assistance or replacement.
Frequently Asked Questions About Tire Patch Drying
Can I drive immediately after patching a tire?
Usually, no. Wait at least the time specified by the patch manufacturer, then confirm that the repair is firmly bonded and passes a leak test. Many repairs need about 10–30 minutes to set, while the complete service may take longer.
If the surface is still wet, soft, movable, or leaking, do not drive. Driving can flex the tire and pull an unfinished patch away from the inner liner.
How long does a tire patch take to dry in cold weather?
Cold conditions can make the adhesive take longer to set and cure than the standard label estimate. The tire and work area should be dry and within the product’s recommended temperature range before installation.
Do not compensate with a torch, heat gun, or other intense heat source. Allow additional time and rely on the manufacturer’s instructions and a leak test.
Is a tire patch fully cured when it feels dry?
Not necessarily. A dry surface may only indicate that some solvent has evaporated. The bond may still be developing strength beneath the patch.
Readiness should be based on the product’s cure guidance, firm adhesion, correct inflation, and a successful leak test—not touch alone.
Does a tire patch need to dry before inflating the tire?
Follow the repair material’s instructions. Some systems require a specific pressure or rolling process to seat the patch, while others require a waiting period before inflation. Inflating or flexing the tire too early can disturb the bond.
When in doubt, do not improvise. The repair instructions are more reliable than a general drying estimate.
Can I use tire cement to repair a puncture without a patch?
No. Tire cement is normally a bonding component, not a standalone structural repair. It does not fill and reinforce a puncture by itself.
A suitable patch, plug, or combination repair must be selected for the injury and installed according to its directions. Household glue or generic rubber cement is not an acceptable substitute for a tire repair system.
How long should a patched tire last?
A correctly selected and installed repair in an otherwise sound tire can remain in service for the tire’s remaining usable life. That is not a guarantee, because age, tread wear, inflation, road hazards, and the original injury still matter.
Check pressure regularly and watch for renewed air loss, vibration, bulges, or changes around the repair. A patched tire still needs the same maintenance and inspections as any other tire.
Can a patch fix a sidewall puncture?
A sidewall puncture generally should not be repaired with a conventional tread patch. The sidewall flexes heavily and performs a structural role that a patch cannot reliably restore.
Have the tire inspected by a qualified professional and be prepared for replacement. Do not rely on an exterior plug for sidewall damage.
Conclusion
So, how long does a tire patch take to dry? In many ordinary repairs, the material sets in roughly 10–30 minutes, while a complete professional repair commonly takes 30–60 minutes. The exact timing depends on the repair system, temperature, preparation, and the manufacturer’s instructions.
The major safety limitation is that drying time cannot make an unsuitable tire safe A repair should be internally inspected when possible properly bonded leak-tested and checked for.
Follow the patch manufacturer’s cure time, then have the repaired tire leak-tested and pressure-checked before driving normally.