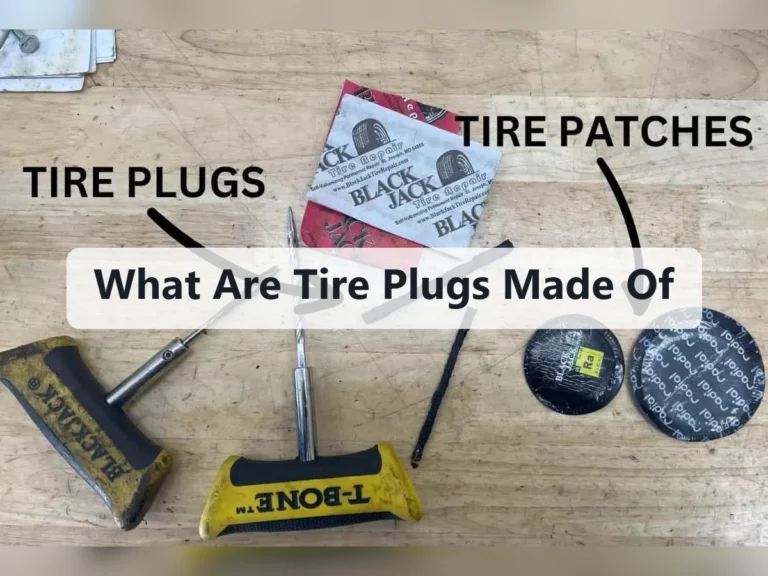
How to Install a Mushroom Tire Plug Safely and Correctly at Home
A mushroom tire plug is an internal tire repair that seals a puncture from both directions. Unlike a rope plug inserted from outside, its stem fills the puncture channel while its broad rubber head bonds to the inside of the tire. That design can make a durable repair, but only when the damage is in the repairable tread area and the tire is inspected from the inside first.
Learning how to install a mushroom tire plug is not simply a matter of pushing rubber through a hole. The tire must be removed from the wheel, the injury must be measured and examined, and the repair must be installed with the product maker’s specified cementing and curing method. A plug cannot safely repair a sidewall, shoulder, bead, run-flat damage, or a tire driven while severely underinflated.
This guide explains the complete process, including the equipment, compatibility checks, installation, inflation, leak testing, and follow-up inspection. If you do not have tire-changing equipment or experience working around bead-seating operations, stop after identifying the puncture and have a qualified tire shop perform the repair. The final result should be a properly seated, airtight repair—not merely a plug that appears to hold air for a few minutes.
At a glance
- A mushroom plug is installed from the inside after the tire is removed from the wheel.
- Only a small puncture in the central tread area is a possible candidate; sidewall and shoulder damage require tire replacement.
- Check the repaired tire for leaks, correct pressure, and even seating before returning it to service.
How to install a mushroom tire plug safely and correctly
A mushroom plug is best treated as an internal plug-patch repair. The tire must be inspected on the inside so hidden liner damage, stretching, or a puncture that is too large can be found before any repair material is installed. Follow the instructions supplied with your specific plug because stem size, cement, preparation, and curing requirements vary among products.
Tools you will need
- Vehicle jack and approved jack stands, or a suitable lift, for safely removing the wheel
- Wheel removal tools, including the correct socket or lug wrench and a torque wrench for reinstallation
- Tire-changing equipment capable of removing one bead from the wheel without damaging the tire or rim
- Approved mushroom plug or plug-patch kit matched to the puncture size, tire type, and manufacturer instructions
- Tire inspection light, soapy water, and a way to mark the puncture
- Vulcanizing cement or repair lubricant only if the kit instructions specify it
- Air compressor and an accurate tire-pressure gauge
- Optional: bead lubricant approved for tire service and a tire repair stand
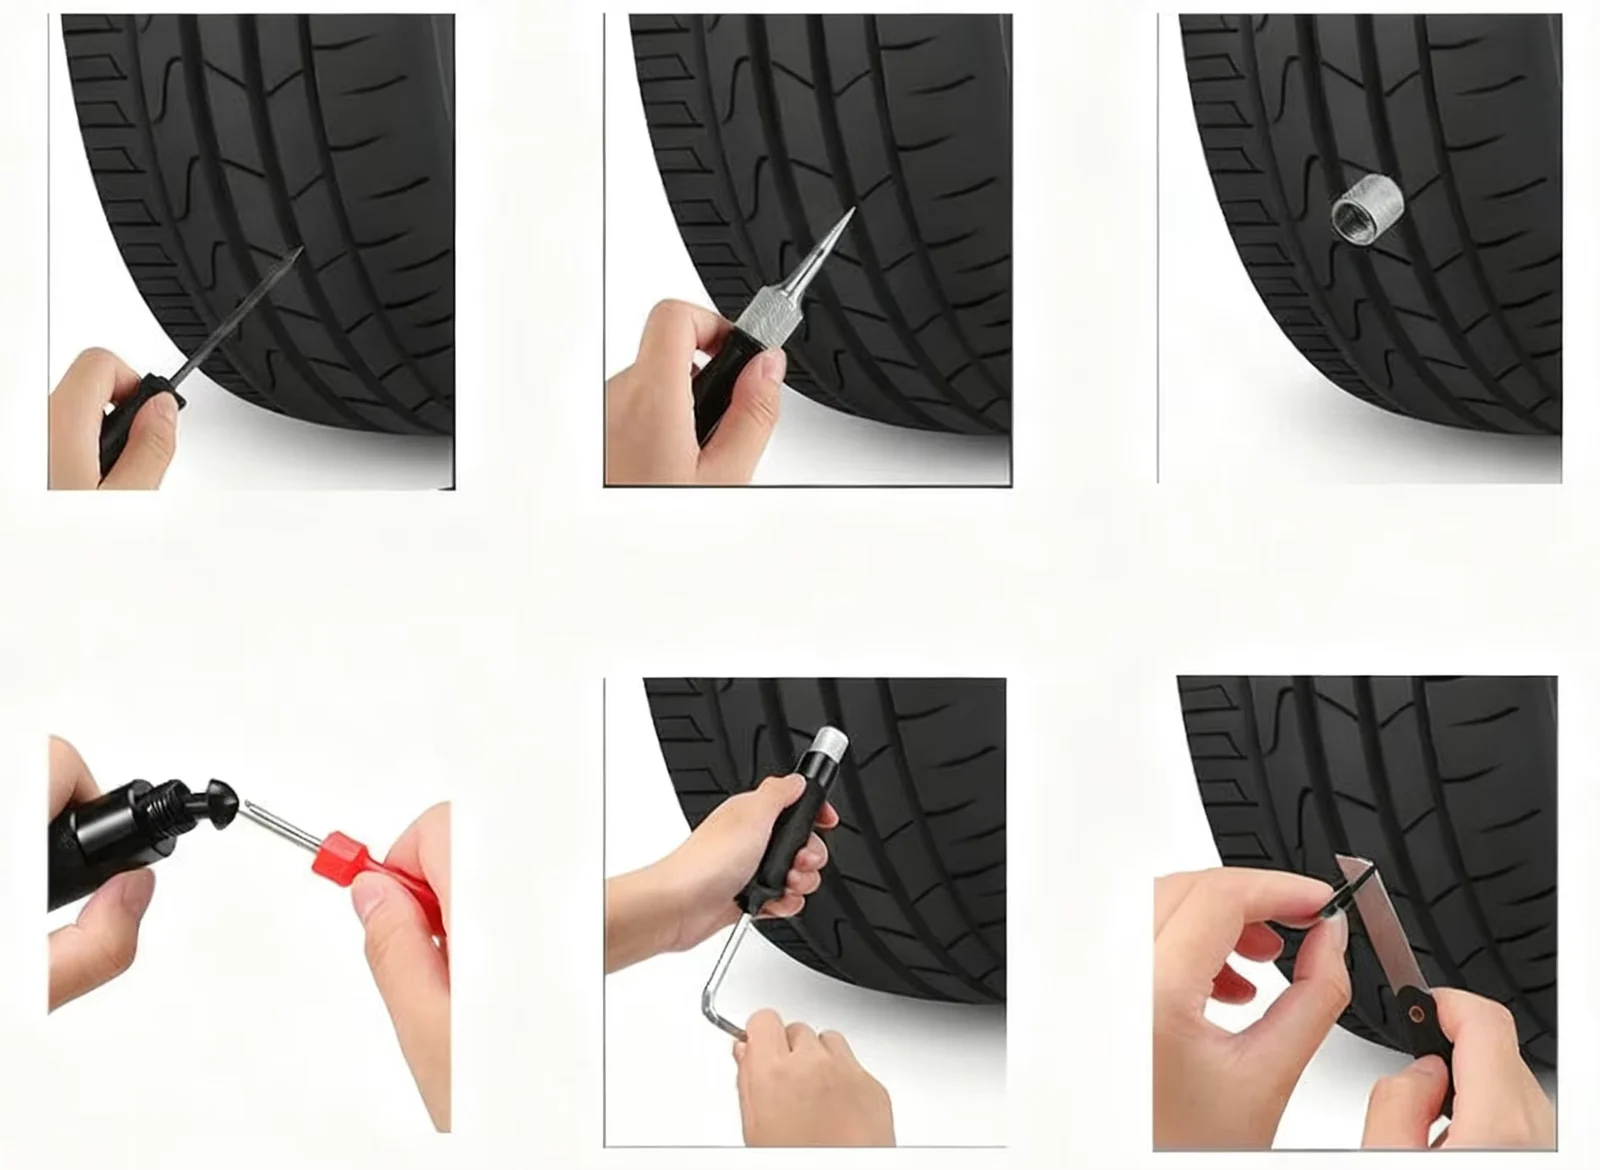
Step 1 Confirm that the tire is a possible repair candidate
Park on a firm, level surface and identify the suspected puncture while the tire is still mounted. Do not put your hands near a tire that is visibly damaged, bulging, split, or partially separated. If the tire is flat, avoid driving on it; driving even a short distance with little or no air can damage the sidewalls and inner liner beyond what you can see from outside.
Measure or estimate the injury only after locating it. A small, clean puncture made by a nail or screw in the central tread may be repairable. Damage in the shoulder—the curved area where the tread transitions into the sidewall—or anywhere on the sidewall is not a suitable mushroom-plug repair.
Multiple nearby punctures, a cut rather than a round puncture, exposed cords, a damaged bead, or a tire that has been run severely underinflated are reasons to replace the tire or obtain a professional inspection.
Check the tire’s age, condition, and construction as well. A repair does not restore tread that is worn out or correct cracking, bulges, separation, or other defects. If the tire is a run-flat or uses a special self-supporting construction, consult the tire manufacturer or a qualified tire shop before attempting any repair.
Important
Never repair a sidewall or shoulder puncture with a mushroom plug. If the puncture location is uncertain, leave the tire off the road and have a tire professional inspect it.
Step 2 Remove the wheel and release the tire pressure
Loosen the wheel’s lug nuts slightly while the vehicle is on the ground, then raise and support the vehicle according to its owner’s manual. Use the vehicle’s designated lift points and approved jack stands; do not rely on a jack alone. Remove the wheel and keep the lug nuts together where dirt will not enter the threads.
Before breaking the bead, remove the valve-core insert with the proper valve-core tool so the tire is fully deflated. Confirm that the gauge reads zero and that no air remains trapped. A tire can store substantial energy even when it looks flat, so do not cut, drill, or force the bead while the assembly is pressurized.
If the wheel has a tire pressure monitoring system, commonly called a TPMS sensor, note its location before separating the bead. Many sensors are attached near the valve stem on the inside of the wheel. Keep bead-breaking tools away from that area and follow the wheel or sensor maker’s clearance guidance.
Step 3 Break one bead and expose the inner liner
Use a tire changer or other equipment specifically designed for passenger-tire service to loosen one bead from the rim. The bead is the reinforced edge of the tire that seals against the wheel. Remove only enough of one side to inspect and reach the puncture; completely removing the tire is not always necessary.
Use approved bead lubricant where the equipment instructions call for it. Avoid petroleum products, screwdrivers, or improvised bars that can cut the bead, scratch the rim, or damage a TPMS sensor. As the bead comes off the rim, watch both sides of the wheel and keep tools clear of the sensor.
Once the inner liner is visible, find the puncture from inside. A nail or screw may still be lodged in the tread, but do not assume the outside entry point tells the whole story. Mark the injury if needed and inspect around it for a long split, a raised area, exposed fabric, or a dark scuff that indicates the tire was driven while underinflated.
Step 4 Remove the puncturing object and assess the injury from inside
Pull out the nail, screw, or other object with pliers while keeping track of the puncture path. Inspect the hole from the inside and outside. The channel should be reasonably clean and localized, not a torn flap or an elongated cut.
Use the mushroom plug manufacturer’s size gauge or instructions to determine whether the injury is within the kit’s permitted range. Do not enlarge a puncture simply to make a plug fit. A plug that is too small may not seal, while forcing an oversized plug can damage the casing or create a weak repair.
Look for evidence of internal damage around the injury. A rough, melted, or abraded inner liner, loose rubber, exposed cords, or a puncture that enters at an angle may require a different repair decision. When the casing cannot be clearly evaluated, stop and have the tire inspected by a trained technician rather than guessing.
Step 5 Prepare the puncture channel and inner liner
Follow the kit directions for cleaning and preparing the repair area. Some mushroom plugs use a specially textured stem and require a particular reaming tool; others specify a rasp, cleaner, or cement. The purpose is to remove loose contamination and create the surface condition needed for the stem to seal without unnecessarily enlarging the hole.
Work from the outside or inside exactly as the product instructions direct. Keep the path aligned with the original puncture. A reamer forced sideways can turn a small round injury into a tear, and an overly aggressive tool can damage the tire’s internal cords.
Clean the inner liner around the puncture with the approved preparation method, then allow it to become dry if the instructions require a dry surface. Do not apply ordinary glue, household adhesive, or an unapproved solvent. If the kit calls for vulcanizing cement, use only that product and the specified amount.
The prepared area should be free of dirt, loose rubber, and moisture. The goal is not to polish a large circle inside the tire; it is to provide a sound bonding surface around the plug’s head while preserving as much original rubber as possible.
Step 6 Install the mushroom plug through the puncture
Orient the plug so its stem follows the puncture channel and its broad head will lie flat against the inner liner. Apply the kit’s specified cement or lubricant to the stem if required. Some products must be installed immediately after preparation, while others call for a particular waiting period, so use the supplied directions rather than a general rule.
Push or pull the stem through the puncture with the tool provided in the kit. The method varies: some mushroom plugs are drawn from the inside toward the tread, while others are inserted from the tread side and seated against the liner. Do not substitute a different tool if it could cut the stem or enlarge the injury.
Continue until the plug head is fully flat against the inside of the tire and the stem fills the puncture channel. The head should not be folded, sharply wrinkled, or lifted at an edge. From the outside, the stem should fill the hole without a large gap; from the inside, the head should make continuous contact around the repair.
Check your result
Before reassembling the tire, confirm that the plug head lies flat, the stem is centered in the puncture, and no section of the head edge is peeling away from the inner liner.
Step 7 Finish the repair according to the kit instructions
Some products require the exposed stem to be trimmed flush with the tread. Others specify leaving a particular amount or use a stem designed to wear down naturally. Trim only when the manufacturer directs you to do so, using a sharp tool that will not pull the plug head loose.
A useful way to approach how to install a mushroom tire plug is to check your progress after each stage.
If a separate inner patch is part of the approved repair system, install it exactly as specified. Do not add a random patch over a mushroom plug simply because extra rubber seems reassuring. Unapproved layers can trap contamination, interfere with bonding, or conceal a repair that should instead be rejected.
Observe any required cement or curing time before mounting the tire. Keep the repair clean and undisturbed during that period. A repair that looks secure but has not completed the specified bonding process is not ready for inflation or road use.
Step 8 Reassemble the tire and inflate it cautiously
Lubricate the bead with approved tire lubricant if needed, then mount the bead using a tire changer and the correct technique for the wheel. Keep the tool away from the repaired area and any TPMS sensor. Inspect the bead as it enters the rim to make sure it is not pinched or rolled over.
Inflate the tire using the equipment manufacturer’s safety procedure. Stay out of the trajectory zone while seating the bead, and do not exceed the tire maker’s or tire changer’s seating limit. If the bead does not seat normally, stop and deflate it before repositioning the tire; never keep adding air to force a stubborn bead into place.
Once both beads are seated, install the valve core if it was removed and inflate the tire to the vehicle manufacturer’s recommended cold pressure. That number is normally found on the driver’s door-jamb label or in the owner’s manual, not on the maximum-pressure marking molded into the tire sidewall.
Step 9 Check the repair under pressure
Spray soapy water over the repaired tread area, the inside plug head if accessible, the valve stem, and both bead seats. Watch closely for growing bubbles. A few stationary foam bubbles from the spray are not necessarily a leak; a bubble that grows or a continuous stream indicates escaping air.
Rotate the wheel slowly and inspect the entire circumference. Check the tread on the outside as well as the inner liner near the plug. If bubbles appear at the repair, deflate the tire and do not return it to service.
A failed repair should be evaluated by a qualified tire technician, and repeated attempts with the same damaged hole are not a safe substitute for replacing the tire.
If the tire holds pressure, check that the tread is not distorted around the plug and that the bead is evenly seated around the rim. Reinstall the wheel, tighten the lug nuts by hand, lower the vehicle enough to keep the wheel from turning, and torque the lug nuts to the vehicle manufacturer’s specification. Recheck the pressure after the wheel is installed.
Step 10 Monitor the tire before normal driving
Record the cold pressure immediately after installation. Let the tire sit and check it again before driving, then inspect the pressure again after the first trip and during the next several days. A slow loss may not create visible bubbles during a quick test, especially if the leak is at the valve, bead, or a second puncture.
If the vehicle has TPMS, the warning light may remain on until the system updates or is reset according to the owner’s manual. A reset does not prove that the tire is airtight. Treat the pressure gauge and a visual inspection as the primary checks after repair.
Watch for vibration, pulling, unusual noise, a renewed warning light, or pressure loss. Stop driving if any of these symptoms appears. Have the tire and wheel inspected before continuing, because a repair cannot correct an out-of-round tire, bent wheel, bead leak, or internal casing failure.
When a mushroom plug is appropriate
A mushroom plug is intended for a limited type of puncture: generally a small, round injury in the central tread that has not damaged the tire’s internal structure. The exact allowable size and location depend on the tire and repair system, so the kit’s instructions and the tire manufacturer’s guidance control the decision.
The major advantage of an internal plug-patch design is that it seals the puncture channel and covers the inner liner around the injury. That is different from an exterior rope plug, which is inserted without removing the tire and may be used as a temporary roadside measure depending on local guidance and the tire manufacturer’s policy.
Learning how to install a mushroom tire plug should not be used as a reason to repair every tread puncture. A tire that has been driven flat may have hidden sidewall or liner damage even when the hole itself looks small. A professional tire inspection is the safer choice when the repair area, tire history, or product compatibility is uncertain.

Damage that normally rules out this repair
- Any puncture or cut in the sidewall or shoulder area
- A slit, gash, tear, or irregular injury rather than a small puncture channel
- Exposed cords, belt separation, bulges, cracking, or severe tread wear
- Damage near another repair or several punctures close together
- A puncture larger than the repair kit allows
- Evidence that the tire was driven while flat or substantially underinflated
- Bead damage or a wheel problem that prevents a proper air seal
How to verify the finished repair
A successful repair has more than one sign. The plug head is flat and bonded inside, the stem fills the puncture, the beads are evenly seated, the tire reaches the correct cold pressure, and the pressure remains stable after the tire is rechecked.
Use this compact inspection list before treating the job as complete:

- Inside: The plug head is fully in contact with clean liner material and has no lifted edge.
- Outside: The tread surface is not bulging or separating around the stem.
- Leak test: Soapy water produces no growing bubbles at the repair, valve, or beads.
- Pressure: The tire is inflated to the vehicle’s recommended cold pressure.
- Wheel: Lug nuts are tightened to the specified torque.
- Monitoring: Pressure remains stable during repeated checks, and the vehicle shows no vibration or pulling.
Balance is not automatically changed by every plug repair, but a tire that vibrates after reinstallation should be checked. The cause could be a disturbed wheel weight, improper bead seating, a bent wheel, or internal tire damage rather than the plug itself.
Troubleshooting common problems
Most problems come from choosing an unsuitable injury, using the wrong preparation method, or treating a quick pressure check as proof of a permanent repair. The symptoms below help identify when to stop rather than keep modifying the tire.
| What you observe | What it may mean | Safer response |
|---|---|---|
| Bubbles grow around the plug | The stem or head is not sealing | Deflate the tire and have the repair evaluated; do not keep driving on it |
| The plug head lifts or wrinkles | The liner was contaminated, the wrong cement was used, or the plug is incompatible | Do not press it back down; seek a tire professional or replace the tire |
| Pressure drops but no bubbles appear at the plug | A valve, bead, wheel, or second puncture may be leaking | Test the entire assembly and correct the actual leak |
| The bead will not seat normally | Incorrect lubricant, bead damage, wheel damage, or poor mounting position | Stop inflating and use proper tire equipment or professional service |
| TPMS light remains on | The system has not updated, needs a reset, or detects incorrect pressure | Verify pressure first, then follow the vehicle’s reset procedure |
| Vibration starts after repair | Wheel balance, bead seating, wheel damage, or casing damage may be involved | Stop and have the wheel and tire inspected |
Should you remove and redo a failed plug?
Do not repeatedly pull out and reinstall a mushroom plug in the same injury. Every attempt can enlarge or distort the puncture channel and contaminate the bonding surface. If the repair does not seal on the first proper installation, the tire needs an expert assessment and may need replacement.
What if the puncture is close to the shoulder?
Do not judge the location only by looking at the tread from above. The shoulder curves toward the sidewall, and a puncture close to that transition can flex too much for a safe repair. When the injury is near the outer tread grooves or the curved shoulder area, have a tire professional make the decision.
Mushroom tire plug FAQs
Can I install a mushroom tire plug without removing the tire?
No. A true mushroom plug is installed from the inside so the inner liner and the plug head can be inspected and bonded. An exterior rope plug is a different repair method and does not provide the same internal inspection.
Can a mushroom plug repair a sidewall puncture?
No. Sidewall and shoulder damage should not be repaired with a mushroom plug. Those areas flex heavily and contain structural components that a plug cannot safely restore, so tire replacement or professional evaluation is required.
Do I need tire cement with every mushroom plug?
Not necessarily. Some systems specify vulcanizing cement, while others use a prepared stem or a different bonding process. Use only the material and preparation method listed for the exact product; ordinary glue is not an acceptable substitute.
How long should I check the repaired tire?
Check the cold pressure before driving, after the first trip, and repeatedly over the following days. Also inspect the repair whenever the vehicle develops a vibration, pulling, unusual noise, or a TPMS warning. Stable pressure and no bubbles are reassuring, but they do not make an unsuitable tire safe.
Is a mushroom plug a permanent repair?
It can be an approved permanent repair for a suitable puncture when installed correctly and accepted by the tire and repair-system manufacturers. It is not permanent when the tire has sidewall damage, hidden run-flat damage, severe underinflation damage, or an injury outside the permitted size or location.
Finish with a verified, limited repair
Knowing how to install a mushroom tire plug means understanding the inspection and safety limits as much as the installation itself. Remove the tire, evaluate the injury from inside, use a compatible repair system, seat the plug head completely, and verify the repair with pressure and leak checks.
If the puncture is outside the central tread, the tire has been driven flat, the plug does not seal immediately, or bead service feels uncertain, stop and use a qualified tire shop. A correctly repaired tire should hold the vehicle’s specified cold pressure and remain free of leaks, vibration, and visible damage during follow-up checks.