How to Install Running Boards on Ram 1500: Overview and Key Facts
Adding running boards to a Ram 1500 can make the cab easier to enter, protect the lower body from some road spray, and give the truck a more finished appearance. The job is usually manageable in a home garage because many vehicle-specific kits use existing threaded holes rather than requiring drilling. The difficult part is not the basic idea; it is confirming the correct kit, supporting the boards while you align them, and tightening every fastener evenly.
This guide explains how to install running boards on Ram 1500 models using a typical bolt-on, vehicle-specific kit. Bracket shapes, hardware, torque values, and mounting locations vary by model year, cab configuration, bed length, and manufacturer, so the instructions supplied with your exact kit remain the authority for those details. Do not force a bracket to fit or substitute a bolt simply because its diameter appears close.
You will learn how to verify compatibility, prepare the truck, identify the mounting points, attach the brackets and boards, and check the finished installation. The process assumes a level work area and ordinary mechanical ability. If a fastener is seized, a mounting point is damaged, or the kit requires structural drilling you cannot confidently perform, stop and get qualified help rather than improvising.
At a glance
- Match the kit to your Ram 1500 cab style and model year before opening the hardware.
- Use jack stands or ramps when you need extra clearance; never rely on a jack alone.
- Finish with a torque check, door-clearance check, and cautious load test on both sides.
How to install running boards on Ram 1500 safely
A typical installation follows this order: confirm fitment, lay out the hardware, expose the factory mounting holes, loosely attach the brackets, position the running boards, and then tighten everything to the kitâs specifications. Keeping the fasteners loose until the board is aligned is important because it allows the bracket slots to compensate for small differences in position.
Tools you will need
- Vehicle-specific running board kit with brackets, bolts, washers, and nuts
- Ownerâs manual and the running board manufacturerâs instructions for torque specifications
- Socket set, ratchet, and suitable extensions for the supplied fasteners
- Torque wrench that covers the kitâs specified torque range
- Work gloves and safety glasses
- Floor jack and jack stands or approved vehicle ramps, only if additional clearance is needed
- Painterâs tape and a marker for labeling bracket positions
- Optional: trim tool, penetrating oil, and a second person to support a long board

Step 1 Confirm the kit matches your Ram 1500
Park the truck on a level, solid surface and compare the kitâs application information with the truckâs model year, cab style, and door layout. A Crew Cab and a Quad Cab can use different running board lengths and bracket locations, even when both are sold as Ram 1500 parts. Also check whether the kit is intended for a regular production truck, a factory step-equipped model, or a truck with an aftermarket fuel tank, skid plate, lift, or rocker protection.
Open the boxes and compare the contents with the parts list. Separate left-side and right-side brackets, then identify front, center, and rear brackets if the shapes differ. A useful visual check is that the board should cover the intended door area without extending into a wheel opening or interfering with the front mud flap.
Do not begin if the instructions call for a bracket or fastener that is missing. Contact the manufacturer before installation; trying to distribute the load across fewer brackets can make the finished step unsafe.
Step 2 Choose a safe working position and prepare the truck
Set the parking brake, place the transmission in Park, and turn off the ignition. Chock the wheels on the opposite side from the area where you are working. You generally do not need to remove the wheels for a bolt-on installation, but you do need enough room to see the underside of the rocker area and swing a ratchet.
If the truck sits too low for comfortable access, use approved ramps or raise it with a floor jack and support it on jack stands at the manufacturer-approved points. Never work beneath a truck supported only by a hydraulic jack. Keep the stands on matching solid surfaces and give the truck a gentle stability check before placing any part of your body underneath it.
Wash or brush dirt away from the mounting areas. Mud packed around a factory threaded hole can prevent a bolt from seating fully and can make a bracket appear aligned when it is not. Let the area dry, and use a small amount of penetrating oil only on rusty fasteners or exposed threads; keep oil away from brake components and friction surfaces.
Important
Stop if you find cracked metal, severe corrosion, a bent rocker panel, or damaged factory threads at a mounting point. A running board transfers entry loads into those areas, so a cosmetic-looking defect can require inspection or repair before installation.
Step 3 Identify the factory mounting points
Look along the underside of the cab for the holes or threaded inserts shown in the kit instructions. These mounting points are usually positioned along the rocker or lower frame-side structure, not on the thin exterior door panel. Some trucks have plastic plugs, tape, or small covers over the holes; remove only the pieces identified by the instructions.
Hold each bracket near its intended location without installing it and compare its bends, slots, and bolt holes with the truck. The bracket should sit against the designated mounting surface naturally. The bolt holes should line up without prying the bracket sideways or twisting it into place.
Label the brackets with painterâs tape if their positions are not obvious. Do not assume that two brackets that look alike are interchangeable: small differences in offset can determine whether the board sits level and clears the doors.
Step 4 Test-fit the brackets and start the fasteners by hand
Begin on one side of the truck. Place the front, center, and rear brackets at their assigned mounting points, then install the supplied bolts and washers through the brackets. Turn each fastener by hand for several threads before using a ratchet.
Leave every fastener loose enough for the bracket to move. This is the alignment stage, not the final tightening stage. If a bolt will not start smoothly by hand, remove it and inspect the hole, washer orientation, and bracket position.
Cross-threading a captive nut or factory insert can turn a straightforward installation into a repair.
Where the kit includes separate nuts, place the washer and nut on the accessible side exactly as illustrated. Do not replace a flanged nut, spacer, or shoulder bolt with a standard hardware-store substitute unless the manufacturer explicitly approves it. The supplied hardware may control bracket spacing and load distribution.
Step 5 Attach the running board to the loose brackets
With the brackets loosely attached, lift the running board into position and align its underside tracks or mounting holes with the bracket slots. A long board is awkward and can scratch the truck, so use a second person or support it temporarily with a stable padded support that cannot roll or collapse. A useful way to approach how to install running boards on ram 1500 is to check your progress after each stage.
Install the board-to-bracket fasteners with their washers, again starting every bolt by hand. Keep the board loose enough to slide slightly from front to rear and from side to side. Check that the finished-facing surface is oriented upward and that any end caps or tapered ends point in the correct direction.
Do not use the board as a lever to bend a bracket into alignment. If the holes do not match, lower the board and recheck the bracket positions and kit compatibility. A board that requires force to line up may be the wrong length or may have a bracket in the wrong location.
Step 6 Center the board and check door clearance
Close the doors gently and inspect the running board from above, below, and at both ends. The board should run parallel to the rocker area, sit at a consistent height, and leave enough clearance for the doors to open without contacting it. Check the gap with the doors fully open as well as closed, because a door edge or lower trim piece may swing closer than expected.
Stand several feet behind the truck and look along the boardâs length. Correct any visible forward or rearward tilt before tightening. If the kit uses slotted holes, center the available adjustment rather than placing every bolt at the extreme end of a slot; this leaves useful adjustment for future service.
Repeat the fit check on the other side before final tightening. Comparing both sides can reveal a reversed bracket, an incorrectly oriented spacer, or a board that is sitting unusually low.
Check your result
Before tightening, open and close every door slowly. The board should not touch the doors, lower trim, mud flaps, or exhaust components, and both sides should appear level when viewed from the front and rear.
Step 7 Tighten the hardware in the specified sequence
Once the position is correct, snug the board-to-bracket fasteners and then the bracket-to-truck fasteners, or follow the sequence in the kit instructions if it differs. Tighten in stages rather than fully tightening one bolt while the others remain loose. This helps the brackets settle evenly and reduces the chance of shifting the board out of alignment.
Use the torque values supplied for the exact kit. Running board hardware does not have one universal torque specification because bolt grade, diameter, bracket design, and thread type vary. If the instructions provide separate values for the body-side bolts and board-side bolts, use the correct value for each group.
A torque wrench is the reliable way to finish. Keep the wrench square to the fastener, pull smoothly, and stop at the specified setting. Do not add thread locker unless the instructions call for it; some fasteners are supplied with a locking feature, and an incompatible compound can affect the intended torque or future removal.
After tightening, visually confirm that each bolt has a washer where required, each nut is fully engaged, and no bracket edge is folded or pulled away from its mounting surface. If the board moved during tightening, loosen the affected hardware, realign it, and repeat the staged process.
Step 8 Repeat the installation on the opposite side
Install the second side using the same sequence rather than assuming it will mirror the first automatically. Vehicle-specific kits may use mirrored brackets, but the front and rear pieces can still have different bends or offsets. Keep the remaining hardware organized until both sides are complete.
Compare the two sides from the front, rear, and along the doors. Differences in height or angle usually indicate a bracket orientation problem, an unseated spacer, or a fastener tightened before the board was centered. Correct those issues before moving to the final inspection.
Step 9 Perform a final inspection and cautious load test
Walk around the truck and inspect every mounting point. Look for missing washers, exposed threads that do not match the instructions, loose nuts, contact with wiring or exhaust parts, and gaps between a bracket and its mounting surface. Check that no brake line, fuel line, parking-brake cable, or plastic shield has been pinched or rerouted by a bracket.
Apply firm downward pressure by hand near each bracket, then place one foot on the center of the board while holding the truck for balance. Increase pressure gradually rather than jumping onto it. The board should feel solid, with no rocking, popping, sliding, or visible bracket movement.
Do not exceed the manufacturerâs stated weight capacity.
If the board shifts during this check, do not drive the truck until the cause is found. Recheck torque and bracket placement; if the hardware is tight but the mounting surface moves or deforms, remove the board and have the truck inspected. Understanding how to install running boards on ram 1500 also means recognizing the limits of the method.
How the mounting system fits the Ram 1500
Most bolt-on running boards use a series of metal brackets that connect the board to reinforced mounting points under the cab. The board itself may use a track, channel, or several fixed holes, allowing its position to be adjusted before the hardware is tightened.
The brackets carry the downward entry load into the truckâs mounting structure. That is why the installation must use the supplied fasteners and the intended factory holes rather than convenient holes in thin sheet metal. The visible board can look secure even when one bracket is not properly seated.

Cab configuration matters
Ram 1500 running boards are commonly offered for specific cab styles, including Crew Cab and Quad Cab configurations. Door count and cab length affect the board length, bracket spacing, and the location of the factory mounting points. A part described only as âfor Ram 1500â is not specific enough by itself.
Check the product application chart and compare it with the vehicle identification information in the ownerâs manual or registration documents. Also account for factory side steps, rock rails, aftermarket armor, lift components, and other accessories that may occupy the same space.
Why loose assembly comes first
Keeping the hardware loose lets the parts find their intended relationship before friction locks them in place. If you tighten one bracket immediately, the board can end up angled or pulled toward that bracket, leaving the remaining holes difficult to align.
Loose does not mean unsupported. Hold the board securely while installing bolts, and never leave a raised board resting precariously on a jack, loose box, or rotating stand.
How to verify the finished installation
A successful installation is more than a board that appears level. Confirm that the mounting hardware is tight, the doors and nearby components have clearance, and the board remains stable under a controlled load.
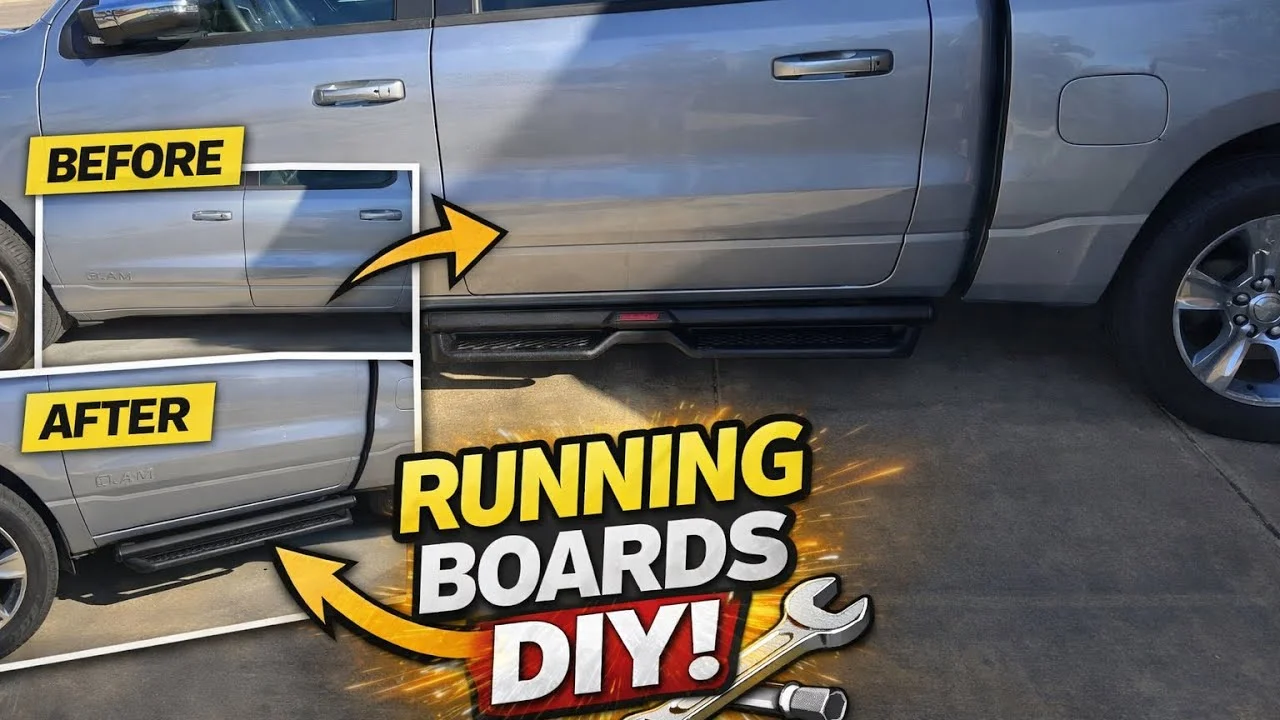
Use this final inspection checklist
- Every listed bracket is installed in its assigned position.
- Every fastener has the required washer, spacer, and nut orientation.
- Fasteners are tightened to the kitâs specifications, not a guessed value.
- The board is parallel to the truck and similar in height on both sides.
- All doors open and close without touching the board.
- The board clears mud flaps, exhaust parts, brake lines, fuel lines, and wiring.
- No bracket, bolt, or nut contacts the ground or a moving suspension component.
- A cautious hand-pressure and foot-pressure check produces no movement or noise.
Take a short, slow drive on a smooth surface after the inspection. Listen for rattling and stop if you hear a sharp click, scrape, or repeated knock. Recheck the hardware after that first drive and periodically afterward, especially if the truck sees rough roads, heavy use, or frequent passengers using the boards.
Common installation problems and fixes
Most problems come from a fitment mismatch, reversed bracket, trapped dirt, or premature tightening. The table below provides a starting point, but the kit instructions take priority whenever they specify a different arrangement.
| What you observe | Likely cause and response |
|---|---|
| A bolt will not start by hand | The bracket is misaligned, the hole is dirty, or the hardware is wrong. Remove the bolt, clean and inspect the hole, then compare the fastener with the parts list. Do not force it with a ratchet. |
| The board sits at an angle | A bracket may be reversed, a spacer may be missing, or one side was tightened too early. Loosen the related hardware, compare the bracket orientation with the diagram, and realign. |
| The board touches a door or mud flap | The board may be shifted too far inward or forward, or the kit may not match the cab. Use the available adjustment only within the instructions; do not bend the bracket. |
| The board rocks after tightening | One or more fasteners may be missing torque, a bracket may not sit flat, or the mounting structure may be damaged. Do not use the board until the cause is corrected. |
| A factory hole is blocked | A plug, shield, dirt, corrosion, or another accessory may be in the way. Remove only approved covers or shields and stop if access requires cutting structural metal or moving safety-related lines. |
When drilling is required
Some universal running boards or older aftermarket designs require drilling, while many vehicle-specific kits do not. Drilling into the cab, rocker structure, or frame is not a minor variation: it can expose metal to corrosion, damage hidden wiring or lines, and create a weak or misplaced mounting point.
If the instructions clearly require drilling, follow the manufacturerâs hole location, bit size, corrosion protection, and reinforcement procedure exactly. If you cannot identify what is behind the drilling location or cannot support the new fastener correctly, stop and use a professional installer or choose a no-drill kit.
Cleanup and ongoing maintenance
Remove protective film, tape, packaging, and loose metal shavings from the boards and the underside of the truck. If drilling was part of an approved installation, seal the exposed metal as directed. Do not leave tools or unused hardware near the brakes, exhaust, or suspension.
Clean the running boards with a product compatible with their finish. During routine oil changes or washes, look for chipped coating, rust around fasteners, loose end caps, and changes in board movement. A small issue found early is easier to correct than a bracket that has worked loose over many trips.
Frequently asked questions
Can I install Ram 1500 running boards by myself?
Often, yes, if the kit is a vehicle-specific bolt-on design and you can support the board safely while aligning it. A second person makes long boards easier to control, but the essential requirements are safe vehicle support, correct tools, and careful adherence to the kit instructions.
Do I need to remove the wheels?
Usually not. Most bolt-on kits are installed with the wheels in place. Wheel removal may provide more room for a particular bracket, but it should be done only with proper lifting equipment and support.
Should I use thread locker on the bolts?
Only if the running board instructions specify it. Some kits use locking nuts or pre-applied thread treatment, and adding an unapproved compound can change the intended installation method. The supplied instructions should identify any required thread locker and its application.
What if my Ram 1500 has no obvious threaded holes?
Recheck the kit application, mounting diagram, and underside of the cab for plugs or covers. Do not attach the brackets to thin sheet metal or drill an arbitrary hole. If the listed mounting points are absent or damaged, contact the kit manufacturer or a qualified installer.
How tight should the running board bolts be?
Use the torque values provided for your exact kit and fastener group. There is no single safe universal torque value for all Ram 1500 running boards because designs and hardware grades differ.
Finish with a stable, verified installation
Learning how to install running boards on Ram 1500 trucks is mainly a matter of correct fitment, controlled alignment, and disciplined final inspection. Use the factory mounting points specified by the kit, keep the brackets loose while positioning the board, and tighten each fastener with the supplied hardware and stated torque.
Before carrying passengers, confirm that the doors clear, both boards are level, and neither board moves under cautious pressure. If the parts do not fit without force or the truckâs mounting structure is damaged, stop and resolve that problem first. Once the checks pass, clean up the work area, take a careful short drive, and recheck the hardware so the new step remains secure.