How to Patch a Tire From the Inside: Step-by-Step Instructions
A tire can be patched from the inside, but the tire must first be removed from the wheel so the puncture can be inspected and repaired with an approved internal patch or combination plug-patch. An inside repair is generally appropriate only for a small puncture in the central tread, not for damage in the sidewall, shoulder, bead, or a tire that has been driven severely underinflated.
The reason is straightforward: air loss is only the first visible problem. A nail or screw creates a channel through the tread, while driving on low pressure can damage the inner liner, cords, and sidewalls. Whether the tire can be saved depends on the puncture’s size, location, angle, condition of the carcass, previous repairs, tire type, and the repair product’s instructions—not on a one-size-fits-all rule.
This guide explains how an internal tire repair is performed, why proper inspection and surface preparation matter, which tools and materials are compatible, and where a repair becomes unsafe. You will learn how to distinguish a repairable tread puncture from replacement-only damage, understand the risks of home demounting and remounting, check the finished repair, and decide when a tire shop is the safer next step.
What an inside tire patch repairs and why
An inside patch seals the puncture from within the tire after the tire has been removed from the wheel. The repair material bonds to the prepared inner liner, covering the opening and restoring an airtight barrier.
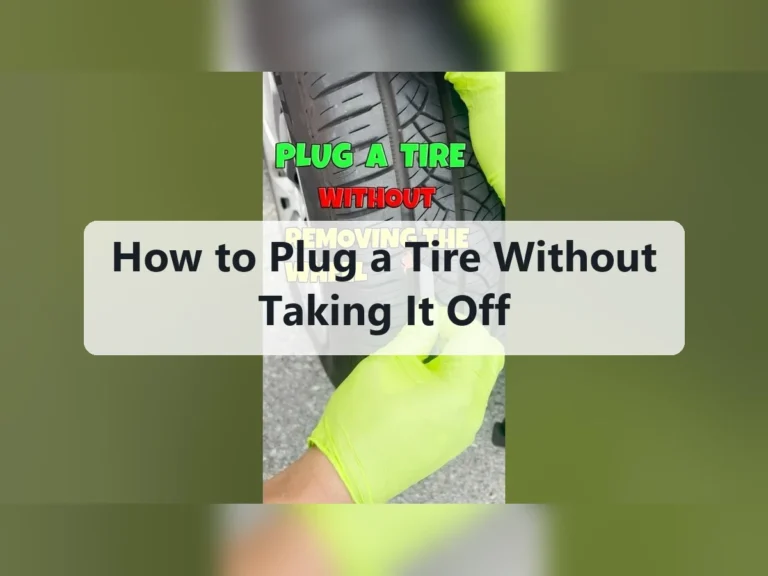
A traditional string plug is installed from the outside and fills the puncture channel with a sticky rubber compound. It can be useful as a temporary emergency measure in some situations, but an external plug alone does not inspect or repair hidden internal damage. For a permanent repair, tire manufacturers and industry repair practices commonly favor a combination repair unit, often called a plug-patch, installed from inside.
A plug-patch has two connected parts. The stem fills the injury channel, while the broad patch seals the inner liner around it. This design addresses both paths through which air could escape and is different from placing a flat patch over a contaminated or unfilled puncture.
Why a flat patch alone may not be enough
A flat patch can cover the inside of the tire, but it may not completely fill the puncture tunnel. Moisture, air, and contaminants can continue moving through the injury channel, especially if the puncture is angled or the object removed a section of rubber.
Some tire repair systems are specifically approved as patch-only repairs for particular injuries, while others require a plug-patch. The product instructions and the tire manufacturer’s repair policy control. Do not substitute a generic flat patch simply because it looks large enough.
When an internal tire repair is usually possible
An internal repair is usually considered when the injury is a small puncture in the repairable portion of the tread and the tire has not suffered additional damage. The tire must also meet the repair material’s size and construction requirements.
Many repair policies use approximately 1/4 inch, or 6 millimeters, as the maximum injury diameter for a standard passenger-tire puncture. That figure is not permission to repair every hole of that size. The exact limit can vary by tire type, repair system, manufacturer, and the shape of the injury.
The following conditions generally support further inspection rather than immediate replacement:
- The puncture is in the central tread area, away from the shoulder and sidewall.
- The opening is within the repair kit or tire manufacturer’s stated size limit.
- The tire has not been driven a significant distance while flat or severely underinflated.
- The inner liner is smooth and intact, without abrasion, bubbling, exposed cords, or melted rubber.
- The tire has not already received an improper repair or too many repairs in the same area.
- The casing, bead, tread, and sidewalls show no additional structural damage.
- The tire is not a special construction that requires a dedicated repair procedure.
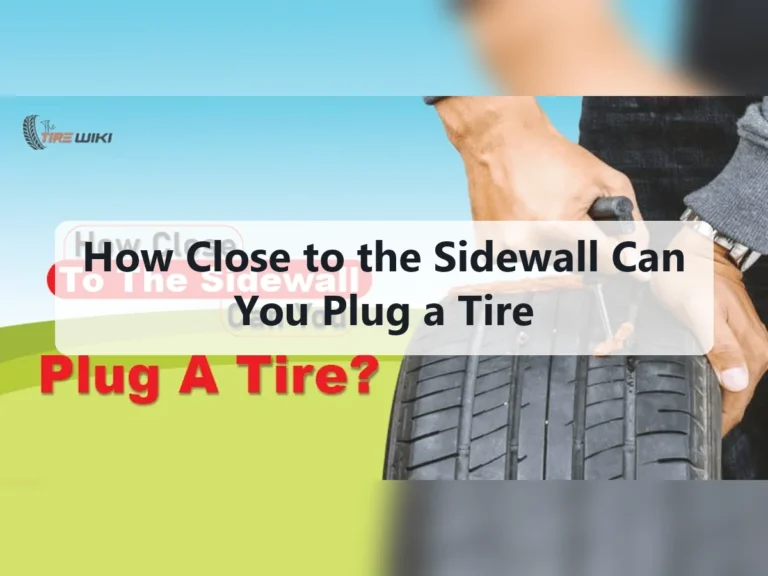
Location is especially important. The center tread normally flexes less severely than the shoulder and sidewall, making a properly performed repair more predictable. As a puncture approaches the outer tread ribs or shoulder, the tire bends more aggressively and the repair may not remain secure.
When you should replace the tire instead of patching it
A tire should not be repaired from the inside when the injury compromises a nonrepairable area or when the tire’s structure has been damaged. In those cases, an internal patch can hide the problem without restoring the tire’s strength.
Replacement is normally the safer choice for these conditions:
- Sidewall damage: cuts, punctures, bulges, or penetrations in the sidewall are not safely restored with a conventional patch.
- Shoulder damage: injuries near the transition between tread and sidewall flex too much for a standard permanent repair.
- Large or irregular holes: a torn, gouged, or elongated injury may exceed the repair system’s limits even if one measurement appears small.
- Run-flat operation: driving after pressure loss can create hidden heat and structural damage that requires specialized inspection.
- Inner-liner abrasion: a ring of scuffing, dust, wrinkling, or rubber powder indicates that the tire may have been driven underinflated.
- Exposed or damaged cords: belts and body plies cannot be restored by an ordinary patch.
- Bead damage: a damaged bead may prevent a reliable seal against the wheel.
- Previous unsafe repairs: overlapping repairs, plugs that were not installed correctly, or a repair in the same area can disqualify the tire.
- Age or severe wear: a repair does not make an excessively worn, cracked, or deteriorated tire suitable for continued service.
Do not judge a sidewall injury by its size alone. Sidewalls carry load while constantly flexing, so even a small penetration can affect the cords that support the vehicle.
Why driving on a flat tire changes the decision
Pressure supports the tire’s sidewalls and keeps the tread in its intended shape. When pressure falls sharply, the sidewalls flex excessively, heat builds up, and the inner liner can develop damage that is invisible from the outside.
For that reason, a tire that arrived at the shop with a screw in the tread may still be repairable, while the same tire may need replacement if it was driven several miles after losing most of its air. An internal inspection is essential because an external visual check cannot reveal all run-low damage.
Tools and materials needed for an internal tire repair
A proper repair requires more than a patch and a bottle of cement. The tire must be safely separated from the wheel, the injury must be measured and inspected, and the repair area must be prepared without damaging the inner liner.
A professional repair setup may include:
- A tire changer or other approved method for removing the tire from the wheel.
- Wheel and tire safety equipment, including eye protection and suitable gloves.
- Soapy water or leak-detection solution.
- Needle-nose pliers or another tool for removing the puncturing object.
- A tire injury probe, awl, or inspection tool appropriate to the repair system.
- A method for measuring the puncture and identifying its direction.
- A scraper, buffing tool, or approved inner-liner preparation tool.
- Repair cement or vulcanizing solution specified for the patch system.
- An approved patch or combination plug-patch in the correct size.
- A stitcher or roller for working the patch firmly onto the liner.
- Cleaning materials that do not leave oil, silicone, or residue on the bonding surface.
- A tire inflator, pressure gauge, and leak-testing solution.
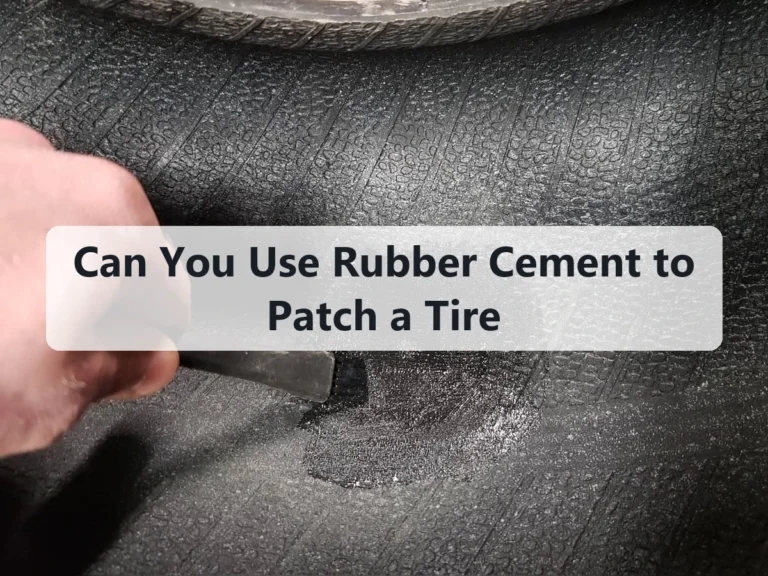
Use only materials designed for tire repair. Household rubber cement, bicycle-tube patches, super glue, silicone sealant, and automotive body adhesives are not substitutes for a tire repair system. They may fail to bond to the inner liner or tolerate the heat and flexing produced during driving.
Why tire-changing equipment creates a serious safety issue
Removing and mounting a tire is not simply a matter of prying rubber off a wheel. The bead can store substantial force, and an incorrectly seated tire can release suddenly during inflation.
Never attempt to break the bead or inflate a tire with improvised equipment if you do not understand the hazards and the manufacturer’s safety procedure. A tire shop has a bead breaker, tire changer, inflation equipment, and restraints designed for this work. The cost of a professional repair is usually far lower than the consequences of an inflation accident or a damaged wheel.
How to patch a tire from the inside: step-by-step process
The following describes the correct sequence for a conventional internal puncture repair. It is an explanation of the process, not a recommendation to demount a tire at home without suitable equipment and training.
1. Remove the wheel and identify the puncture
Remove the wheel from the vehicle using the vehicle manufacturer’s lifting and support procedure. If the puncturing object is still present, mark its position before removing it so the injury can be found from the inside.
Do not pull out a nail or screw immediately if the tire is still holding enough pressure to move the vehicle to a repair facility. Removing it can cause a rapid leak. If the tire is already flat, keep the wheel off the road and avoid driving on it.
After the object is removed, locate the injury with soapy water or an approved leak detector. Mark both the outside tread position and the inside location once the tire is demounted.
2. Demount the tire for a complete inspection
Deflate the tire completely before breaking the bead. The valve core may need to be removed so trapped air is released, and a tire-pressure monitoring sensor may be attached to the valve or mounted inside the wheel.
Use the correct tire-changing technique so the tool does not strike a TPMS sensor, scrape the bead, or damage the wheel. Once one or both beads are off the rim, inspect the entire inner liner, tread, sidewalls, bead areas, and belt region.
Look for:
- Scuffing or a circumferential abrasion ring on the inner liner.
- Wrinkles, bubbles, separation, or loose rubber.
- Exposed cords, broken belt wires, or a soft spot.
- Additional punctures or cuts that were not visible outside.
- Bead damage caused by mounting, demounting, or driving while flat.
- Evidence of sealant contamination or a previous repair.
If the inside shows signs of structural damage, stop the repair process. A patch cannot reverse heat damage or rebuild broken cords.
3. Measure the injury and determine its direction
Probe the puncture carefully to determine the channel’s angle and whether the injury is a clean penetration or a tear. Measure the largest part of the hole using the repair manufacturer’s method, rather than guessing from the visible tread opening.
The repair unit must match the injury. A stem that is too small may not fill the channel, while forcing an oversized stem through the hole can damage the belt package or distort the repair area.
Check the puncture’s position relative to the repairable tread zone. The tread area that appears flat from above can transition into the shoulder sooner than expected, especially on tires with rounded profiles.
4. Prepare the puncture channel when the repair system requires it
Some combination repair systems require the channel to be reamed or otherwise prepared so the stem can pass through clean rubber. Follow the product instructions for the correct tool and movement.
Do not aggressively enlarge the hole just to make installation easier. Excessive reaming removes sound rubber and can create an injury larger than the repair unit is designed to handle.
The channel must be clean and dry. Tire sealant, moisture, dirt, and loose rubber can interfere with the stem’s bond and prevent the repair from sealing.
5. Buff the inner liner only in the specified repair area
Mark the area where the patch will sit, then use the specified preparation method to remove the surface finish. The goal is to create a clean, uniform bonding surface without cutting deeply into the inner liner.
Buffing too little can leave mold release, oxidation, or a glossy surface that prevents adhesion. Buffing too aggressively can thin the liner, expose cords, generate heat, or create a larger weak area around the puncture.
Remove buffing dust with the cleaner specified by the repair system. Avoid gasoline, brake cleaner, oily rags, or unapproved solvents. A surface that looks clean may still contain residue that causes the patch to lift later.
6. Apply the correct cement or vulcanizing solution
Apply the repair cement evenly to the prepared area and, where directed, to the combination unit. Some products use a chemical vulcanizing solution, while others are designed for a different bonding process.
Allow the cement to become tacky for the time stated by the manufacturer. Applying the patch while the solution is wet can trap solvent or cause the repair to slide; waiting too long can leave a contaminated or inactive surface.
Keep the cement container closed between applications. Tire repair chemicals can dry or become contaminated, and an old product may look usable while producing a weak bond.
7. Install the plug-patch through the injury
Feed the stem through the puncture from the inside, following the repair unit’s instructions for insertion direction. Pull or push it until the patch lies flat against the inner liner and the stem fills the injury channel without twisting.
The patch should be centered over the puncture. Its edges must remain fully supported by prepared, sound liner, with no wrinkles, lifted corners, trapped debris, or stretched areas.
If the repair unit will not pass through easily, stop and reassess the injury and tool. Do not use excessive force that could damage the belts or distort the repair material.
8. Roll the patch firmly onto the liner
Use a stitcher or roller from the center of the patch toward its edges. This pushes out trapped air and ensures full contact between the patch and the prepared liner.
Work methodically across the entire patch, including the perimeter. A patch that looks attached in the center can still have an unbonded edge where air later works its way underneath.
Do not touch the bonding surface with dirty fingers after preparation. Oils and dust can create a contamination layer that is difficult to see but harmful to adhesion.
9. Trim the exterior stem only as directed
After the patch is secured, trim the portion of the stem that extends above the tread if the repair system calls for trimming. Use the specified technique and leave the repair flush without gouging adjacent tread.
Some repair systems use a stem that is trimmed after installation, while others have different instructions. Do not assume that a visible stem can simply be cut away with any knife or side cutter.
10. Reinstall, inflate, and check the repair
Mount the tire using an approved lubricant and careful positioning around any TPMS sensor. Inflate it according to the tire changer’s safety procedure, never exceeding the equipment or tire manufacturer’s limits during seating.
Inspect both sides of the bead to confirm that it is seated evenly. Then apply leak-detection solution to the repair, valve, bead, and entire tread area. Bubbles indicate a leak that must be corrected before the tire returns to service.
Reinstall the wheel, torque the lug nuts to the vehicle manufacturer’s specification, and set cold inflation pressure according to the vehicle placard. If the vehicle uses direct TPMS, verify that the sensor reads correctly and that any warning light is reset according to the vehicle procedure.
How to inspect an internal patch after installation
A repair is not finished when the patch sticks to the liner. It must remain airtight, centered, and secure after inflation and, ideally, after the tire has been allowed to sit while the repair material reaches its specified condition.
Check the following before driving normally:
- No bubbles appear around the patch, stem, valve, or bead during a leak test.
- The patch edge is fully bonded with no lifting, wrinkles, or visible contamination.
- The stem fills the puncture without an open channel beside it.
- The tire holds the correct cold pressure.
- The tread and sidewall do not show a bulge, deformation, or separation.
- The wheel and TPMS system operate normally.
Follow the repair manufacturer’s instructions for any required curing or waiting period. Many modern systems are intended to return to service after installation, but the specific product determines when the tire may be inflated and driven.
Recheck pressure after the tire has cooled and again during routine maintenance. A slow leak does not always produce a dramatic bubble during a brief inspection, particularly if the leak is at the bead or valve rather than the patch.
Patch, plug, and plug-patch: which repair is appropriate?
The right choice depends on the injury and the product’s approval, but a properly installed combination repair usually offers the most complete treatment for a conventional tread puncture. The stem addresses the puncture channel and the patch seals the inner liner.
A flat patch may be suitable for some small injuries when the repair manufacturer specifically permits it and the channel is otherwise sealed. It is not automatically equivalent to a plug-patch.
An outside plug can restore air pressure quickly, which is valuable in an emergency. However, it does not permit the complete inside-out inspection required to identify run-low damage, and a plug that is not part of an approved permanent repair system should not be treated as a guaranteed long-term solution.
Liquid tire sealant is also different from an internal patch. Sealant may temporarily reduce air loss, but it can complicate later repairs, affect TPMS components, and fail to address structural damage. Tell the repair technician if sealant has been used.
Special tire types and situations that need extra caution
Run-flat and extended-mobility tires
Run-flat tires can sometimes be repaired, but their construction and operating history matter. Because they are designed to carry the vehicle for a limited distance after pressure loss, they may hide heat damage that is not apparent from the outside.
Use the tire manufacturer’s repair policy and have the tire inspected by a technician familiar with that construction. A standard repair kit does not automatically make a run-flat repairable.
Low-profile, reinforced, and extra-load tires
Low-profile and reinforced tires may require specialized mounting equipment and procedures. Their stiff sidewalls can be damaged during demounting if the tool is positioned incorrectly.
Extra-load and high-performance tires also operate under particular pressure and load conditions. A repair decision should account for the tire’s speed rating, load index, construction, and intended use rather than treating it as an ordinary passenger tire.
Self-sealing tires
Self-sealing tires contain a sealant layer beneath the tread that can close certain small punctures. A conventional internal patch may not be appropriate because ordinary buffing and cementing can interfere with the sealing layer.
Consult the tire manufacturer’s repair instructions before attempting to alter that layer. If the puncture is outside the self-sealing zone or the tire has other damage, replacement may be required.
Temporary spares and mobility kits
A temporary spare is not generally repaired like a full-size passenger tire unless the manufacturer explicitly provides a repair procedure. Mobility kits may include a compressor and sealant intended only to get the vehicle to a repair facility.
Do not confuse a temporary inflation solution with a permanent tire repair. Observe the kit’s speed and distance limits and arrange a proper inspection as soon as practical.
Common mistakes that cause internal tire patches to fail
Most failed repairs are linked to an incorrect repair decision, poor preparation, contamination, or an installation that does not match the injury. The patch itself is rarely the only issue.
- Repairing by location alone: A puncture may look central from outside but extend into the shoulder internally.
- Skipping the inside inspection: This can miss abrasion, belt damage, or an earlier failed repair.
- Using the wrong solvent: Oil-based or harsh cleaners can leave residue or damage the inner liner.
- Applying cement to a glossy liner: Without correct surface preparation, the patch may lift.
- Buffing too deeply: Removing too much liner creates another weakness.
- Installing a patch over a dirty surface: Dust, moisture, sealant, and fingerprints reduce adhesion.
- Using a flat patch where a combination repair is required: The puncture channel may remain open.
- Forcing an oversized repair unit: This can enlarge the injury and damage internal components.
- Ignoring bead or valve leaks: Not every pressure loss after a repair comes from the puncture.
- Failing to check TPMS: A sensor can be damaged during demounting even when the tire repair is sound.
Another common mistake is assuming that a tire is safe because it holds air immediately after installation. A tire can hold pressure at rest while still having structural damage, an incomplete bond, or a repair outside the approved area.
How much an internal tire repair costs
The price of an internal repair varies with the tire size, vehicle, repair method, local labor rates, TPMS configuration, and whether the wheel must be removed from the vehicle. A simple tread puncture is usually less expensive than tire replacement, but the inspection and demounting work are part of a professional repair.
A shop may recommend replacement rather than repair if the tire is worn, old, damaged from low pressure, or mismatched with the vehicle’s other tires. Paying for an inspection that prevents a dangerous repair is a better outcome than choosing the cheapest procedure without confirming the tire’s condition.
If only one tire on an all-wheel-drive vehicle requires replacement, ask about tread-depth matching and the vehicle manufacturer’s requirements. Differences in rolling circumference can matter on some drivetrains, so the repair decision may involve more than the punctured tire alone.
When professional tire service is the safest option
Professional service is the safest choice when you lack a tire changer, when the tire is run-flat or self-sealing, when the puncture is near the shoulder, or when the tire was driven while flat. It is also appropriate when the wheel has a TPMS sensor or an unusual construction.
A qualified technician can inspect the inner liner, measure the injury, identify the tire’s repair zone, and use the correct repair system. The technician can also check the bead, valve, wheel, balance, and sensor after the repair.
Stop and seek service rather than driving if the tire is losing pressure quickly, has a sidewall bulge, shows cords, vibrates after the incident, or cannot maintain the vehicle placard pressure. Driving farther can turn a repairable puncture into a structurally damaged tire.
FAQ about repairing a tire from the inside
Can I patch a tire from the inside without removing it from the wheel?
No, a proper internal patch requires the tire to be demounted for inspection and installation. Access through the valve stem or a small gap does not allow a reliable inspection of the inner liner, and attempting to force a patch into place can create an unsafe repair.
Is an inside tire patch better than an outside plug?
A properly installed inside combination repair is generally more complete than an outside plug alone. It seals the liner and fills the puncture channel, while an outside plug does not reveal hidden internal damage or confirm the condition of the casing.
Can I repair a tire puncture near the shoulder with an internal patch?
Usually, a shoulder or shoulder-transition puncture should not receive a conventional permanent repair. That area flexes heavily and may fall outside the repairable tread zone, even when the hole is small.
How large can a puncture be for an internal repair?
Many standard repair policies limit a passenger-tire puncture to about 1/4 inch, but the repair system and tire manufacturer control the actual limit. Shape, location, injury angle, previous repairs, and internal damage can disqualify a tire below that size.
Can a tire with a screw still be driven to a repair shop?
Only if it remains properly inflated and the trip is short and safe; a flat or rapidly leaking tire should not be driven. Removing the screw can release air, so leave it in place until the tire can be inspected unless driving conditions make that unsafe.
Can I use a bicycle-tire patch or household glue inside a car tire?
No, use only a repair product approved for the tire and the specific injury. Bicycle patches, super glue, silicone, and general-purpose rubber cement may not bond to the tire’s inner liner or withstand road heat, pressure, and flexing.
Does an internal patch repair a tire that was driven flat?
An internal patch cannot repair hidden damage caused by driving flat or severely underinflated. The tire must be demounted and examined for abrasion, heat damage, broken cords, and separation; if any of those conditions appear, replacement is normally necessary.
Can a patched tire be used on a highway?
A properly inspected and approved repair in the correct tread area can return to normal service when installed according to the repair system’s instructions. An improvised plug, a repair outside the permitted zone, or a tire with structural damage should not be treated as highway-safe.
How often should I check a tire after an inside repair?
Check the cold pressure soon after the repair and continue checking it during regular vehicle maintenance. A recurring pressure loss requires another leak inspection, because the problem could involve the repair, valve, bead, wheel, or an additional puncture.
Make the repair decision from the inside out
An internal tire patch is a legitimate repair for a suitable, small tread puncture when the tire is demounted, inspected, prepared, and repaired with the correct approved system. It is not a solution for sidewall or shoulder damage, run-low structural damage, a large irregular injury, or a contaminated and deteriorated casing.
The practical next step is to maintain pressure without driving on a damaged tire, then have the wheel inspected and the tire demounted by a properly equipped technician. If the inner liner and casing are sound, an approved plug-patch may restore the tire; if not, replacement is the safer answer.