
Do Fender Flares Cause Rust: What Happens and How to Respond
Do fender flares cause rust? Usually, no. Properly designed and correctly installed flares do not automatically rust a vehicle, but they can create conditions that accelerate corrosion when they trap moisture, damage the paint, or hide existing rust.
The practical uncertainty is understandable: a flare sits directly over a vulnerable wheel arch, where water, road salt, mud, and gravel already collect. A poorly fitted part can rub through the finish or hold damp debris against the metal, much like a wet sponge left against a painted door eventually weakens the surface underneath. The flare is not necessarily the cause, but it can make a small problem harder to see and easier to ignore.
This article explains how installation, fasteners, road conditions, and maintenance affect corrosion risk. You will learn what to inspect before mounting flares, how to recognize rust hidden behind them, when removal or repair is necessary, and how to decide whether a flare can stay in place safely.
How Fender Flares Can Contribute to Rust
Fender flares can contribute to rust when they interfere with the vehicle’s protective finish or prevent the wheel arch from drying. The risk depends less on the flare’s appearance and more on its fit, mounting method, material, and exposure to moisture and debris.
Most vehicle body panels rely on several layers of protection: galvanized or coated steel, primer, paint, and sometimes a seam sealer or corrosion-resistant coating. If installation leaves those layers intact, the flare generally has little reason to cause a problem. If the layers are cut, scratched, drilled, or compressed by a moving edge, exposed metal can begin oxidizing.

Common corrosion pathways
- Moisture retention: Water can remain between the flare and the wheel arch after rain, washing, or driving through puddles.
- Trapped road debris: Mud, sand, salt, and small stones can collect behind the flare and hold moisture against the body.
- Paint abrasion: Vibration or movement can rub through the clear coat, paint, and primer.
- Unsealed drilled holes: Screws or rivets can expose bare metal if the holes are not properly protected.
- Hidden damage: The flare may conceal bubbling paint or surface rust until the corrosion has spread.
Plastic itself does not rust, but plastic or fiberglass components can still affect the steel panel behind them. A rigid flare that flexes differently from the body may place repeated pressure on the paint. Dirt caught at the contact edge can act like sandpaper as the vehicle moves over rough roads.
Do Fender Flares Cause Rust on Every Vehicle?
No. Fender flares do not cause rust on every vehicle, and many remain trouble-free for years. The deciding factors are the condition of the wheel arch, the quality of the installation, the local climate, and how often the area is cleaned and inspected.
A flare installed over clean, undamaged paint with suitable spacing and sealed mounting points presents much less risk than one fitted over bubbling paint or an already corroded lip. In the second situation, the flare may not have started the rust, but it can block airflow, retain contamination, and conceal the damage from view.
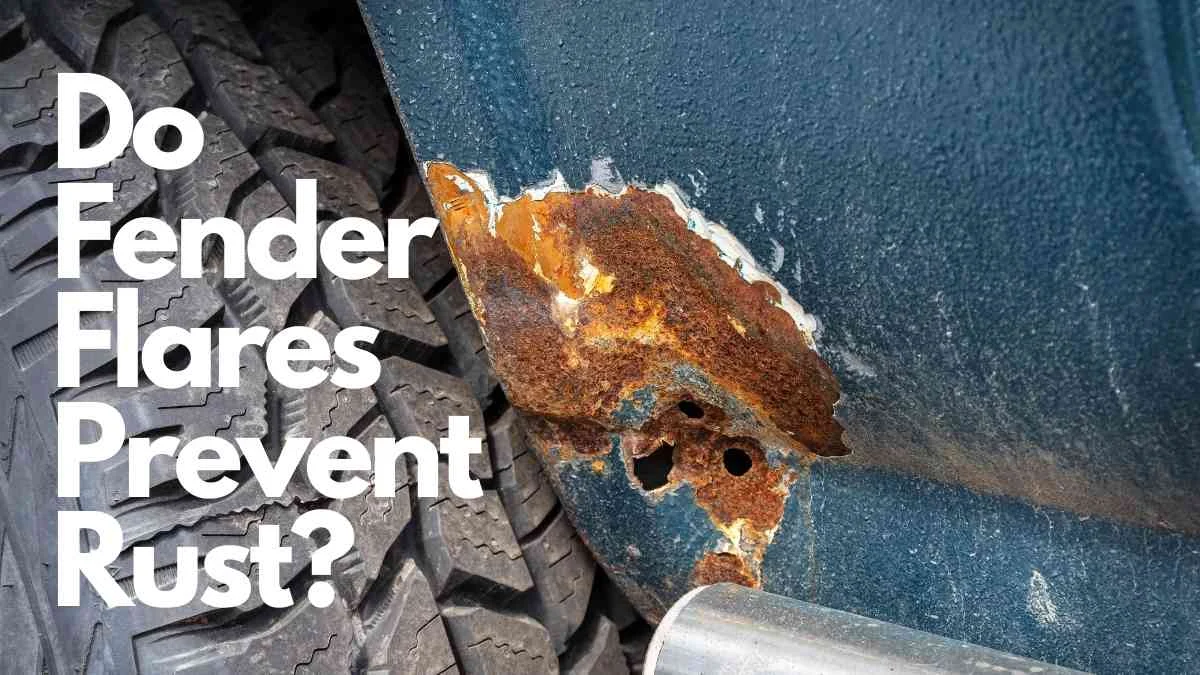
Conditions that increase the risk
Vehicles driven in areas that use deicing salt face a higher corrosion risk because salt residue makes it easier for moisture to support electrochemical corrosion. Coastal air, frequent rain, deep mud, and unpaved roads can create similar problems by keeping the wheel well damp and dirty.
Fitment is another major variable. An aftermarket flare that follows the body contour closely and stays fixed is less likely to cause abrasion than one that is warped, too narrow, or forced into position. A loose flare can move with vibration, while an overly tight flare can press against the paint and create a concealed wear line.
The mounting hardware also matters. Ordinary steel screws can corrode and stain the surrounding panel, especially where the protective coating has been pierced. Incorrectly sized fasteners may enlarge holes, loosen over time, or allow water to enter the edge of the panel.
When a flare is more protective than harmful
A well-designed flare can sometimes reduce direct impact from gravel and mud by covering part of the wheel arch and redirecting spray. That benefit is limited, however, because it does not replace the factory coating or eliminate the need to wash the area behind the part.
The safest assumption is that a flare changes the maintenance routine. It creates another edge and another concealed surface that should be checked periodically rather than treated as permanent protection.
Installation Mistakes That Lead to Corrosion
Installation is often the difference between a low-risk accessory and a corrosion trap. Before fitting any flare, the wheel arch should be clean, dry, structurally sound, and free of active rust or loose paint. This distinction matters when answering “do fender flares cause rust”.

Mounting over existing rust
Installing a flare over rust does not stop the corrosion process. It can hide the evidence while moisture and oxygen continue reaching the steel through cracks, seams, and damaged coating.
Surface rust may look minor, but corrosion around a wheel arch can develop on both the visible outer lip and the folded inner edge. If bubbling paint is present, the surface should be investigated before the flare is mounted. Loose paint and flaky metal should not be covered as a shortcut.
Drilling without protecting the holes
Some flares use clips or adhesive, while others require drilling. Any drilled hole creates a potential entry point for water, so the exposed metal should be treated with a compatible corrosion-protection product and sealed as appropriate for the vehicle and fastener design.
Sealant should not be used to conceal dirty surfaces or active rust. It works best when applied to clean, dry, properly prepared areas, and it should not block drainage paths that the vehicle’s body design needs.
Allowing contact and movement
A flare should not continuously scrape the body as the suspension moves or the panel flexes. Check the entire contact edge after installation, including the lower rear portion of the wheel opening where mud and debris commonly collect.
Loose hardware deserves prompt attention. A small amount of movement can create a polished or dull rubbing line in the paint, and the damage may be difficult to notice until the flare is removed.
Using unsuitable adhesives or fasteners
Adhesive-backed mounting tape can hold water if the surface is contaminated or if the edge lifts. Fasteners made from incompatible metals may also contribute to galvanic corrosion when moisture and road salt are present, although the severity depends on the metals, coatings, and environment.
Follow the flare manufacturer’s instructions for fastener type, spacing, and clearance, but do not assume the instructions eliminate the need to protect the vehicle’s original finish. A vehicle-specific fit is generally preferable to forcing a universal part into place.
How to Inspect for Rust Behind Fender Flares
If you suspect corrosion, inspect the flare and the surrounding wheel arch in good light. Look for changes in paint texture, staining, movement, and debris buildup rather than relying only on visible holes or large patches of rust.
Warning signs to look for
- Bubbling or lifting paint along the wheel opening
- Brown or orange staining around screws, clips, or the flare edge
- A dark, damp line where the flare touches the body
- Cracked paint, scuffs, or a polished rubbing mark
- Loose fasteners, shifting trim, or a flare that no longer sits evenly
- Flaking metal, soft spots, or pinholes in the wheel arch
- Mud and salt packed into the gap behind the flare
A flexible plastic trim tool can help separate an accessible edge without scratching the paint, but forcing the part off can cause additional damage. If the flare is heavily bonded or riveted, professional removal may be safer than pulling it away and tearing the panel.
What to do after removing the flare
Wash away loose dirt and allow the area to dry fully before judging the damage. Do not aggressively sand a panel that may already be thin, and avoid using compressed air directly into body seams where it could drive water or debris deeper. Keep these limitations in mind when considering “do fender flares cause rust”.
Light surface oxidation may be repairable with careful cleaning, corrosion removal, primer, and matching paint. Rust that has perforated the metal, spread beneath the wheel arch lip, or weakened a mounting area usually requires metal repair rather than a cosmetic coating.
Photograph the area before cleaning if you need to document the condition for a repair estimate. If the flare is covering structural rust, a body shop can determine whether the panel can be patched, reshaped, or needs replacement.
How to Prevent Corrosion Under Fender Flares
Prevention starts before installation and continues through routine washing. The goal is to keep the contact area stable, coated, clean, and able to dry.
- Inspect first: Confirm that the wheel arch has no active rust, loose paint, cracks, or weakened metal.
- Clean thoroughly: Remove wax, mud, grease, and salt from both the body and the flare’s contact surface.
- Protect exposed metal: Treat drilled edges and scratches with a suitable corrosion-resistant primer or coating before assembly.
- Check clearance: Make sure the flare does not rub the paint or interfere with the tire, suspension, or inner liner.
- Use correct hardware: Tighten fasteners securely without distorting the flare or crushing the body panel.
- Preserve drainage: Do not seal every gap if doing so prevents water from escaping.
- Rinse regularly: Flush mud and salt from behind and below the flare, especially during winter or after off-road driving.
- Reinspect: Check the mounting edge after the first few drives and periodically afterward for movement or paint wear.
After washing, pay attention to drying. A clean area that remains wet for long periods can still corrode, particularly where paint has been scratched or a fastener has pierced the coating.
Some owners apply cavity wax or another protective treatment in concealed areas, but the product must be compatible with painted surfaces, rubber, plastic, and the vehicle’s existing coatings. Avoid coating brakes, tire contact surfaces, exhaust components, or drainage openings.
When You Should Remove the Flares
Removal is sensible when the flare is loose, rubbing, cracked, trapping heavy debris, or hiding visible corrosion. It is also worth considering when the vehicle has been exposed to road salt for several seasons without an inspection behind the accessories.
Do not remove a flare casually if it is attached with strong adhesive, rivets, or hardware that could damage the panel. A body repair professional can remove it while reducing the chance of peeling paint or enlarging mounting holes.
If rust has reached the edge of the panel, the inner wheel arch, or a suspension-related mounting area, prompt evaluation is important. Cosmetic rust treatment may be inadequate when corrosion has reduced metal thickness or affected a load-bearing structure.
After repairs, the flare should not be reinstalled until the repaired area is fully cured and the fitment problem has been corrected. Otherwise, the same rubbing or moisture-retention issue may restart the damage.
Do Fender Flares Cause Rust? Frequently Asked Questions
Can fender flares trap water?
Yes, a poorly fitted flare can trap water and contaminated debris. A properly fitted part should not create a permanently wet pocket, but dirt, salt, damaged seals, and blocked drainage can keep the wheel arch damp long enough to encourage corrosion.
Can installing fender flares over rust make it worse?
Yes, covering existing rust can allow it to spread unnoticed. The flare does not remove the moisture and oxygen involved in corrosion, and it can make bubbling paint or weakened metal harder to inspect.
Do fender flares cause rust if they are drilled into
Drilling increases the need for proper rust prevention but does not guarantee corrosion. The holes need clean preparation, appropriate protection, suitable hardware, and a fit that prevents movement and water entry.
How often should the area behind a flare be checked?
Inspect it at least once or twice a year and after severe exposure. Check more often if the vehicle is driven on salted roads, near the coast, through mud, or on gravel, or if the flare has started moving.
Can surface rust under a flare be repaired without replacing
Sometimes, if the metal remains solid and the corrosion is limited. A repair may involve removing rust, stabilizing the surface, priming, painting, and correcting the flare fit; perforation or deep structural corrosion calls for more extensive bodywork.
Should I use silicone around fender flares?
Not automatically, because sealing every edge can trap water or block drainage. Use only a compatible sealant where the installation design calls for it, and follow the part and vehicle requirements rather than relying on sealant to cover poor preparation.
Can a loose flare damage the paint?
Yes, movement can wear through the clear coat and paint. Once the protective layers are damaged, moisture and road salt can reach the underlying metal, so loose hardware or contact marks should be addressed promptly.
Conclusion: Preventing Rust Around Fender Flares
Do fender flares cause rust? They can contribute to it when they trap moisture, hold salty debris, rub through paint, or cover existing corrosion, but a correctly fitted and maintained flare is not automatically a rust problem. Inspect the wheel arch before installation, protect any drilled areas, preserve drainage, and wash behind the flare regularly.
If you find bubbling paint, soft metal, or spreading corrosion, remove the accessory carefully and have the area evaluated before reinstalling it.


