How to Patch a Tire: Safe Repair Steps for Bicycle and Car Tires
A flat tire can turn a short ride into a frustrating walk, but a small puncture in a bicycle inner tube is usually a manageable repair. With a tire lever, a patch kit, and a little patience, you can remove the tube, locate the leak, seal it, and reinstall the tire without replacing the entire tube.
This guide explains how to patch a tire when “tire” means a bicycle tire with a separate inflatable inner tube. That is the safest realistic beginner repair. A car tire is different: its internal structure carries much higher loads, and a proper repair normally requires removing the tire and applying an approved repair from the inside.
You will learn how to identify a repairable puncture, match the patch to the tube, prepare the rubber so the patch bonds, and verify the result before riding. You will also learn when a damaged tube, tubeless tire, or automobile tire should be replaced or handled by a qualified tire professional instead.
At a glance
- Patch the inner tube, not the outside of the bicycle tire.
- Roughen and clean the tube before applying a vulcanizing patch.
- Test the repaired tube and inspect the tire for the object that caused the flat.
How to patch a tire safely: repair a bicycle inner tube
The method below repairs a small puncture in a conventional bicycle inner tube. The tube is the rubber bladder inside the tire; the tire itself is the textured outer casing that contacts the road. Removing the tube makes it possible to find the leak and patch it evenly.
Before starting, move the bicycle to a clean, well-lit area and shift the chain to make wheel removal easier if necessary. If the wheel uses rim brakes, opening the brake quick release may create enough clearance; disc-brake wheels generally do not need that step. Keep dirt away from the exposed tube and never inflate a damaged tube to high pressure while it is outside the tire.
Tools you will need
- Bicycle tire levers for lifting the tire bead over the rim
- Correct-size replacement patch and vulcanizing solution from a bicycle patch kit
- Bicycle pump with a gauge, for controlled inflation and the final pressure check
- Small piece of chalk or a pen for marking the puncture
- Container of water, optional, for finding a slow leak with bubbles
- Fine sandpaper or the roughening surface supplied with the patch kit

Step 1 Remove the wheel and release the air
Take the affected wheel off the bicycle according to its axle design. For a quick-release wheel, open the lever and loosen the retaining nut only as much as needed. For a bolt-on wheel, use the appropriate wrench.
If the bicycle has a rear derailleur, ease the chain onto the smallest rear sprocket before removing the rear wheel.
Remove the valve cap, then press the valve to release all remaining air. A Presta valve has a small threaded tip that must be unscrewed before you press it; a Schrader valve has a spring-loaded pin like an automotive valve. Knowing which valve you have prevents forcing the wrong part.
The wheel should now be loose and the tire should feel soft all around. Set the bicycle securely aside so it cannot fall onto the exposed brake rotor or derailleur.
Step 2 Take one side of the tire off the rim
Push the tire beads—the tire’s inner edges—toward the center channel of the rim. This creates slack. Starting opposite the valve, slide a tire lever under one bead and hook it over the rim edge.
Place a second lever a short distance away and move it around the rim until one side of the tire is outside the rim.
Use plastic tire levers rather than screwdrivers. A screwdriver can pinch or cut the inner tube, scratch the rim, and make the next flat more likely. You usually need to remove only one side of the tire, not both.
Once one bead is free, remove the valve from the rim hole and pull the inner tube out. Leave the tire mounted on the other side of the rim so its original position remains easy to identify.
Step 3 Inspect the tire before patching the tube
Run your fingers carefully around the inside of the tire, or inspect it with a bright light, to find glass, wire, thorn, or another sharp object. Work slowly: a sharp fragment can still be embedded even when it is difficult to see. Also examine the outside for a cut, bulge, exposed casing threads, or a puncture large enough to admit debris.
Remove any object you find with pliers or another safe tool, not with an unprotected fingertip. Check the rim tape, too. Rim tape covers the spoke holes inside the rim; if it has shifted or split, a spoke hole or spoke end can puncture the tube from the rim side.
This inspection is essential. A perfectly applied patch will fail again if the thorn or sharp edge remains in the tire.
Step 4 Find and mark the puncture
Inflate the tube just enough for it to take shape, then listen and feel for escaping air. If the leak is slow, submerge sections of the tube in water and watch for a steady stream of bubbles. Dry the tube afterward so moisture does not interfere with the patch adhesive.
Mark the hole with chalk or a pen. If you cannot find it, compare the tube’s valve position with the valve hole in the rim and inspect the corresponding area of the tire. That positional comparison often shows whether the puncture came from the tread side or the rim side.
A useful way to approach how to patch a tire is to check your progress after each stage.
Look for a single clean hole. Two close parallel slits, sometimes called a pinch flat or snake bite, indicate that the tube was squeezed against the rim, often by low pressure or an impact. A patch can cover a small pinch flat, but a badly torn area or several nearby holes is a reason to replace the tube.
Step 5 Prepare the rubber around the hole
Dry the marked area completely and make sure it is free of oil, dust, and talc. Use the roughening tool or fine sandpaper to lightly scuff an area larger than the patch. The goal is a dull, slightly textured surface—not a deep groove or a thin spot in the tube.
Choose a patch that is larger than the puncture on every side and round off sharp corners if the patch is square. Rounded edges are less likely to catch or peel. Keep the protective foil on the patch until the adhesive is ready.
For a traditional vulcanizing patch, apply a thin, even layer of the supplied rubber solution over the prepared area. Do not immediately press the patch onto wet liquid. Follow the kit’s instructions and allow the solution to become tacky, usually with a dull appearance rather than a glossy, wet one.
Important
Do not use household glue, duct tape, or a tire plug as a substitute for a bicycle tube patch. Adhesive patches labeled “glueless” can work for an emergency, but a properly prepared vulcanizing patch is generally the better choice for a lasting repair.
Step 6 Apply and press the patch firmly
Remove the backing without touching the bonding surface. Center the patch over the puncture and press it down from the middle outward, pushing out air pockets. Hold firm pressure over the entire patch, especially along its edge.
If the kit includes a clear film on top, leave it in place unless the instructions say to remove it. Keep the patched area flat while the bond develops. Do not inflate the tube fully right away; the pressure can lift an edge before the repair has adhered.
A successful application lies flat with no visible channel, wrinkle, or lifted edge. If the patch moves while you press it, the surface was probably still wet, dirty, or insufficiently roughened. Remove it and start again with a fresh patch rather than trying to rescue a contaminated one.
Step 7 Perform a low-pressure leak test
Inflate the repaired tube only enough to make it round, then listen closely around the patch. You can also hold the area near your cheek, where a small air current is easy to notice, or use the water test again. Avoid stretching the tube aggressively.
No bubbles or hissing should come from the hole or the patch edge. A faint leak at the edge means the bond did not form correctly. If the original puncture is sealed but another leak appears, inspect the entire tube; more than one puncture may mean the tube has been damaged beyond a sensible patch repair.
Check your result
A good low-pressure test shows a patch that stays flat and a tube that holds its shape without bubbles, hissing, or a growing soft spot.
Step 8 Reinstall the tube and tire without pinching it
Let most of the test air out, but leave the tube slightly shaped. Put the valve through the rim hole and place the tube inside the tire, making sure it is not twisted. Start fitting the tire bead back onto the rim at the valve and work around both directions.
As you approach the final section, push the tire beads into the rim’s center channel. That gives you the slack needed to fit the last portion by hand. Avoid using a lever for the final section if possible; a lever can trap the tube between the bead and rim and create a new puncture.
Before adding full pressure, inspect both sides of the wheel. The tube should not be visible outside the tire, and the tire bead should sit evenly in the rim all the way around. Press the valve upward slightly so the tube is not caught under its base.
Step 9 Inflate, seat, and verify the repaired wheel
Inflate the tire gradually to the pressure range printed on its sidewall. Stop occasionally and check that the bead’s molded line, if present, remains an even distance from the rim. If one section dips or bulges, release air, push the bead into place, and reinflate rather than riding on it.
Understanding how to patch a tire also means recognizing the limits of the method.
Spin the wheel and watch the tire from the front and side. It should rotate without a side-to-side wobble, pronounced hop, or bulge. Confirm that the valve is straight and that the patch is not creating an unusual soft spot.
Reinstall the wheel securely and test the brakes before riding. For the first short ride, choose a location close to home and recheck the tire afterward. The wheel should remain firm, and the repaired area should not show a repeat loss of pressure.
Know which tire repairs are safe to attempt
The phrase “patch a tire” can describe several different repairs, and treating them as interchangeable can be dangerous. A bicycle inner tube is a replaceable air bladder. A car tire is a structural pressure vessel with belts, plies, and a bead, so its repair needs a different standard.
When a bicycle tube is a good patch candidate
Patch a tube when it has one or two small punctures in the main rubber body, the valve is intact, and the rubber around the hole is clean and sound. A patch kit is useful roadside because it is small, inexpensive, and can restore a tube that would otherwise be discarded.
Replace the tube instead when the valve stem is torn, the rubber is brittle or badly stretched, the hole is near the valve, or several patches already cover the tube. A new tube is also the sensible choice when a tear is too large for the patch to overlap securely.
Why car-tire damage needs more caution
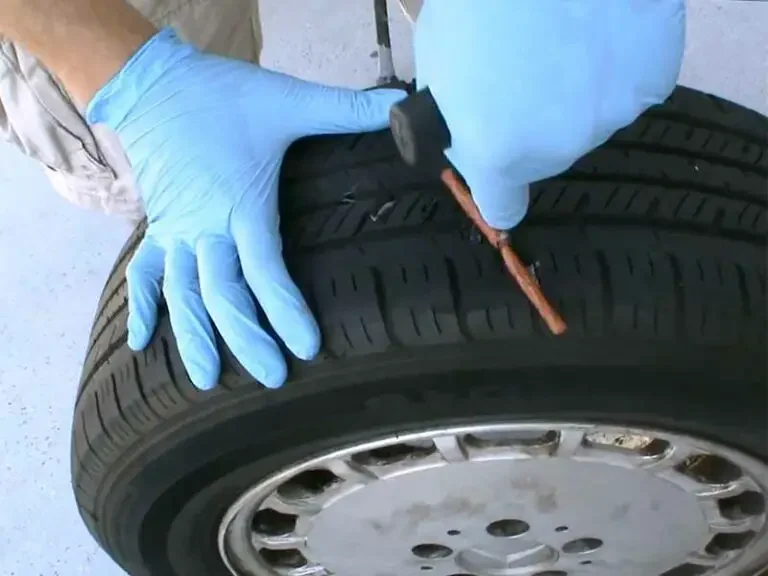
A car tire with a small puncture in the central tread may be repairable, but the accepted repair is generally a combination repair made from the inside: a plug fills the puncture channel while a patch seals the inner liner. The tire must be removed and inspected internally to check for hidden damage.
An externally inserted rope plug may temporarily stop air loss, but it is not the same as a complete internal repair. Do not attempt a beginner patch on a car tire’s sidewall or shoulder, and do not drive on a tire that has been run flat, has a bulge, has exposed cords, or loses air quickly.
Important
If the damaged tire is on a car, motorcycle, trailer, or other high-load vehicle, use the spare or arrange professional service rather than following the bicycle-tube procedure. Never repair sidewall damage or rely on a visibly compromised tire.
Check the repair before you trust it on the road
Verification is more than noticing that the tire feels inflated. The repaired tube must hold air, the tire must be seated evenly, and the original cause of the puncture must be gone. These checks reduce the chance of a second flat or an unstable wheel.

- Air retention: Compare the tire’s firmness after sitting for a while with its firmness immediately after inflation. A gradual loss suggests a remaining leak.
- Patch edge: Look for lifting, wrinkles, or bubbles around the patch perimeter.
- Tire casing: Confirm that no thorn, wire, glass, or sharp cut remains.
- Rim tape: Make sure spoke holes and spoke ends are covered and smooth.
- Bead position: Check that the tire sits evenly on both rim sides.
- Valve: Confirm that it is straight and not pulling sideways against the rim.
- Wheel installation: Make sure the axle is fully seated and the brake works before moving off.
Clean the tube and tire of grit before putting the repair kit away. Dispose of the damaged patch backing and any sharp object safely, and keep the kit’s rubber solution tightly capped so it does not dry out.
Troubleshoot a patch that does not hold
Most failed patches result from a preparation problem rather than a defective patch. The table below connects common symptoms with the most likely cause and the appropriate response.
| What you observe | Likely cause and response |
|---|---|
| Bubbles appear at the patch edge | The surface was wet, dirty, smooth, or not pressed firmly. Remove the failed patch, clean and roughen a wider area, and apply a new one. |
| The tube leaks beside the patch | The hole was larger than expected, or another puncture was missed. Mark every leak and replace the tube if the damage is extensive. |
| The tire goes flat after installation | The tube may have been pinched during mounting, or the sharp object remains in the tire. Remove the tube and inspect both the tire and rim tape again. |
| The tire has a bulge after inflation | The bead is not seated correctly, or the tube is trapped beneath it. Release air, reposition the bead, and inspect carefully before reinflating. |
A valve-area leak deserves special attention. If bubbles form where the valve joins the rubber, a conventional patch usually cannot restore that connection reliably. Replace the tube rather than layering patches around the valve.
Beginner questions about patching a tire
These questions address decisions that commonly arise when a first repair does not go exactly as expected.
Can I patch a bicycle tire without removing the wheel?
You can sometimes remove one tire bead and pull the tube out with the wheel still on the bicycle, but wheel removal usually gives you better access and a more reliable inspection. The tire itself is not what gets patched; the inner tube must come out far enough to find and prepare the puncture.
How long should a bicycle tube patch last?
A properly prepared vulcanizing patch can last for the remaining useful life of the tube. Its durability depends on clean preparation, full contact, correct inflation, and the absence of another sharp object in the tire. A rushed glueless patch is better treated as a temporary roadside measure.
Can I use a car-tire patch kit on a bicycle inner tube?
Use a product specifically made for the material and size of a bicycle inner tube unless the manufacturer clearly states compatibility. Car-tire repair materials and procedures are designed for a different structure, and a bicycle tube has limited space for an oversized patch.
Should I patch a tube with multiple holes?
One or two small, well-separated punctures can often be patched. Replace the tube when holes are clustered, the tube is cracked or stretched, the valve is damaged, or the patchable area is too close to another repair.
Is an external plug safe for a car tire?
An external plug may be used as a temporary measure in some situations, but it does not replace an internal inspection and approved repair. Do not use one for sidewall or shoulder damage, a large cut, a tire driven while flat, or any tire that a qualified technician says is structurally damaged.
Finish the repair with a careful test ride
Learning how to patch a tire is mainly a lesson in careful inspection. For a bicycle, remove the inner tube, locate the puncture, prepare clean textured rubber, apply the correct patch, and check the tire gradually before riding. The patch is only part of the repair; removing the original thorn or correcting damaged rim tape matters just as much.
If the tube will not hold air, the tire bead will not seat, or the damage is near a valve or sidewall, stop and replace the part or seek qualified help. For a car tire, use the spare and have the tire professionally inspected. Once the repaired bicycle wheel holds pressure, runs true, and passes a short cautious test, the repair is ready for normal use.