How to Patch a Tire From the Outside: Step-by-Step Instructions
You can patch a small tread puncture from the outside with a tire plug kit, but it is a temporary repair and not suitable for sidewall damage, large holes, or unsafe tires.
Choosing whether to repair a flat tire depends on more than whether you can see a nail A slow leak in the center of the tread may be.
Learning how to patch a tire from the outside is useful when you are stranded without a spare or need to stop a small puncture long enough to.
This guide explains how to identify a repairable puncture use a rope-plug kit correctly inflate and test the tire and recognize situations that require professional service instead You.
- ✓A plug is generally limited to small punctures in the central tread area, not sidewalls or shoulders.
- ✓Inspect the tire before repairing it; driving while flat can cause damage that an outside plug cannot fix.
- ✓Use the reaming and insertion tools carefully, then inflate the tire to the vehicle’s recommended pressure.
- ✓An outside plug is best treated as a temporary or emergency repair until a tire professional evaluates it.
- ✓Never rely on a plug for a tire with exposed cords, bulges, severe wear, or a large or irregular hole.
When an Outside Tire Plug Is Appropriate
An outside plug works by filling a puncture channel in the tread with a sticky rubber strip The plug is pushed through the remaining rubber from the outside.
That convenience does not make every puncture repairable Tire repair standards generally distinguish between the repairable tread area and the shoulder or sidewall where the tire flexes more.

- Location: The hole should be in the broad, central tread area and clearly away from the shoulder and sidewall.
- Size: A small nail or screw puncture is more suitable than a cut, tear, or enlarged hole.
- Tire condition: The tire should not have cords showing, a bulge, deep cracking, or dangerously shallow tread.
- Inflation history: A tire driven at very low pressure may have internal damage even if the puncture looks minor.
Repairable tread versus unsafe damage
The tread is the thick rubber portion that contacts the road A puncture near the middle of that area usually follows a relatively straight path through the tread.
Do not confuse a clean puncture with a slice A nail or screw often leaves a narrow channel but road debris can create an irregular opening with torn.
Measure the object and inspect the hole only after the tire is safely supported and the vehicle cannot roll If the puncture is large enough that the plug.
Why driving on a flat changes the decision
Air pressure supports the vehicle s weight and keeps the tire s sidewall from flexing excessively When pressure is lost the sidewall can fold against itself and generate.
An outside plug only addresses the hole It cannot restore damaged inner cords repair a separated belt or make a heat-damaged sidewall safe If you drove any distance.
Tools and Preparation for How to Patch a Tire From the Outside
Before starting move the vehicle to a firm level location away from traffic Turn on the hazard lights apply the parking brake place the transmission in park or.
Most tire plug kits contain a rasp or reaming tool an insertion tool with a split eye rubber plug strips and sometimes rubber cement or lubricant You will.

- Use the correct inflator: A portable compressor is preferable to a small emergency cartridge because it lets you set and verify pressure gradually.
- Inspect the kit: Do not use dried-out, cracked, contaminated, or overly stiff plug strips.
- Protect yourself: Keep your hands behind the tool handles and avoid placing your face over the insertion path.
- Know the target pressure: Use the pressure listed on the driver’s doorjamb label or owner’s manual, not the maximum pressure molded into the tire sidewall.
Find the puncture before removing anything
If the tire still contains air listen for a hiss and look for the object A spray bottle containing soapy water can reveal bubbles around a slow leak.
Mark the leak with chalk or a washable marker before removing the nail or screw If there is no obvious puncture the leak may come from the valve.
Remove the tire only when inspection requires it
An outside plug is designed for a mounted tire so do not remove the wheel simply to perform the basic procedure However a tire shop may need to.
If the tire has lost most of its air, inflate it only enough to move the vehicle to a safe place or service location. Do not drive at normal road speed on a tire that is leaking rapidly or visibly deformed.
How to Patch a Tire From the Outside: Step-by-Step Method
Once you have confirmed that the damage is a small puncture in the central tread and the tire has no obvious structural problem an outside plug can temporarily.
These steps describe a typical rope-plug kit Individual kits differ so follow any instructions supplied with your specific tools If the kit calls for rubber cement use it.

- Stabilize first: Secure the vehicle and identify the leak before touching the puncturing object.
- Prepare the channel: Use the reamer to clean and size the hole so the plug can fill it.
- Insert fully: Center the plug and push it deep enough to leave only a small amount outside the tread.
- Verify the result: Inflate, check for bubbles, trim excess material, and monitor pressure closely.
1. Remove the nail or screw
Use pliers to pull the object straight out of the tire. Avoid twisting aggressively because twisting can enlarge the hole or tear the tread. Keep the object if you need to show a technician the approximate size and shape of the puncture.
Air may escape quickly once the object is removed. That is normal, but do not delay if the tire is losing pressure. If the puncture appears much larger than expected or exposes internal material, stop instead of trying to force a plug into it.
2. Prepare the puncture with the reaming tool
Insert the rasp into the existing hole and work it in and out several times The tool cleans debris from the channel and creates a rough surface that.
This step can require force especially in a thick passenger-car tread Hold the tool by its handle push in a controlled motion and avoid placing your hand directly.
3. Load the plug into the insertion tool
Thread one plug strip through the eye or slot in the insertion tool. Center it so approximately equal lengths extend from both sides. Some kits recommend applying a small amount of cement to the plug before insertion, while others use pre-coated strips.
Do not combine chemicals casually or use household adhesive. Tire-plug compounds are made for rubber and heat exposure, whereas general-purpose glue may interfere with the plug or create an unpredictable seal.
4. Push the plug into the tire
Press the loaded tool into the puncture using steady straight force The plug should enter the channel while the tool s insertion depth guide if provided approaches the.
When the plug is seated pull the insertion tool straight out The split eye should release the plug and leave it in the hole If the entire strip.
5. Trim the excess plug material
Use a sharp knife or cutters to trim the exposed ends close to the tread Leave the repair slightly proud of the surface if the kit instructions call. This distinction matters when answering “how to patch a tire from the outside”.
A ragged, loose plug that lifts as you pull on it is a warning sign. It may not be seated correctly, or the hole may be too large or irregular. In that case, do not assume inflation pressure will hold it in place.
6. Inflate and check for leaks
Inflate the tire to the vehicle manufacturer’s recommended cold pressure. If the tire was completely flat, add air in stages and watch for bulges, unusual deformation, or rapid leakage. Keep your body to the side rather than directly in front of the sidewall while inflating.
Apply soapy water around the plug and observe for at least several seconds. A few bubbles from wet foam are not the same as a continuing stream of bubbles. If bubbles grow steadily, the repair is leaking and should not be trusted for normal driving.
After the repair holds, reinstall any valve cap, lower the vehicle properly if it was raised, and confirm that the wheel nuts are secure if the wheel was removed. Record the pressure and recheck it before driving farther than necessary.
Testing the Repair and Deciding Whether to Drive
A tire that holds air immediately after plugging is not automatically ready for a long trip. The plug may seal when the tire is stationary but leak once the tread flexes under load. Heat, speed, underinflation, and repeated impacts can also expose a weak repair.
Drive only far enough to reach a safe destination or tire service when the repair is being used as an emergency measure. Use moderate speed, avoid hard cornering and heavy loads, and stop if the vehicle pulls, vibrates, or the tire-pressure warning returns.
- Pressure: Confirm the tire reaches and holds the doorjamb-recommended pressure.
- Plug condition: Look for lifting edges, tearing, or a plug that appears to be pushed out.
- Leak test: Reapply soapy water after inflation and again after a short drive.
- Vehicle behavior: Stop for vibration, steering changes, noise, or a new pressure warning.
How to monitor pressure afterward
Check the repaired tire when it is cold, preferably before driving for the day. Compare it with the other tires and use a reliable gauge. A small change caused by temperature can be normal, but a continuing downward trend indicates a leak that needs attention.
Do not wait for the tire-pressure monitoring system to warn you. The system may alert only after pressure has fallen substantially, and its reading may not identify a slow leak soon enough to prevent additional damage.
Why a plug may leak after installation
The most common causes are an oversized or irregular puncture inadequate channel preparation poor plug placement contamination from water or dirt or damage near the shoulder A plug.
If a second plug seems necessary in the same hole, stop rather than stacking repairs. Multiple strips do not reliably compensate for a puncture that is too large, and they can make professional inspection more difficult.
Outside Plug Versus Internal Patch or Patch-Plug
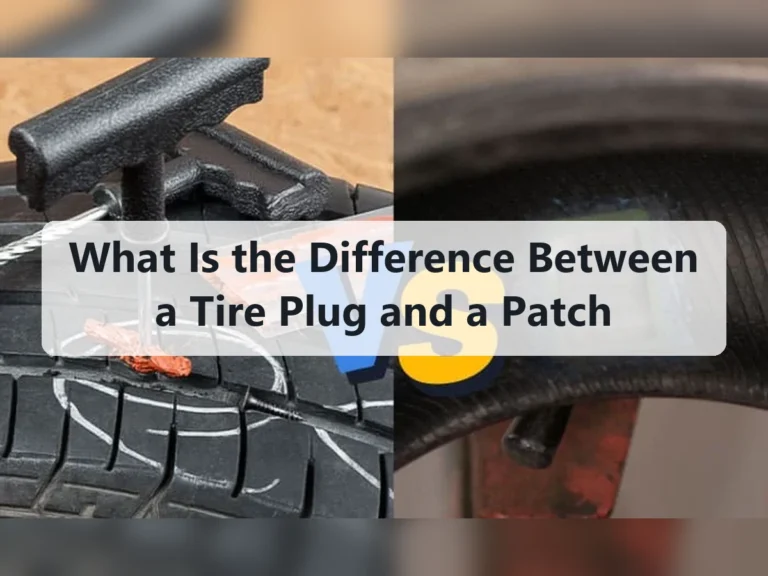
An outside plug and an internal patch solve related but different problems The plug fills the puncture from the exterior while an internal repair requires removing the tire.
For a lasting repair a technician generally needs to locate the puncture from the inside determine whether the tire was driven underinflated prepare the liner correctly and apply.
| Repair type | How it works | Best use | Main limitation |
|---|---|---|---|
| Outside rope plug | Fills the tread puncture from the exterior | Emergency roadside sealing of a suitable small puncture | Does not inspect or seal the inner liner |
| Internal patch | Seals the inner liner after the tire is demounted | Professional repair when the puncture and tire condition qualify | Does not fill a puncture channel as completely by itself |
| Patch-plug unit | Uses a stem in the channel and a patch inside | Professional, permanent-style repair for an appropriate tread puncture | Cannot make shoulder, sidewall, or structurally damaged tires safe |
| Tire replacement | Removes the damaged tire from service | Structural damage, excessive wear, or nonrepairable location | Costs more than a temporary seal |
In practical terms, how to patch a tire from the outside is mainly an emergency skill. It can help you avoid being stranded, but an outside plug should not be treated as equivalent to an internal inspection and approved repair.
- Inspection: Internal service can reveal liner damage, belt separation, and debris that an outside plug leaves hidden.
- Durability: A properly completed professional repair is generally a better long-term solution than a roadside-only plug.
- Convenience: An outside plug is faster and requires fewer tools, making it useful when immediate mobility matters.
When You Should Not Plug the Tire
Some damage should end the repair attempt immediately The sidewall and shoulder flex significantly as the tire rolls so a plug in those areas may not remain secure.
Replacement is also the safer choice when the tire is worn beyond a usable tread depth has been repaired improperly several times or has damage close to another.
- Sidewall puncture: Do not plug or patch it as a normal tread repair.
- Shoulder damage: A puncture near the tread edge is outside the usual repair zone.
- Large cut: A slit, tear, or hole that does not form a clean channel needs professional evaluation.
- Visible structure: Exposed cords, a bulge, or belt separation means the tire should be removed from service.
- Flat-driving damage: If the tire was driven substantially while deflated, have it inspected internally.
Do not use tire sealant as a substitute
Liquid sealants may temporarily slow some leaks, but they are not a replacement for inspecting and repairing a punctured tire. Sealant can spread through the tire, interfere with pressure sensors, complicate a technician’s work, and conceal a continuing structural problem.
Emergency sealant has a place in some vehicle manufacturers’ roadside kits, but follow the vehicle and product instructions closely. If you use it to reach service, tell the technician what was added and how far the vehicle was driven.
Know when the tire is beyond economical repair
A cheap plug is not a bargain if the tire s tread is nearly worn out or the casing has already suffered damage Likewise replacing one tire on.
The safest decision is based on the entire tire, not simply on the size of the visible hole. A small puncture in a sound tire may be manageable; a small puncture in a damaged tire may be the final evidence that replacement is needed.
Common Mistakes That Cause Plug Repairs to Fail
Most failed outside repairs result from rushing one of three stages: diagnosis, preparation, or testing. The plug itself is only one part of the repair. If the puncture is misidentified or the channel is contaminated, even a high-quality strip may not seal.
Another common mistake is treating the maximum pressure molded into the tire sidewall as the correct inflation target. That number is a limit for the tire under specified conditions, not the normal pressure for your vehicle. Use the vehicle label or manual instead.
- Pulling first: Removing the nail before locating and confirming the leak can make a slow puncture difficult to identify.
- Over-reaming: Enlarging the hole unnecessarily leaves too little rubber to grip the plug.
- Shallow insertion: A plug left partly outside may lift, tear, or leak as the tread flexes.
- Skipping the leak test: Visual confidence is not proof that the repair is airtight.
- Continuing indefinitely: A roadside plug should not justify ignoring recurring pressure loss or professional inspection.
Using the wrong angle
Insert and remove the tools along the direction of the puncture A nail that entered at an angle may have created a diagonal channel and forcing the tool.
Ignoring a second leak
A vehicle can have more than one puncture, especially after driving through construction debris. If the plugged location holds air but pressure still falls, inspect the entire tread, valve stem, bead, and wheel. Do not keep adding plugs without finding the source.
Frequently Asked Questions
Can you patch a tire from the outside without removing the wheel?
Yes. A rope-plug kit is designed to repair a suitable small tread puncture while the tire remains mounted on the wheel. The wheel does not need to be removed, although the tire should later be demounted if a professional inspection is needed.
Is an outside tire plug a permanent repair?
It is best considered a temporary or emergency repair, particularly when installed beside the road without inspecting the inner liner. A tire professional can determine whether the tire qualifies for a more complete internal repair.
How large of a hole can a tire plug repair?
There is no universal safe hole size for every tire or plug kit. A small, clean puncture is the appropriate situation; a large, torn, irregular, or loose-fitting hole should not be forced closed with a plug. Follow the kit instructions and have uncertain damage inspected.
Can I plug a tire near the shoulder?
Do not assume a shoulder puncture is safe to plug. The shoulder flexes heavily and is outside the normal central tread repair area, so replacement or professional evaluation is usually required.
How long can I drive on an outside plug?
Drive only as far and as long as necessary to reach a safe repair facility when possible. Check pressure frequently, avoid high speeds and heavy loads, and stop immediately for renewed leakage, vibration, pulling, or visible tire damage.
Should I leave the nail in until I get a repair kit?
If the nail is keeping air from escaping rapidly, leaving it in place may reduce the leak temporarily. Do not rely on that condition for normal driving; move to a safe location, monitor pressure, and repair or replace the tire as soon as practical.
Can a plugged tire be used on a highway?
A properly sealed suitable puncture may hold at highway speed but an outside plug does not guarantee a safe long-term repair Because the tire s interior condition is unknown the safer plan.
Conclusion
Learning how to patch a tire from the outside can provide a valuable roadside solution for a small puncture in the central tread The process involves removing the.
The major limitation is that an outside plug cannot reveal or repair internal damage and it is not appropriate for sidewalls shoulders large cuts severe wear or tires.
After plugging a suitable tread puncture, inflate the tire, check it with soapy water, monitor its pressure, and arrange a professional inspection before relying on it for regular driving.