How to Program TPMS Sensors: A Beginner’s Guide
Replacing a tire pressure sensor is not always as simple as installing a new valve stem. A replacement sensor may need the vehicle’s make, model, year, frequency, and communication protocol before the car can recognize it. Even a correctly installed sensor can leave the TPMS warning light on if its identification number has not been learned by the vehicle.
This guide explains how to program TPMS sensors using the safest realistic approach for a beginner: identify the vehicle and sensor, activate or program the sensor with a compatible tool, install it correctly, and complete the required relearn procedure. The exact menu names vary by tool and vehicle, but the logic is consistent.
You will also learn how to tell direct TPMS from indirect TPMS, when cloning an old sensor is useful, how to verify the result, and what to do when programming or relearning fails. If a tire must be dismounted or a valve-stem sensor is damaged, stop and use a qualified tire professional rather than forcing the job.
At a glance
- A sensor must be compatible with the vehicle before programming can succeed.
- Programming the sensor and teaching its ID to the vehicle are separate actions.
- Verification requires checking live sensor data and confirming the warning light stays off.
How to program TPMS sensors correctly
Start by determining whether the vehicle uses direct or indirect TPMS. A direct system has a pressure sensor inside each wheel, usually attached to the valve stem. An indirect system estimates pressure through wheel-speed sensors and normally does not use programmable pressure sensors in the wheels.
For a direct system, the complete job has three parts: configure or activate the replacement sensor, physically install it, and perform the vehicle’s relearn procedure. Some vehicles accept a sensor ID automatically while driving; others require a manual sequence or an OBD-capable scan tool.
Tools you will need
- A vehicle-compatible TPMS programming or activation tool for reading, cloning, and configuring the sensor
- A compatible replacement TPMS sensor matched to the vehicle’s application and radio frequency
- An accurate tire-pressure gauge and air source for setting the specified pressures
- Vehicle service information or the owner’s manual for the correct relearn method
- Optional: an OBD TPMS scan tool if the vehicle requires an ID write or OBD relearn
Step 1 Confirm the vehicle uses direct TPMS
Check the owner’s manual or the vehicle’s service information for the TPMS design. A direct system typically reports individual tire pressures on the instrument display or through a vehicle information menu. An indirect system usually reports only a general low-pressure warning and uses wheel-speed data instead of pressure sensors in each wheel.
Do not buy a programmable valve-stem sensor until this is clear. On an indirect system, the relevant service may be setting tire pressures and resetting or calibrating the TPMS through the vehicle menu, not programming a sensor.
Also record the vehicle’s exact year, make, model, trim, and market. A sensor that fits a similar vehicle may use a different frequency, protocol, valve design, or communication format.
Step 2 Identify the failed sensor and replacement method
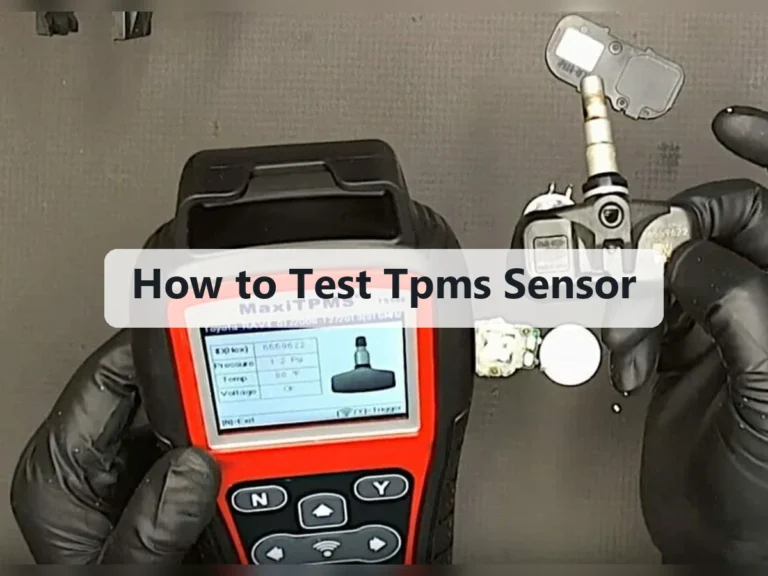
Use a TPMS tool to trigger and read each wheel before replacing anything. Hold the tool near the valve stem and follow its instructions for activation. A healthy sensor normally returns information such as its sensor ID, pressure, temperature, battery condition, and transmission frequency.
Reading all four or five sensors, including the spare when applicable, helps you find the actual fault. It also prevents replacing a sensor when the real issue is a damaged valve, a receiver problem, incorrect tire pressure, or a sensor battery that is nearing the end of its service life.
There are two common replacement approaches:
- Cloning: The new sensor receives the old sensor’s ID and related vehicle data. If the clone is successful, the vehicle may not need to learn a new ID.
- New-ID programming: The tool creates or writes a different ID to the sensor. The vehicle must then learn that new ID through its required relearn procedure.
Cloning is convenient when the original sensor still communicates and the replacement supports cloning. New-ID programming is necessary when the old sensor cannot be read or when the replacement and tool do not support cloning.
Important
Never rely on the sensor’s appearance alone. Confirm application, frequency, valve style, and protocol in the tool’s coverage list or the sensor manufacturer’s application data. An incompatible sensor may program successfully but still fail to communicate with the vehicle.
Step 3 Set the tire pressures before programming
Find the vehicle’s recommended cold tire pressures on the driver’s door-jamb label or in the owner’s manual. Set each tire to that specification, not to the maximum pressure molded into the tire sidewall. If the spare contains a TPMS sensor and is monitored, set it according to the vehicle’s instructions as well.
Correct pressure matters because some relearn procedures use the current pressure as part of the confirmation process. It also gives you a reliable baseline when checking the programmed sensor afterward.
Inspect the valve stem and wheel area for corrosion, cracks, leaks, or damage. If the sensor is mounted inside the tire, tire removal and installation require suitable equipment to avoid breaking the sensor or bending the valve stem.
Step 4 Read the original sensor when cloning is possible
Select the vehicle or sensor application in the programming tool, then choose the read, copy, or clone function. Place the tool close to the original sensor and activate it as directed. Compare the displayed ID and pressure with the wheel position you are testing.
Write down which ID belongs to each wheel. A sensor can respond even when it is not installed at the wheel position you think you are testing, especially when wheels have been rotated or the spare is nearby.
If the old sensor will not respond, check that the tool is positioned at the valve stem and that the tool has the correct vehicle application. A dead internal battery generally cannot be repaired by programming. In that situation, select the new-ID option instead of repeatedly attempting to clone a sensor that cannot transmit.
Step 5 Program or activate the replacement sensor
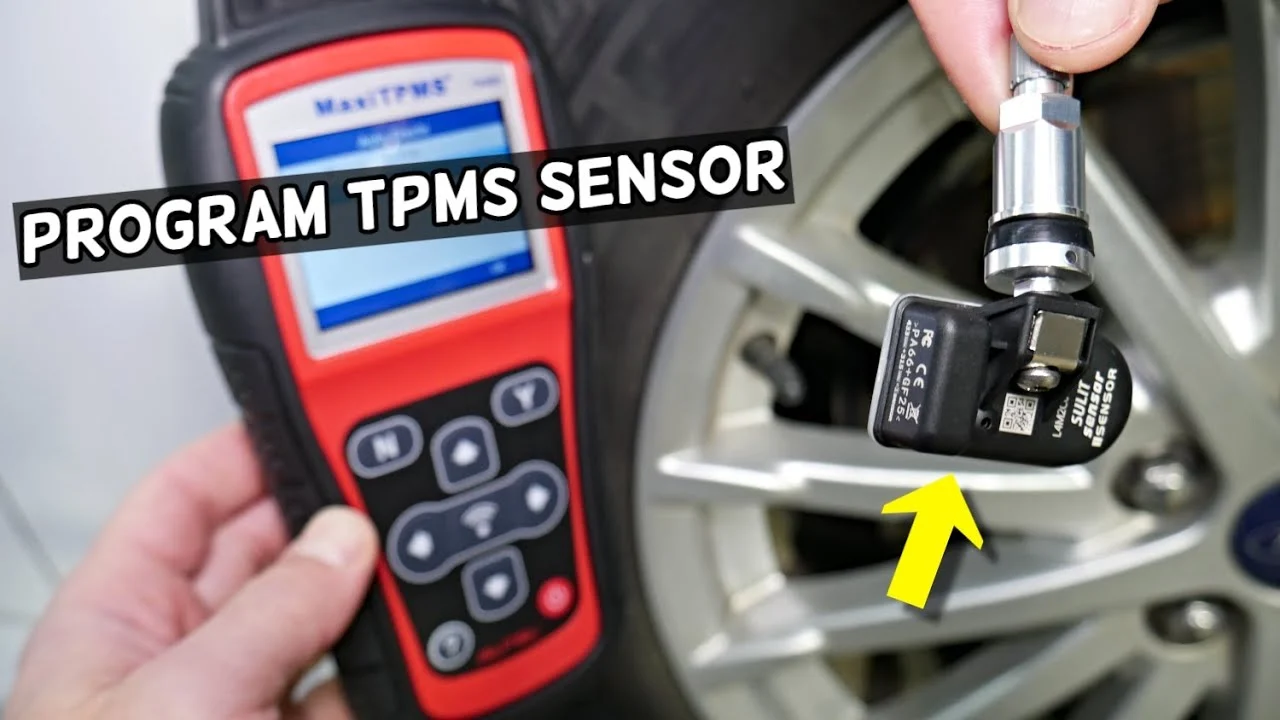
Place the replacement sensor beside the programming tool and select the appropriate function. With a universal sensor, the tool may first write vehicle-specific data to the sensor. With a pre-programmed sensor, the tool may only need to activate it and confirm its ID.
For a clone, transfer the old sensor’s ID when the tool confirms that cloning is supported. For a new ID, allow the tool to generate or assign an ID. Follow the on-screen instructions exactly; some sensors must remain still during writing, while others need to be held in a particular orientation.
A successful operation usually produces a completion message and displays the new sensor ID. Trigger the sensor again after programming and verify that the tool reads the expected ID, pressure, and other available data. If the tool reports an unsupported sensor, incorrect frequency, or failed write, do not install it yet.
Step 6 Install the programmed sensor without damaging it
If the sensor is an internal valve-stem type, have it installed with the correct grommet, washer, nut, and valve cap. The sealing components are often sensor-specific. Reusing a crushed rubber seal or tightening the valve nut incorrectly can cause a slow leak even when the electronics work.
During tire mounting, keep the mounting head and tire iron away from the sensor. The sensor is commonly positioned near the valve stem, so careless bead removal or installation can crack its housing or bend the stem.
After inflation, apply an approved leak-detection solution around the valve stem and inspect for bubbles. A leak at the stem is not a programming problem and must be corrected before the vehicle is driven.
Step 7 Complete the vehicle’s TPMS relearn
Now teach the vehicle to recognize the sensor ID. The correct method depends on the vehicle and whether you cloned the old ID or programmed a new one. A useful way to approach how to program tpms sensors is to check your progress after each stage.
- Auto relearn: The vehicle learns the sensor while you drive, often after the sensors transmit in a particular sequence.
- Manual or stationary relearn: The vehicle enters a learning mode, and each sensor is triggered in a specified wheel order with the TPMS tool.
- OBD relearn: A compatible scan tool transfers the sensor IDs to the vehicle’s TPMS control module through the diagnostic connector.
Use the owner’s manual or reliable vehicle-specific service information for the exact sequence. Some vehicles require the ignition on with the engine off; others require a menu command, a button combination, or a short drive. Do not assume that a procedure for one model year applies to another.
When a stationary relearn is required, follow the wheel order exactly. The order may begin at the left front and continue clockwise, but that is not universal. The vehicle may honk, flash a turn signal, or display a message after accepting each sensor.
Step 8 Verify the repair with live data and a drive check
After relearn, use the TPMS tool or vehicle display to confirm that every monitored wheel has a pressure reading and a sensor ID. Compare the displayed locations with the physical wheel positions. If the values appear in the wrong positions, the sensors may have been learned in the wrong order.
Turn the ignition off and restart the vehicle. The TPMS warning light may take a short drive to go out, depending on the system. If the light flashes for a period before staying on, the vehicle is usually reporting a system fault rather than merely low pressure.
Drive only when the tires are correctly inflated and the wheel hardware is secure. After the drive, check the display again and inspect the valve stems for leaks. A complete repair should show plausible pressure readings for every monitored wheel, no active TPMS fault, and no returning warning light.
What programming and relearning actually do
Programming writes vehicle-specific information to a replacement sensor or prepares a universal sensor to imitate an approved application. Relearning is different: it tells the vehicle’s control module which sensor IDs belong to the vehicle and, in some cases, which ID belongs at each wheel position.
This distinction explains many unsuccessful repairs. A tool may report “programmed” because it successfully wrote the sensor, while the dashboard remains lit because the vehicle has not learned the new ID.

Why sensor frequency and protocol matter
TPMS sensors transmit by radio, commonly at a vehicle-specific frequency such as 315 MHz or 433 MHz, although the correct specification depends on the application and market. Frequency alone is not enough. The sensor must also use a communication protocol the vehicle can understand and have a compatible valve and housing.
Universal sensors can cover many applications, but coverage depends on the sensor manufacturer and the programming tool. Check coverage before purchase rather than assuming that a sensor advertised as “universal” will work with every vehicle.
When cloning is the better choice
Cloning is useful when the old sensor can still be read and the replacement supports the same cloning method. The vehicle continues to see the familiar ID, so an additional relearn may not be required on some applications.
Cloning does not repair a damaged or dead sensor. It also does not correct an incorrectly recorded wheel position. Record the original IDs and positions before removing wheels whenever possible.
What the TPMS warning light can tell you
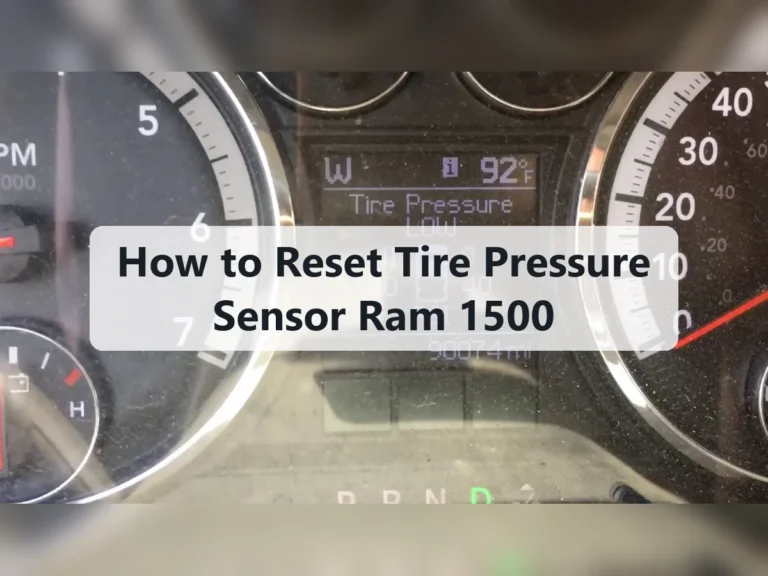
A steady warning light commonly indicates low pressure, but it can also remain on when a sensor has not been learned or a sensor is not transmitting. A flashing light at startup, followed by a steady light, generally points to a TPMS system fault or missing sensor rather than ordinary low pressure.
Use actual pressure readings and scan-tool data instead of interpreting the lamp alone. Warning-light behavior varies by vehicle, so the owner’s manual remains the final reference for that model.
How to confirm the result safely
Verification should be more than seeing the warning light disappear once. A sensor may transmit intermittently, display an implausible value, or be learned at the wrong wheel position. Confirm the electronic result and the physical condition of the tire and valve.

- Check all monitored tires with a separate, accurate pressure gauge.
- Compare each gauge reading with the vehicle display or TPMS tool.
- Confirm that each sensor ID is assigned to the correct wheel position.
- Look for a current sensor battery, signal, or communication fault.
- Inspect each valve stem for air loss after installation.
- Restart the vehicle and complete the drive check required by the manual.
If the vehicle displays pressure in the wrong location, the sensors may not be defective. The IDs were likely entered in an incorrect order, or the vehicle has not completed its position-learning procedure.
Check your result
A successful result is a stable pressure reading for every monitored wheel, correct wheel-position information when the vehicle supports it, no TPMS fault code, and no warning light returning after the required drive.
Troubleshoot common TPMS programming problems
When how to program TPMS sensors does not produce a working dashboard system, isolate the problem in this order: application, activation, installation, relearn, and pressure. Avoid replacing several parts before identifying which stage failed.
| Symptom | Likely cause and next check |
|---|---|
| Tool cannot read the sensor | Wrong application, poor tool position, dead battery, or incompatible sensor. Recheck coverage and trigger the sensor at the valve stem. |
| Sensor programs but vehicle does not recognize it | New ID was not relearned, or the sensor protocol is wrong. Perform the vehicle-specific relearn and confirm compatibility. |
| Warning light flashes, then stays on | System fault, missing sensor, communication problem, or incomplete relearn. Scan the TPMS module if possible. |
| Pressure appears at the wrong wheel | Incorrect stationary relearn order or wheel-position data. Repeat the specified position-learning process. |
| Pressure reading is implausible | Incorrect pressure, damaged sensor, wrong application, or a sensor that was not configured correctly. Compare with a mechanical gauge. |
| Air leaks after installation | Damaged seal, valve hardware, wheel corrosion, or improper installation. Repair the leak before further programming checks. |
When the tool says the sensor is unsupported
Confirm the exact vehicle details and select the correct market or model variant in the tool. Then verify the replacement sensor’s part number, frequency, valve type, and software coverage.
If the tool has not been updated recently, it may lack support for a sensor or vehicle already listed by the manufacturer. Use an approved compatible tool or have a tire shop program the sensor. Do not repeatedly overwrite a sensor with unrelated applications.
When the warning light stays on after relearn
First check every tire with a pressure gauge, including the spare if applicable. Next, trigger each sensor and record whether it responds with a sensible pressure, temperature, and ID.
If all sensors respond but the vehicle still reports a fault, check for stored TPMS codes with a scan tool that can access the TPMS module. A receiver, antenna, wiring, or control-module problem cannot be fixed by reprogramming the wheel sensor.
When a sensor was installed but cannot be triggered
Check the sensor position and tool mode. Some tools require a specific trigger type, and some replacement sensors remain in a shipping or sleep state until activated.
If the sensor still does not respond, tire removal may be necessary to inspect its battery, valve connection, and physical condition. That is a sensible point to stop if you do not have proper tire-service equipment.
TPMS programming FAQs
These answers cover the questions that most often arise during a first replacement. Vehicle-specific instructions always take priority over a general procedure.
Can I program a TPMS sensor without a scan tool?
Usually not for a universal sensor. Some pre-programmed sensors only need the vehicle’s manual or auto relearn, but a programmable sensor generally requires a compatible activation or programming tool before installation.
Do I need to program a sensor after rotating the tires?
Not necessarily. If the vehicle automatically tracks wheel positions, no action may be needed. If it uses a stationary position relearn, you may need to retrain the positions after rotation even though the sensor IDs did not change.
Can I replace only one TPMS sensor?
Yes, if the other sensors are functioning and the replacement is compatible. Read the remaining sensors first because sensors with similar age may have batteries near the end of their service life.
How long does a TPMS sensor battery last?
Battery life varies with sensor design, use, temperature, and transmission behavior. Most internal batteries are sealed, so a weak battery normally means replacing the complete sensor rather than installing a new battery.
Will driving automatically program a new TPMS sensor?
Driving can complete the relearn on vehicles designed for auto relearn, but it does not necessarily program an unconfigured universal sensor. The sensor must first be compatible and properly activated or programmed.
Is it safe to drive with the TPMS light on?
Check the tire pressures immediately. If they are correct but the light remains on, drive only as necessary and arrange diagnosis soon; the system may not warn you about a later pressure loss. Stop if a tire appears damaged, is losing air, or the vehicle handles abnormally.
Finish the repair with a confirmed sensor signal
Learning how to program TPMS sensors means understanding the full chain, not just pressing a button on a programming tool. Confirm the vehicle application, configure or clone a compatible sensor, install it without creating a leak, complete the correct relearn, and verify every pressure reading afterward.
If the tool cannot identify the sensor, the warning light flashes, or tire removal requires equipment you do not have, stop before guessing. A qualified tire professional can inspect the valve hardware, program the correct sensor, access the TPMS module, and confirm that the vehicle is safe to return to the road.