How to reset tire pressure on Honda Civic 2018: Complete Guide
When the tire-pressure light stays on in a 2018 Honda Civic, the reset is usually a calibration rather than a replacement or complicated computer repair. The Civic needs to know what normal pressure feels like after the tires have been inflated correctly, rotated, or repaired. If you calibrate it before correcting the pressure, however, the warning system may learn the wrong baseline.
The safest answer to how to reset tire pressure on honda civic 2018 is to check every tire while it is cold, adjust each one to the pressure listed on the driver-side doorjamb label, and then start TPMS Calibration from the vehicle settings. The system may finish learning while you drive, so the warning light does not always disappear the instant you tap “Calibrate.”
This guide explains the complete process, including where to find the calibration menu, what to do if your Civic has a different display layout, how to verify the result, and when a persistent warning points to a leak or system fault instead of a simple reset. You will not need to disconnect the battery or remove a tire.
At a glance
- Set all four tires to the doorjamb label’s cold-pressure specification before calibration.
- Use the vehicle’s TPMS Calibration menu; do not treat the procedure as a sensor replacement.
- Drive normally afterward and investigate any warning that returns or flashes.
How to reset tire pressure on honda civic 2018
On this Civic, the tire-pressure monitoring system, or TPMS, generally uses the car’s wheel-speed information to detect when one tire is turning differently because of low inflation. Calibration establishes the current, properly inflated condition as the reference point. It does not add air, repair a puncture, or program a new valve sensor.
Tools you will need
- A reliable tire-pressure gauge to check each tire accurately
- An air compressor or tire-inflation service, if any tire needs air
- The driver-side doorjamb label, which provides the correct cold-tire pressure

Step 1 Park safely and let the tires cool
Park on a level surface, switch off the engine, and allow the Civic to sit before measuring pressure. “Cold” means the car has not been driven recently, or has been driven only a very short distance; driving heats the air inside the tires and temporarily raises the reading.
If the TPMS warning appeared while you were driving, avoid making a fast adjustment based only on a hot reading. You can inspect the tires immediately for an obvious flat or damaged sidewall, but make the final pressure adjustment when the tires are cool. Keep the vehicle away from traffic while you work.
A tire that looks noticeably lower than the others deserves extra attention. Do not continue driving on a visibly flat tire, a tire with a bulge or cut, or a tire that is losing air quickly. Have it inspected or repaired before calibrating the system.
Step 2 Find the recommended cold tire pressure
Open the driver’s door and locate the tire-and-loading information label on the doorjamb or door pillar. Read the listed cold tire pressure for the Civic’s installed tire size. Use that label rather than the maximum pressure molded into the tire sidewall; the sidewall number is not the normal operating recommendation for the vehicle.
The front and rear specifications are often the same, but do not assume that they are. If the label lists different values, follow the position-specific numbers. The label may also include a separate specification for a compact spare, if equipped.
Helpful tip
Use the same pressure unit shown on the label, usually PSI. If your gauge is set to kPa or bar, convert carefully or change the gauge’s unit before adjusting the tires.
Step 3 Measure all four tires and inspect them
Remove the cap from each valve stem and press the tire-pressure gauge straight onto the valve. A brief hiss while the gauge seals is normal, but hold it firmly enough to obtain a stable reading. Write down the result or compare each tire with the doorjamb specification as you go.
Check the tread and sidewalls while you are there. Look for a nail, screw, glass, uneven wear, a bulge, or a valve cap that is missing. A low reading in one tire may be caused by a puncture rather than ordinary temperature change.
Inflate any tire that is below specification and recheck it. If a tire is overinflated, release air in short presses and measure again. Avoid deliberately matching the tires to one another if the correct axle pressures on the label are different.
Step 4 Adjust the tires to the cold-pressure specification
Add or release air until each tire matches the appropriate number on the doorjamb label. Replace the valve caps after checking the readings; the caps help keep dirt and moisture away from the valve core, although they do not substitute for a proper seal.
If you cannot bring a tire to the correct pressure because air escapes as quickly as you add it, stop there. A damaged tire or valve needs inspection, and calibration will not solve the leak. Likewise, do not attempt a roadside repair beyond your equipment and experience if the tire has sidewall damage or has come off the wheel.
Once all four tires are set, confirm that the car is in Park and that the ignition is on. You can start the engine or use the vehicle’s normal accessory-power mode, but the infotainment system must be awake so you can reach the settings menu.
Step 5 Open the TPMS Calibration menu
Use the center display to select Home, then Settings, then Vehicle. Look for TPMS Calibration. Select it and choose Calibrate to begin the process.
A useful way to approach how to reset tire pressure on honda civic 2018 is to check your progress after each stage.
The wording and screen arrangement can vary by Civic trim and audio system. If your screen does not show those exact labels, look under Vehicle Settings or use the vehicle’s owner’s manual for the matching menu path. Do not choose a maintenance-reset option simply because it is nearby; oil-life reset and tire-pressure calibration are separate functions.
After you select Calibrate, the display may confirm that calibration has started or that the system will calibrate while driving. This is the point at which the Civic records the current tire-pressure condition as its reference. It does not display an exact PSI value for each tire.
Step 6 Drive so the calibration can complete
After starting calibration, drive normally on a safe route. Honda’s procedure requires driving conditions that allow the system to compare wheel speeds; a short, steady drive at ordinary road speed is more useful than leaving the car parked with the engine running.
Follow the speed and time guidance shown in your owner’s manual or on the vehicle display. Avoid aggressive acceleration, hard cornering, and unnecessary braking while checking the system. If the warning light remains on immediately after calibration begins, that does not automatically mean the reset failed.
When calibration completes, the TPMS warning should remain off during subsequent driving if the tire pressures are correct and the tires are suitable for the vehicle. If the warning returns, stop and recheck the pressures rather than repeatedly starting calibration without investigating.
Step 7 Confirm the warning status and finish the check
After the drive, park safely and turn the Civic off. Restart it and observe the instrument panel. A successful result is a normal startup with no persistent low-tire-pressure warning, followed by no warning during ordinary driving.
Walk around the vehicle once more and make sure every valve cap is installed. Keep the gauge available for a later recheck, especially if the warning first appeared during a significant temperature change or after a tire service.
If the warning remains on but the tires are correctly inflated, repeat the pressure measurement with a second gauge or have a tire shop verify it. If the light flashes for about a minute at startup and then stays on, the vehicle may be reporting a TPMS malfunction rather than simply low pressure.
What the Civic calibration actually changes
TPMS calibration tells the Civic what wheel-speed behavior corresponds to the current tire condition. It is a reference-setting operation, not a direct display of pressure and not a way to erase evidence of a leak. Understanding that distinction prevents a common mistake: calibrating immediately after finding a low tire and assuming the warning problem is solved.
Calibration is not the same as adding air
The Civic cannot inflate a tire through its settings menu. If a tire is below the label specification, use an air source first. The calibration should come only after all four tires have been checked and corrected.
For the same reason, calibrating does not repair a puncture. A tire can be at the correct pressure in the driveway and still lose enough air during a trip to trigger the warning again. A recurring pressure drop is a mechanical issue that needs inspection.
Calibration is not sensor programming
Some vehicles use pressure sensors inside the wheels, while the 2018 Civic’s system can use changes in wheel rotation to identify an underinflated tire. In either case, the dashboard procedure should not be confused with registering a replacement wheel or programming a sensor.
If you installed different wheels, changed tire sizes, replaced suspension components, or had a TPMS-related repair, follow the instructions for that specific equipment. Do not assume that ordinary calibration will correct a compatibility problem. Understanding how to reset tire pressure on honda civic 2018 also means recognizing the limits of the method.
Why temperature can trigger the light
Air pressure normally falls as the surrounding temperature drops and rises as the tires warm during driving. A cold morning can therefore expose a tire that was already close to the low-pressure threshold. Temperature may explain the timing, but it does not prove that the tire is safe or leak-free.
Measure the tires cold and use the doorjamb specification. Do not release air from a recently driven tire merely because its reading is higher than the cold recommendation; recheck it after it cools instead.
How to check that the reset worked
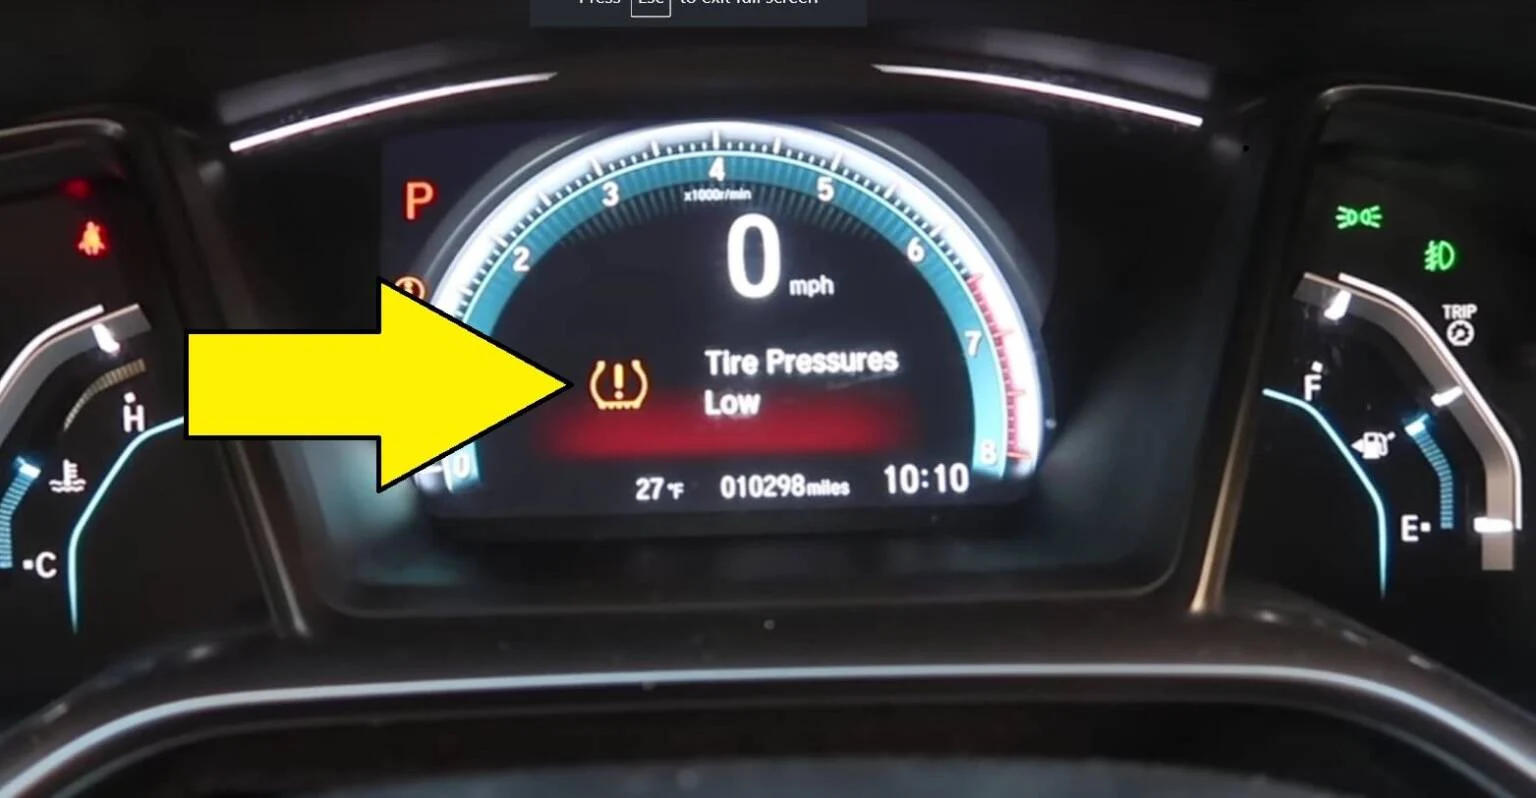
Verification should combine the dashboard result with a physical tire check. The Civic may not show individual tire pressures, so the most dependable confirmation is correct measured inflation followed by a completed calibration drive and a warning light that stays off.
Use a simple confirmation checklist
- All four tires match the cold pressures listed on the driver-side label.
- No tire has an obvious puncture, bulge, cut, or unusual tread wear.
- TPMS Calibration was started from the Vehicle settings menu.
- The car was driven under normal, safe conditions afterward.
- The warning did not return after restarting the car or driving normally.
If those conditions are met, the reset has likely worked. Check pressure again later if the original warning followed a tire repair, a seasonal temperature change, or an unexplained low reading.
Check the tires after service or rotation
Tire rotation can change the position of a tire that has a slow leak, and a tire shop may set all four tires to a general shop value rather than the exact vehicle specification. After any tire service, verify the pressure yourself and calibrate the system if the vehicle instructs you to do so.
Do not use the absence of a warning as permission to skip regular checks. Honda’s monitoring system is a backup alert, not a substitute for looking at the tires and measuring them periodically.
Troubleshooting a warning that will not clear
A warning that stays on after calibration usually has a reason. Start with the physical pressures, then consider whether the calibration was started correctly and whether the driving conditions allowed it to finish. Repeating the menu command without checking those causes is unlikely to help.
| What you observe | What it may mean | What to do |
|---|---|---|
| Warning stays on right after calibration | The calibration is still in progress, or a tire is still underinflated | Drive normally as directed, then recheck all four cold pressures |
| Warning returns after a day or several drives | A slow leak, damaged valve, or puncture may be lowering one tire | Measure the tires and have the suspect tire inspected |
| Light flashes, then remains on | Possible TPMS system fault | Arrange diagnostic service rather than repeatedly calibrating |
| One tire reads very low or will not hold air | Possible puncture or tire damage | Do not continue normal driving; use roadside assistance or qualified tire service |
When the warning returns quickly
Measure every tire again when cold and compare the results with the label. A tire that is several PSI lower than the others or continues losing pressure needs a leak check, even if no nail is visible. Leaks can occur at the valve stem, bead, tread, or a previously repaired area.
If the tires are all correct but the warning returns repeatedly, note when it happens and whether it follows rain, cold weather, a tire rotation, or wheel work. That information can help a technician distinguish an inflation problem from a system or wheel-related issue.
When the TPMS light flashes
A flashing TPMS indicator followed by a steady light commonly indicates a system malfunction rather than ordinary low pressure. The car may not be able to warn you reliably about an underinflated tire while that fault is present.
Important
Do not ignore a flashing TPMS light, a visibly damaged tire, steering pull, vibration, or a rapid pressure loss. Stop in a safe location and seek qualified tire or automotive service before continuing normally.
When the menu option is missing
Confirm that the ignition is on and that you are looking under Vehicle settings rather than general audio settings. Trim-specific displays can use slightly different names, so the owner’s manual is the best authority for the exact button sequence in that vehicle.
If the center display is frozen or unavailable, do not disconnect the battery just to clear the warning. Battery disconnection can reset other vehicle settings without correcting the tire-pressure condition. Have the display or vehicle system diagnosed if the correct calibration function cannot be accessed.
Frequently asked questions
These answers address the most common beginner concerns after setting the tire pressures and starting calibration.
Do I need to reset the TPMS every time I add air?
Not necessarily. If you make a small correction and the warning remains off, there may be no reason to calibrate. If the low-pressure warning appeared, the tires were rotated or repaired, or the vehicle requests calibration, set the cold pressures correctly and run the calibration procedure.
Can I calibrate the system with warm tires?
It is better to calibrate after setting the tires at their cold pressure. Warm tires produce temporarily higher readings, so calibrating from those readings can create an inaccurate reference. If you have already calibrated while the tires were warm, let them cool, correct the pressure, and calibrate again.
How long does the TPMS calibration take?
The menu command starts the process, but the Civic may need normal driving before calibration is complete. The exact time depends on driving conditions. If the warning remains after a reasonable drive, recheck the pressures and consult the owner’s manual or a qualified technician.
Will resetting TPMS tell me which tire is low?
Not always. The 2018 Civic’s display may warn you that pressure is low without providing a precise pressure reading for each tire. Use a separate tire-pressure gauge on all four tires rather than guessing from the dashboard alone.
Can I drive if the tire-pressure light is on?
First inspect the tires and measure them as soon as it is safe. A short, careful drive to an air pump or tire professional may be reasonable when the tires appear intact and are only slightly low, but do not drive on a visibly flat, damaged, or rapidly leaking tire.
Finish the reset with a pressure check
Learning how to reset tire pressure on honda civic 2018 is mainly a matter of using the correct sequence: check the tires cold, match the driver-side doorjamb specification, start TPMS Calibration from the vehicle settings, and drive normally while the Civic learns the reference condition. The reset cannot repair a leak or correct an incompatible tire or wheel.
If the warning stays off afterward, keep monitoring the tires rather than treating the reset as permanent maintenance. If it returns, flashes, or appears alongside damage or rapid air loss, stop relying on calibration and have the tire or TPMS system inspected by a qualified professional.