How to Calibrate Tire Pressure Honda Crv: Complete Guide and Tips
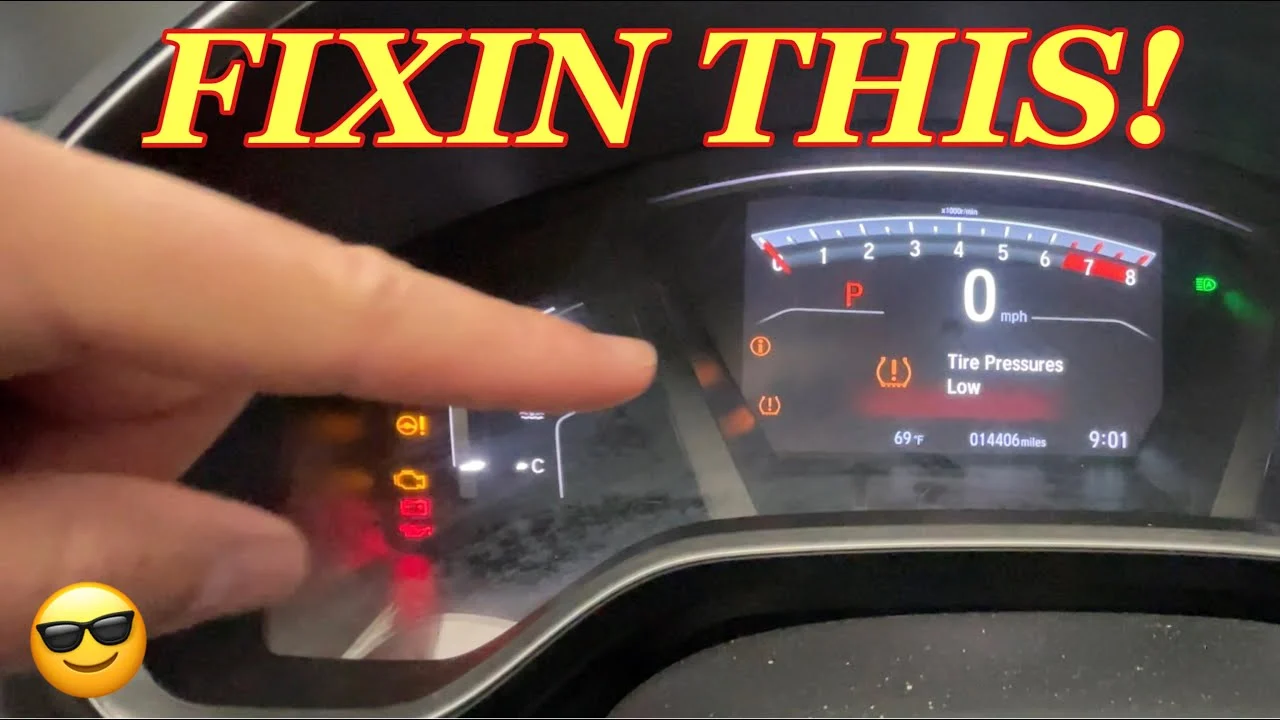
A low-tire warning on a Honda CR-V does not always mean the system itself is broken. In many CR-V model years, the tire pressure monitoring system, or TPMS, needs to be recalibrated after you correct the tire pressures, rotate the tires, replace a tire, or change the load. Calibration teaches the vehicle what normal pressure looks like; it does not add air or repair a leak.
The safe outcome is straightforward: set all four tires to the pressure listed on the driver’s doorjamb label, start the TPMS calibration through the vehicle’s settings or button, and drive as required by your model. The exact menu wording varies by year and trim, so the owner’s manual remains the final authority if your controls differ from the instructions here.
This guide explains how to calibrate tire pressure Honda CR-V systems without guessing at the correct pressure. You will learn how to check the tires cold, use the appropriate calibration control, recognize when the system has completed its learning cycle, and decide when a persistent warning requires a tire shop or Honda service department. This guide explains how to calibrate tire pressure honda crv, what to check first, and how to assess the result.
At a glance
- Use the driver’s doorjamb pressure label, not the maximum pressure molded into the tire sidewall.
- Calibration is performed from the CR-V’s vehicle settings or TPMS button after the tire pressures are corrected.
- A warning that returns after calibration may indicate a puncture, damaged sensor, mismatched tire, or system fault.
How to Calibrate Tire Pressure Honda Crv: Step by Step
Honda CR-Vs use more than one TPMS design, and the controls changed across model years. Newer vehicles commonly use the touchscreen or instrument-panel settings to select TPMS Calibration; some earlier versions use a physical TPMS button. The sequence below covers the shared process while identifying where your CR-V may differ.
Tools you will need
- A reliable tire pressure gauge for checking each tire
- An air compressor or service station inflator for correcting pressure, if needed
- Your CR-V owner’s manual, especially if the menu labels or TPMS control differ
Step 1 Let the tires become cold
Park the CR-V for several hours, preferably overnight, before measuring pressure. A “cold” tire has not been driven enough to heat the air inside it; driving can temporarily raise the reading and lead you to remove air that the tire needs when cold.
If you must check the vehicle after driving, allow it to sit until the tires cool as much as practical and understand that the reading may not match the official cold specification. Do not calibrate based on a hot reading if you can reasonably wait.
Step 2 Read the correct pressure on the driver’s doorjamb label
Open the driver’s door and find the vehicle information label on the doorjamb or door frame. It lists the recommended cold inflation pressure for the front and rear tires, and sometimes the compact spare. Use the pressure for your specific CR-V rather than relying on a generic number.
The number on the tire sidewall is usually the tire’s maximum allowable pressure, not the pressure Honda selected for the vehicle’s handling, ride, load, and fuel economy. If the CR-V has nonstandard wheels or tires, confirm the correct specification with the tire installer or Honda service information before calibrating.
Step 3 Measure all four road tires
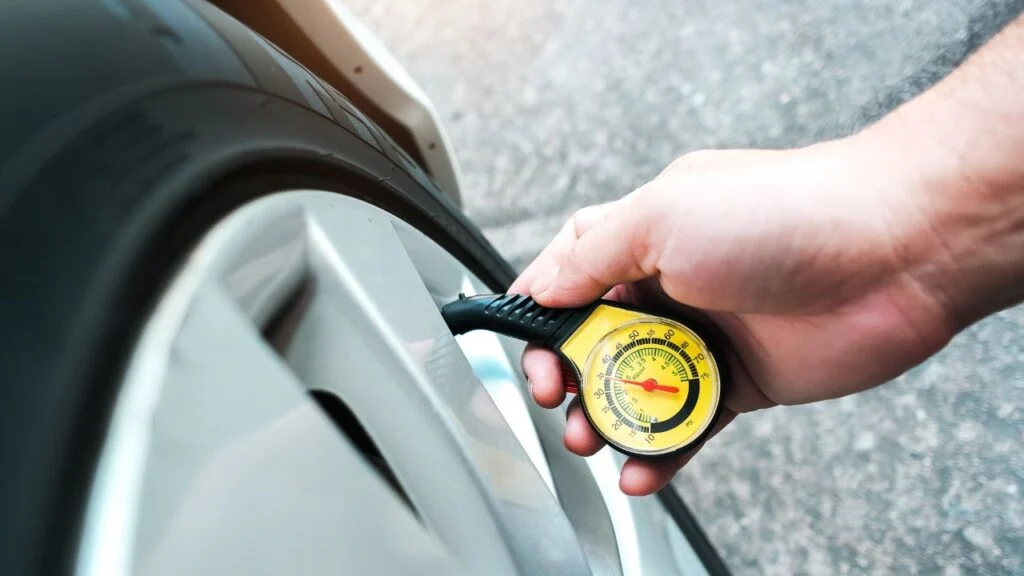
Remove the cap from each valve stem and press the tire gauge firmly onto the valve. Compare each reading with the doorjamb label, then replace the cap after checking. Measure all four tires even if only one warning appeared; a slow leak can be subtle, and the system monitors each wheel.
A small difference between the gauge and the vehicle label may be caused by gauge accuracy or temperature. Correct the pressure carefully rather than trying to make every tire match a number shown on the dashboard, because the dashboard may display a rounded value or may not show individual pressures at all.
Step 4 Adjust the pressure to the cold specification
Add air to a tire that is below the label value. If a tire is above the recommended value, release air in short bursts and recheck it. Finish with all four road tires at the specified cold pressure; do not intentionally leave one tire low to make the TPMS warning disappear.
Inspect the tread and sidewall while you work. A nail, screw, bulge, cut, exposed cord, or valve stem that hisses when touched is a reason to stop driving and seek tire service. Do not attempt to calibrate around a suspected puncture.
Important
Never inflate a visibly damaged tire or a tire that has lost pressure rapidly and then drive it normally. Have it inspected, because internal damage can remain even after air is added.
Step 5 Turn the vehicle on without starting a calibration drive
Place the CR-V in Park and turn the ignition or power mode on. Keep the vehicle stationary while you open the TPMS controls. On models with a touchscreen, use the vehicle settings menus; on models with a physical control, locate the TPMS button beneath the dashboard or near the driver’s knee area.
The wording may be similar to Settings > Vehicle > TPMS Calibration, followed by Calibrate or Initialize. Some model years place the option under Home, Vehicle Settings, or Customize Settings. If you cannot find it, search the index of the owner’s manual for “TPMS,” “tire pressure,” or “calibration.” A useful way to approach how to calibrate tire pressure honda crv is to check your progress after each stage.
Step 6 Start the TPMS calibration
Select the calibration command on the screen and confirm it when prompted. If your CR-V has a physical TPMS button, press and hold it only as described in the manual; a light or message may confirm that calibration has started. Do not press the button repeatedly just because the warning light remains on immediately afterward.
Starting calibration does not instantly verify the tire pressures or turn the warning lamp off. It clears or resets the system’s reference process, after which the CR-V must collect data while being driven.
Step 7 Drive normally while the system relearns the tires
Drive on a normal road after calibration begins, following the speed and distance guidance in your owner’s manual. Honda procedures commonly require sustained driving at road speed for the system to complete calibration, but the exact requirement varies by model year and system. Avoid treating a short trip around the driveway as a completed learning cycle.
Choose a safe route with ordinary traffic conditions. Keep the tires properly inflated, observe the road, and do not try to watch the TPMS screen while moving. The system may finish during the drive without a separate confirmation message.
Step 8 Park safely and confirm the result
After the required drive, stop in a safe place and inspect the instrument panel. The low-tire-pressure indicator should go out once the system has completed calibration and no low-pressure condition remains. If your CR-V displays individual pressures, compare them with the gauge again after the tires cool; a warm-tire reading is expected to be higher than the cold specification.
If the light remains on immediately after starting, continue only long enough to complete the model-specific learning drive if the tires are correctly inflated and appear undamaged. If the light flashes first and then stays on, that pattern commonly indicates a TPMS system problem rather than simply low pressure.
What TPMS calibration actually changes
TPMS calibration establishes a reference for the tire pressure monitoring system. Depending on the CR-V’s design, the vehicle may use wheel-speed information, pressure sensors, or a system that combines several inputs. Calibration tells the vehicle which readings represent normal inflation after you have set the tires correctly.
That is why calibration should follow pressure adjustment, not replace it. If you calibrate while one tire is low, the vehicle may learn an incorrect baseline and delay a warning. The exact keyword phrase how to calibrate tire pressure Honda CR-V describes resetting the monitoring reference; it does not describe inflating the tire or fixing the cause of air loss.

When calibration is normally needed
Use the calibration procedure after adjusting tire pressure, rotating the tires, replacing one or more tires, or changing the tire load when your owner’s manual calls for it. Some CR-V systems can also need calibration after a significant temperature change because air pressure changes as temperature changes.
You generally do not need to calibrate after every routine pressure check if the pressure was already correct and the vehicle has no warning. Follow the model-specific maintenance instructions rather than resetting the system as a substitute for regular inspections.
Why the warning can return after a successful reset
Calibration does not make a tire airtight. A nail, leaking valve core, damaged wheel, bead leak, or temperature-related pressure drop can cause the warning to return. A tire that looks normal from the outside can still be low enough to require attention.
Understanding how to calibrate tire pressure honda crv also means recognizing the limits of the method.
Check the pressure with a gauge when the tires are cold. If the same tire is repeatedly lower than the others, mark its position mentally and have it inspected instead of repeatedly recalibrating the CR-V.
How to verify the CR-V is ready to drive
A completed calibration is only one part of a safe result. Verification means checking both the physical tires and the dashboard response. The most dependable check combines the doorjamb specification, a handheld gauge, a completed learning drive, and a warning light that behaves normally.
- All four road tires match the cold pressure listed on the driver’s doorjamb label.
- No tire has a nail, screw, bulge, cut, exposed cord, or visibly damaged valve stem.
- The calibration command was accepted by the vehicle or the physical button gave its expected confirmation.
- The required driving portion was completed according to the owner’s manual.
- The low-pressure warning is off, or the manual explains a normal delayed response for that model.
Do not use the dashboard display as the only measurement. If the CR-V shows pressure values, use them as a convenient monitoring aid, then confirm an unexpected reading with a gauge. Sensors and displays can report a problem, but they do not replace a physical inspection.
Troubleshooting a Honda CR-V TPMS warning
Most unresolved warnings fall into a few categories: pressure was checked while the tires were hot, calibration was not started, the learning drive was incomplete, or the vehicle has a tire or sensor fault. The table below helps separate those possibilities before you seek service.
| What you observe | Likely explanation and response |
|---|---|
| Light turns on steadily | One or more tires may be low. Check all four cold and inspect for a leak before recalibrating. |
| Light stays on after correct pressure and a complete drive | Calibration may not have started, the procedure may differ by model, or a leak or sensor issue may exist. Recheck the manual and arrange inspection. |
| Light flashes, then remains on | This often indicates a TPMS malfunction. Seek qualified diagnosis rather than repeatedly resetting it. |
| Warning returns after a day or two | A slow puncture, valve leak, wheel leak, or damaged tire is more likely than a calibration issue. Have the tire tested. |
What if your CR-V has no TPMS Calibration menu?
Some CR-Vs use a physical TPMS button, while others may show a calibration option only when the vehicle is in Park and the ignition is on. Check the owner’s manual for the exact control location and sequence. Do not assume that a missing touchscreen option means the vehicle has no calibration function.
If the manual’s instructions do not match the controls in your vehicle, confirm the model year, trim, and market version. A replacement infotainment unit, imported vehicle, or aftermarket wheel setup can also make the procedure different.
Can you calibrate with a tire inflator’s gauge?
An inflator gauge can be useful for adding air, but its accuracy varies. For an important pressure correction, compare it with a separate, reliable tire gauge. Check the gauge at the valve stem with the compressor disconnected so the reading reflects the tire rather than the hose pressure.
When should you stop troubleshooting?
Stop and seek qualified tire or Honda service when a tire loses pressure again, the sidewall is damaged, the vehicle pulls noticeably, the tire has been driven while severely underinflated, or the warning flashes rather than simply staying on. Also seek help if the warning remains after correct cold pressures and the complete model-specific calibration drive.
A service professional can test for punctures, measure leaks, inspect wheel and valve damage, and scan the TPMS system. Avoid installing a sensor or tire solely because a reset failed; diagnosis should establish whether the problem is pressure, hardware, compatibility, or calibration procedure.
Frequently asked questions
These answers address common beginner concerns, but your CR-V owner’s manual takes priority when its procedure or warning description differs.
Do I calibrate the TPMS before or after adding air?
Calibrate after setting all four tires to the recommended cold pressure. Calibration records the current condition as the reference, so doing it first can teach the system an incorrect baseline.
Can I use the tire sidewall pressure for my Honda CR-V?
No. The sidewall typically lists a maximum pressure for the tire. Use the cold inflation pressure on the driver’s doorjamb label unless Honda or a qualified tire professional has specified a different setup for approved replacement tires.
How long does a CR-V TPMS calibration take?
The reset itself usually takes only a short time through the vehicle controls, but the system may need a road drive to complete learning. The required speed and duration depend on the model year, so follow the owner’s manual rather than assuming a brief trip is enough.
Why is the tire-pressure light still on right after calibration?
The system may not have completed its learning drive yet, or a tire may still be low. Check the cold pressures and inspect for damage. If the light stays on after the required drive, or flashes before staying on, arrange diagnosis.
Does rotating the tires require TPMS calibration?
It can. Honda’s procedure varies by TPMS design and model year, but calibration after a tire rotation is commonly recommended because the system may need to relearn the normal readings. Check the manual for your CR-V.
Finish by checking the tires, not just the light
The reliable way to calibrate tire pressure Honda CR-V systems is to begin with cold tires, use the driver’s doorjamb specification, correct all four pressures, start the correct TPMS calibration command, and complete the required drive. Then verify that the warning behaves normally and that no tire is losing air.
If the warning returns, the pressure keeps dropping, or the light flashes, calibration is not the solution by itself. Stop repeated resets and have the tire, wheel, valve, and TPMS components inspected. With the pressures set correctly and the system confirmed after its learning cycle, your next action is simply to recheck tire pressure regularly—especially before a long trip or after a major temperature change.
For a reliable result, approach how to calibrate tire pressure honda crv as a sequence of manageable actions and checks.