How to reset tire pressure light honda civic: safe, clear steps
A tire-pressure warning on a Honda Civic can stay illuminated even after you add air. That does not always mean the car needs a new sensor or an expensive repair. On many Civics, the system needs to learn the corrected tire pressures through a calibration command, while some older versions use a different reset procedure.
The safest approach is to check every tire first, including the spare if your Civic has one, and set the pressure to the specification on the driver’s doorjamb label. Do not use the number molded into the tire sidewall as the vehicle’s recommended pressure. The sidewall number is a maximum reference for the tire, not necessarily the correct setting for your Civic.
This guide explains how to reset tire pressure light honda civic models using the available vehicle controls. You will learn how to identify the likely system type, start calibration from the touchscreen or steering-wheel menu, confirm that the warning has cleared, and recognize when a persistent light points to a puncture, sensor issue, or other problem. The exact menu names vary by model year and trim, so use the option that matches your dashboard.
At a glance
- Correct all four tire pressures before starting TPMS calibration.
- Many newer Civics reset through Vehicle Settings, while some older models use a TPMS button or a separate calibration menu.
- A light that flashes, returns quickly, or remains on after a careful check needs further diagnosis.
How to reset tire pressure light honda civic
Honda Civic tire-pressure systems generally work in one of two ways. An older or lower-trim Civic may have a dedicated TPMS button or a calibration command controlled with steering-wheel buttons. Many newer Civics use an indirect tire pressure monitoring system, which compares wheel-speed information and must be recalibrated after the tires are set correctly.
Calibration does not repair a flat tire, seal a leak, or replace a failed sensor. It teaches the vehicle what normal rolling behavior looks like, so begin with the physical tire check rather than trying menu commands repeatedly.
Tools you will need
- A reliable tire-pressure gauge to measure each tire accurately
- An air pump or compressor, if any tire needs inflation
- Your Civic owner’s manual, optional but useful for confirming the exact menu or button layout
Step 1 Park safely and let the tires cool
Park on a level surface away from traffic, switch the ignition off, and inspect the tires before touching the vehicle controls. Tire pressure changes with temperature, and driving warms the air inside the tires. For the most consistent reading, check them after the car has been parked for several hours or before driving for the day.
If you must check after driving, understand that the readings may be temporarily higher than the cold specification. Do not release air from a warm tire simply to match the doorjamb number; recheck it when cold instead.
Look for an obviously low tire, a nail or screw in the tread, a bulge in the sidewall, a cut, or a wheel that appears damaged. A tire with a bulge or serious sidewall damage should not be driven on. Have it inspected or repaired safely.
Step 2 Find the correct cold tire pressure
Open the driver’s door and locate the tire-information label on the doorjamb or door edge. It lists the recommended cold pressure, usually in pounds per square inch, or PSI, for the front and rear tires. Some Civic versions specify the same pressure at all four corners; others may list different values.
Use the vehicle label rather than the tire sidewall. If the car has nonfactory wheels or tires, the correct pressure may require confirmation from a qualified tire professional, especially if the tire size differs from the original equipment.
Important
Never reset the warning while knowingly leaving a tire underinflated. A calibration can make the system treat an unsafe condition as normal, which defeats the purpose of the warning.
Step 3 Measure and adjust all four tires
Remove the valve-cap from each tire and press the gauge firmly onto the valve stem. Record the reading, then add or release air until each tire matches the cold pressure listed for your Civic. Replace each valve cap afterward so dirt and moisture do not enter the valve.
Check all four tires even if only one looks low. Small pressure differences can be hard to see, and a slow leak may lower a tire without making it visibly flat. If your Civic has a full-size spare connected to its monitoring system, check it according to the owner’s manual as well.
Do not continue driving on a tire that loses pressure again shortly after inflation. A puncture, leaking valve, damaged wheel, or bead leak may require professional attention. The warning light is a safety warning, not merely a dashboard inconvenience.
Step 4 Turn the ignition on without starting the engine
Sit in the driver’s seat with the vehicle in Park. Turn the ignition to the ON position, or press the engine-start button without pressing the brake pedal, so the dashboard and infotainment controls become active. The exact behavior depends on whether your Civic uses a physical key or push-button start.
You can usually perform the calibration while parked. Keep the engine off if you are using a push-button system and do not need the engine running. If the car’s menu will not respond in accessory mode, start the engine only when the vehicle is safely parked and the controls require it.
Step 5 Open the tire-pressure calibration setting
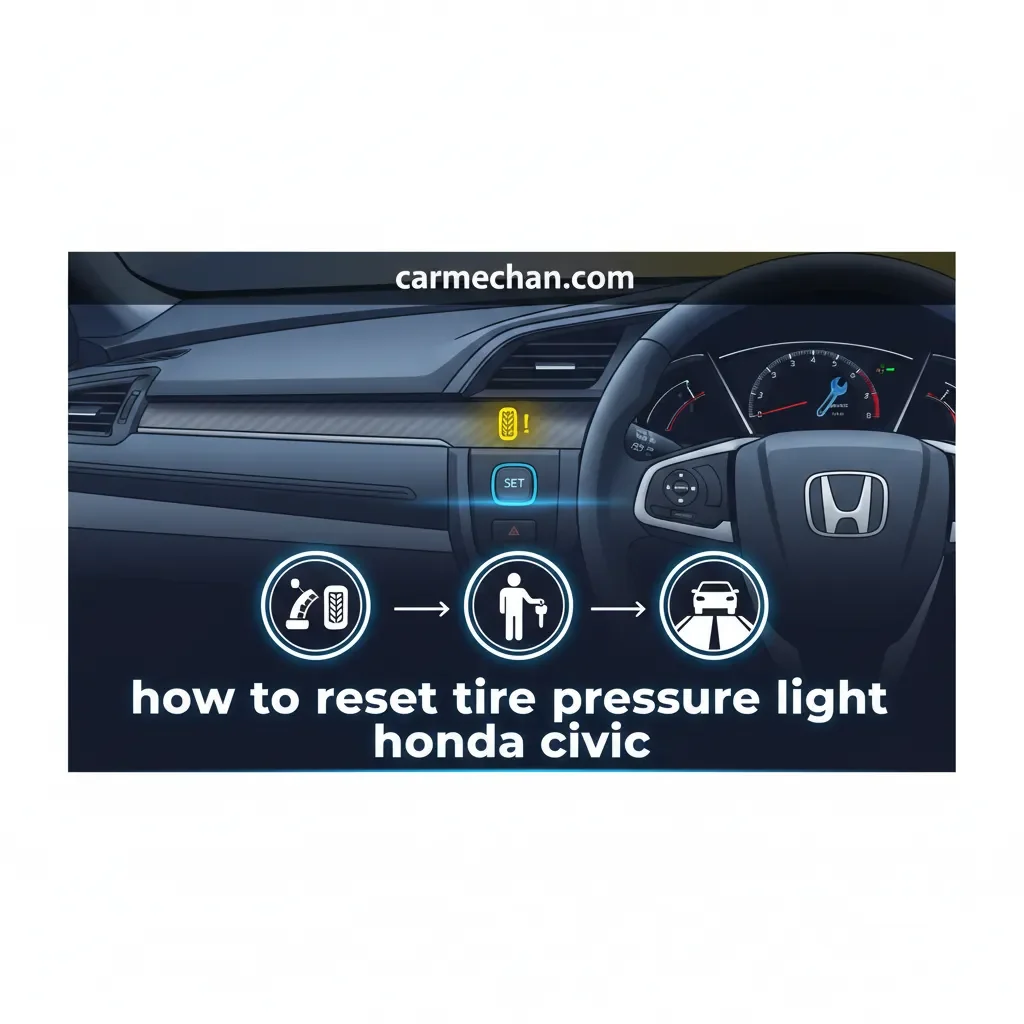
Use the method that matches your Civic’s controls. On many newer models with a touchscreen, the path is similar to Home > Settings > Vehicle > TPMS Calibration. Select the calibration option, then choose Calibrate, Initialize, or a similarly worded command.
Menu names and locations vary by model year and trim. Some Civics place the option under Vehicle Settings, Maintenance, or a Driver Assist menu. If you see a Tire Pressure Monitor or TPMS Calibration choice, select that rather than a general reset for another maintenance system.
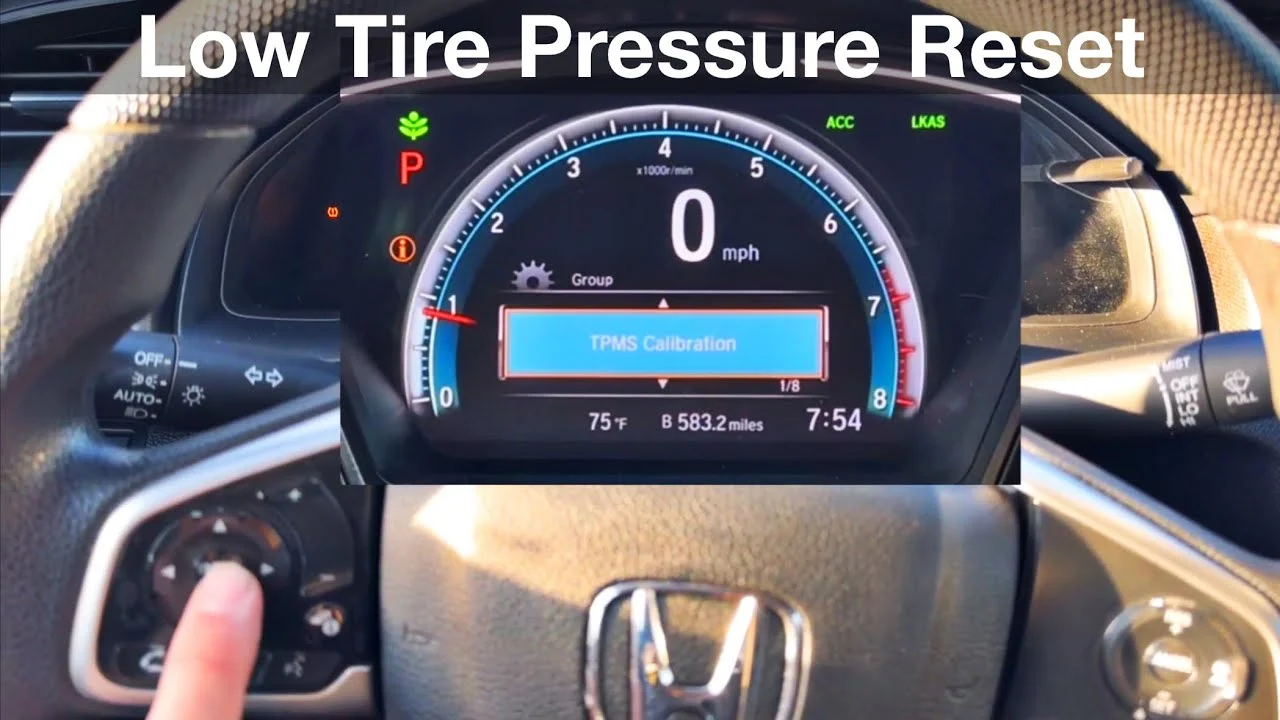
On certain Civics, the calibration command is accessed through the steering-wheel information display. Use the display or information buttons to open Vehicle Settings, find TPMS Calibration, and confirm the command. Move through the menus slowly; a short press and a press-and-hold may perform different functions.
Older Civic versions may have a dedicated TPMS button below the dashboard or near the steering column. With the ignition on, press and hold the button until the TPMS indicator blinks or the system acknowledges calibration. If the button does not respond, consult the owner’s manual instead of holding random dashboard controls.
Step 6 Confirm calibration and allow the system to learn
After you confirm the command, look for a message such as Calibration Started, Calibration Complete, or a confirmation indicator. On many Honda systems, the calibration process continues while you drive rather than finishing immediately in the driveway.
If the display says calibration started, leave the setting alone and drive normally when it is safe. Follow the owner’s manual for the learning conditions; ordinary driving may be enough, but the system may need time to compare wheel-speed signals. Avoid aggressive acceleration or hard cornering while you are checking a warning condition.
A common mistake is to start calibration before adjusting the tires, then assume the warning has been fixed because the message temporarily disappears. Calibration establishes a baseline. It cannot determine that the baseline itself is too low.
Step 7 Drive carefully and watch the warning indicator
Once the tires are set and calibration has been initiated, take a normal drive on a safe road. Pay attention to the dashboard and to the car’s behavior. The low-tire-pressure symbol should remain off after the system completes its learning process.
If the light goes out and stays out, the reset was likely successful. If it remains on during the learning drive, stop in a safe place and recheck the tire pressures when they are cold. Do not keep driving simply to force the light off if the vehicle pulls, vibrates, or shows another warning.
Step 8 Verify the result after the vehicle is parked
After the drive, switch the Civic off and restart it. Confirm that the tire-pressure warning is no longer illuminated. Look at the tires again for an obviously low sidewall or new damage, and check that all valve caps remain installed.
A useful way to approach how to reset tire pressure light honda civic is to check your progress after each stage.
The most useful final check is not only whether the light disappeared. The pressures should remain at the specified levels, the vehicle should drive normally, and the warning should not return during the next several trips. If it returns, treat that as information about the vehicle rather than repeating the reset indefinitely.
Check your result
A successful result is a warning light that stays off after restart and normal driving, with all tires holding the correct cold pressure.
Why the Honda Civic tire-pressure light may need calibration
The TPMS warning light tells you that the vehicle has detected a tire-pressure difference or a system fault. In many Civics, the system is indirect: it does not measure air pressure in each tire with a conventional pressure sensor. Instead, it uses wheel-speed data from the anti-lock braking system and notices when one tire rotates differently because its effective size has changed.
That design explains why calibration matters after adjusting tire pressure, rotating tires, replacing a tire, or installing seasonal tires. The Civic needs a new reference for normal tire behavior. It also explains why the light may not turn off immediately after air is added.
Some model years or configurations may use direct pressure sensors. Those systems can report pressure from sensors installed in the wheels, and their reset or relearn requirements differ. The owner’s manual and the exact dashboard message take priority over a generic procedure.

What the warning symbols mean
A steady amber tire-shaped symbol commonly indicates low pressure in one or more tires, although the system cannot always tell you which tire is affected. Check every tire with a gauge rather than relying on appearance.
If the TPMS light flashes for a period after startup and then remains illuminated, the vehicle may be reporting a system malfunction rather than ordinary low pressure. Possible causes include a failed sensor, a missing sensor, an incompatible wheel, wiring trouble, or a calibration problem.
A separate message may also appear alongside the symbol. Read the full message before dismissing it, because “TPMS,” “Check Tire Pressure,” and “TPMS Problem” can point to different next actions.
When to calibrate instead of simply resetting
Honda generally treats this process as calibration, not a universal erase function. A calibration command is appropriate after the tire pressures are corrected and when the system needs to relearn the normal condition.
If you have changed the tire size, installed wheels without compatible equipment, or replaced a valve-mounted sensor, calibration alone may not solve the issue. The vehicle may need compatible parts, sensor registration, or diagnostic equipment. Do not assume every Civic uses the same procedure because two cars share the same name.
How to check that the reset actually worked
Knowing how to reset tire pressure light honda civic controls is only half the task. Verification prevents a driver from mistaking a temporary dashboard change for a safe repair.
Start with the pressure readings. Compare each cold tire with the doorjamb label, including the tire that did not look low. Then restart the car and watch the warning through startup.
A light that stays off is encouraging, but it should also remain off after the system has had an opportunity to learn during normal driving.
- Pressure check: Every tire matches the vehicle label when cold.
- Visual check: No tire has a bulge, cut, exposed cord, lodged object, or unusual shape.
- Dashboard check: The warning does not remain illuminated after startup.
- Driving check: The Civic does not pull, shake, or produce unusual tire or wheel noise.
- Follow-up check: The warning does not return after the vehicle sits and is driven again.
Keep the pressure gauge in the car if practical, especially after repairing a puncture or during large temperature changes. Cold weather can reduce tire pressure enough to trigger a warning even when no puncture is present, but a seasonal pressure change still needs correction.
What to do if the tire-pressure light stays on
If the warning remains after calibration, do not keep selecting reset over and over. A persistent light usually means the tire pressure is still incorrect, the calibration was not completed, or the system has detected a fault that calibration cannot repair.
| What you observe | Likely direction | Next check |
|---|---|---|
| Light stays on steadily | Low pressure or calibration not completed | Measure all tires cold, correct pressure, and repeat the model-specific calibration. |
| Light flashes, then stays on | TPMS malfunction or sensor issue | Have the system scanned by a qualified shop or Honda service facility. |
| Light returns after a day or two | Slow leak or recurring pressure loss | Inspect for a puncture, valve leak, wheel damage, or tire damage. |
| Light appears after tire or wheel replacement | Missing, incompatible, or unregistered equipment | Confirm that the replacement wheel and sensor setup match the Civic. |
A tire keeps losing air
Inflating the tire and calibrating the system may make the warning disappear temporarily, but it does not solve a leak. Marking or recording the pressure and checking it again when cold can help confirm pressure loss, but do not delay a professional inspection if the tire drops noticeably.
A screw or nail in the tread does not always cause an immediate flat. Do not remove an embedded object on the roadside unless a qualified professional has given you a safe plan. The object may be limiting the leak, and the tire may need proper internal inspection before repair.
The light flashes before staying on
A flashing TPMS indicator generally suggests a monitoring-system malfunction rather than a simple low-pressure condition. The vehicle may be unable to receive a signal, recognize a sensor, or interpret the system correctly.
Check the tire pressures once for safety, but arrange diagnosis if they are correct and the flashing pattern continues. A scan tool or compatible TPMS equipment may be required, particularly after wheel replacement or tire work.
The reset option is missing
If your Civic has no touchscreen calibration menu, check the steering-wheel information display and look for a Vehicle Settings or TPMS Calibration entry. Older vehicles may use a physical TPMS button, while some procedures require the ignition in a particular position.
Use the manual for the specific model year and trim rather than forcing a menu choice that is not present. A missing option can indicate a different system design, not a failure to find the right wording.
The warning appears after a tire rotation
Tire rotation changes the location of each tire, but on many indirect Honda systems the main requirement is still correct pressure followed by calibration. If the car uses direct sensors, the system may need to identify sensor locations or relearn the sensors after service.
Ask the tire shop what equipment was installed and whether the vehicle reported a sensor or relearn issue. This information helps distinguish a normal calibration need from an incompatible or damaged component.
Honda Civic tire-pressure reset FAQs
These answers address common beginner questions, but the owner’s manual remains the final reference when the dashboard layout or system behavior differs from the procedure described above.
Can I reset the Honda Civic tire-pressure light without adding air?
You can start a calibration command, but you should not do so until the tires are set to the correct cold pressure. Resetting an underinflated tire creates an inaccurate reference and can leave you without a useful warning.
How long does a Honda Civic TPMS calibration take?
The command itself may be quick, but the vehicle may need normal driving to complete the learning process. The exact time and driving conditions vary by model year, so follow the message on the display or the owner’s manual.
Why is the light still on after I filled the tires?
The system may need calibration, the tires may not be at the correct cold pressure, or one tire may have a slow leak. A flashing light or a warning that returns soon after inflation points more strongly toward a TPMS fault or pressure loss.
Does a Honda Civic have a TPMS reset button?
Some older Civic versions do, but many newer models use a touchscreen or steering-wheel menu instead. Look for a button labeled TPMS or a calibration setting under Vehicle Settings, and confirm the method for your specific trim.
Should I reset the light after changing from winter to summer tires?
Check the cold pressure first, then calibrate if your Civic’s system calls for it. If the second wheel set lacks compatible TPMS equipment or uses a different system, the warning may require sensor service rather than a normal calibration.
Finish the reset with a pressure check
The practical answer to how to reset tire pressure light honda civic models is to correct the tire pressures first, then use the Civic’s TPMS calibration menu, steering-wheel controls, or dedicated button that matches the vehicle. Finish by driving normally and confirming that the warning stays off, not merely by watching it disappear once.
If the light flashes, returns after a short time, or accompanies unusual handling, stop treating it as a reset problem. Recheck the tires and have a qualified tire or Honda service professional inspect the vehicle for a leak, damaged wheel, failed sensor, or incompatible replacement equipment.