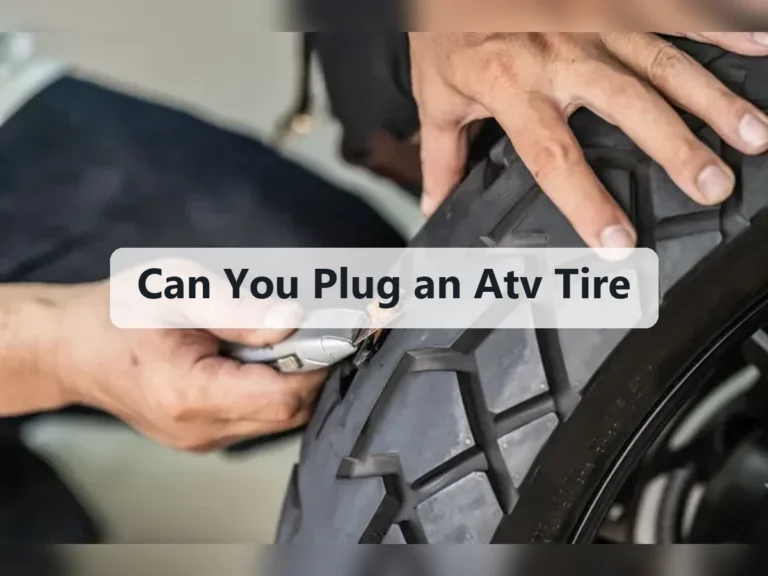
How to Use a Tire Patch Kit Safely for a Flat Tire Repair Job
A punctured tire can turn an ordinary drive into a stressful roadside problem, especially when the nearest shop is closed or far away. A tire patch kit may offer a practical way to restore enough air to move the vehicle to a safe location, but the name can be misleading: many small roadside kits contain rubber plugs designed for an external, temporary repair rather than a true internal patch.
This guide explains how to use a tire patch kit on a tubeless passenger-vehicle tire when the damage is a small puncture in the tread. You will learn how to identify a repairable puncture, remove the object safely, install a plug, inflate the tire, and check for escaping air.
The result should be treated as a temporary repair unless a qualified tire professional inspects and repairs the tire from the inside. Do not attempt this method for sidewall damage, a large cut, a damaged valve, a tire that was driven while severely underinflated, or any puncture near the shoulder.
At a glance
- External plug kits are generally for small tread punctures in tubeless tires, not sidewall or shoulder damage.
- Inflate the tire to the vehicle maker’s specified pressure, then confirm the repair with a soapy-water leak test.
- Drive only as needed to reach a tire shop, and stop immediately if the tire loses air or behaves abnormally.
How to Use a Tire Patch Kit Safely for a Tread Puncture
Before starting, understand which repair your kit actually provides. A true patch is installed on the inside of a demounted tire, while most roadside “patch kits” use a sticky rubber plug inserted through the tread from the outside. The steps below apply to that common plug-style kit and are intended for a temporary repair on a tubeless tire.
Work on level ground away from moving traffic whenever possible. Turn on the hazard lights, set the parking brake, and use a wheel chock if one is available. If the vehicle is in an unsafe location, call roadside assistance instead of working beside the road.
Tools you will need
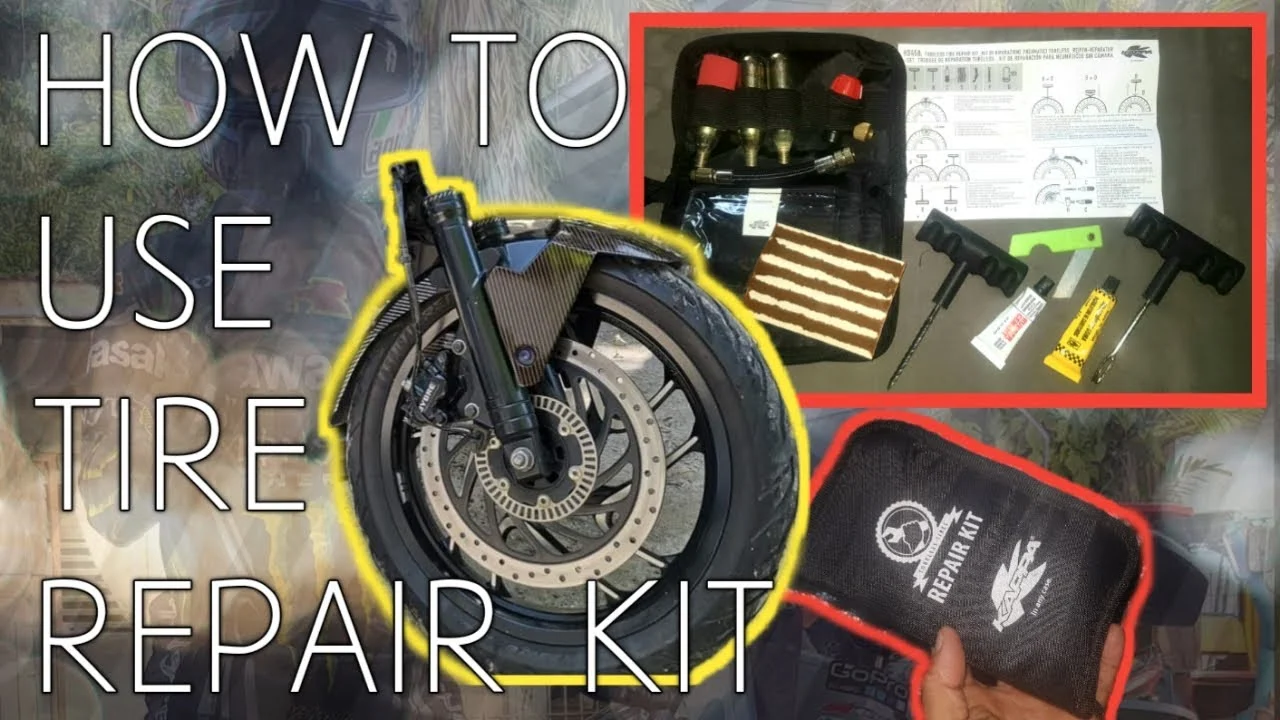
- Rubber tire plugs matched to the kit, for sealing the puncture channel
- Reaming tool, to clean and prepare the puncture
- Plug insertion tool, to push the prepared plug into the tread
- Replacement blade or cutters, to trim excess plug material
- Air compressor or suitable inflator, to restore tire pressure
- Soapy water in a spray bottle, for checking escaping air
- Optional: pliers, for removing a nail, screw, or other tread object
- Optional: tire-pressure gauge, if the inflator does not include one
Step 1 Move the vehicle to a safe, level location
Get as far from traffic as conditions allow before inspecting the tire. Stop on firm, level ground, switch on the hazard lights, apply the parking brake, and place the transmission in Park or in gear for a manual vehicle.
If the tire is rapidly losing air, the wheel is damaged, or you cannot safely work where the vehicle stopped, use the spare tire or call for assistance. A repair kit is not a reason to stand in a traffic lane or on an unstable shoulder.
Step 2 Confirm that the kit and tire are compatible
Check that the tire is a tubeless tire and that the kit contains a rubber plug, a reaming tool, and an insertion tool. Most modern passenger-car tires are tubeless, but a kit intended for a bicycle tube, inner tube, or a different tire type is not interchangeable.
Look at the puncture location before removing anything. A small hole in the central tread may be a candidate for a temporary plug. The repair should stop if the damage is in the sidewall, on the shoulder where the tread curves toward the sidewall, or in a visibly weakened section.
Important
Do not plug a sidewall puncture, a long cut, a hole caused by a torn or missing chunk of rubber, or damage close to the tire’s edge. These areas carry major structural loads and require professional evaluation, usually followed by tire replacement.
Step 3 Find the puncture and check the tire’s condition
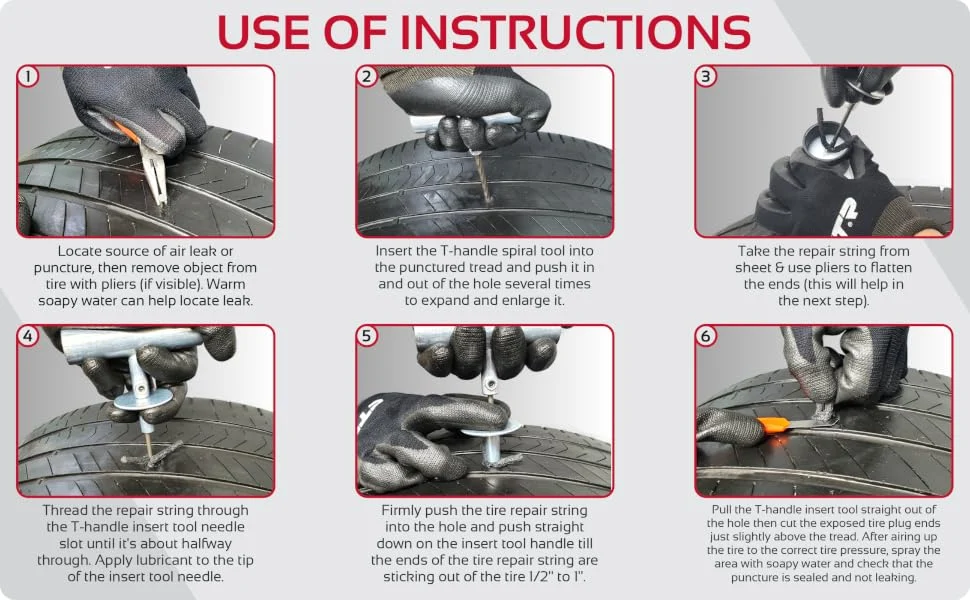
Examine the tread for a nail, screw, shard of metal, or other object. If the object is not obvious, add a small amount of air and spray soapy water over the tread, valve stem, and bead area—the seal where the tire meets the wheel. Bubbles that grow steadily identify an air leak.
Do not rely only on the location of a hissing sound. Inspect the entire tire for bulges, exposed cords, deep cuts, uneven wear, or a section that has separated from the wheel. A puncture may be repairable while other damage makes the tire unsafe.
Step 4 Remove the puncturing object carefully
Use pliers to pull out a nail or screw in a straight, controlled motion. Keep your face and hands clear of the object’s path, and expect the tire to lose air more quickly once the hole is open.
If the object is large, jagged, or difficult to remove, do not enlarge the damage by forcing it out. Mark the puncture location and have the tire inspected. A puncture that is too large for the plug supplied with the kit is not made safe by adding multiple plugs.
Step 5 Prepare the puncture channel with the reaming tool
Push the rough, file-like reaming tool into the hole and work it in and out several times. This cleans debris from the channel and creates a path wide enough for the repair plug. Use firm control rather than excessive force, and keep the tool aligned with the original puncture.
The tool should pass through the tread at the same general angle as the object that caused the puncture. Do not sweep it sideways or deliberately enlarge the hole. The aim is to prepare the existing channel, not to drill a new one.
Step 6 Load one plug into the insertion tool
Thread one rubber plug through the slot or eye of the insertion tool according to the kit’s design. Center the plug so that roughly equal lengths extend from both sides of the tool, unless the manufacturer’s instructions specify a different position.
Apply only the lubricant supplied with the kit, if any. Do not substitute oil, grease, or a petroleum product; these can affect rubber and make the plug less reliable. Prepare the plug immediately before insertion so it remains clean and tacky.
Step 7 Insert the plug into the puncture
Push the loaded insertion tool straight into the prepared hole until the plug is mostly inside the tire. Leave a small amount of plug material visible above the tread. Use steady pressure and keep your hands behind the tool’s handle.
When the tool has reached the intended depth, pull the insertion tool straight back out while leaving the rubber plug in the tire. The tool’s slot should release the plug as it exits. If the plug comes back out, stop and inspect it; do not assume a partially inserted or torn plug will seal.
Step 8 Trim the plug flush with the tread
Use cutters or the kit’s blade to trim the exposed plug close to the tread surface. Leave enough rubber to fill the channel, but remove the loose tail that could catch on the road. Do not cut deeply into the surrounding tire rubber.
A properly seated plug should remain in the puncture without pulling out when you make a light visual check. It may sit slightly below or nearly level with the tread, depending on the kit. A plug that is loose, split, or pulled out during trimming needs professional attention rather than another improvised plug beside it.
Step 9 Inflate the tire to the specified pressure
Use an inflator to add air gradually. Find the correct cold tire pressure on the vehicle’s door-jamb label, glove-box label, owner’s manual, or another manufacturer-provided location—not on the tire’s sidewall, which normally lists a maximum pressure rather than the vehicle’s target. A useful way to approach how to use a tire patch kit is to check your progress after each stage.
Check the pressure with a gauge while inflating. The tread should regain its normal shape, and the tire should sit evenly against the wheel. If air escapes rapidly around the plug or the tire will not hold pressure, stop and install the spare or arrange professional service.
Step 10 Test the repair for leaks before driving
Spray soapy water over the plug and the surrounding tread. Watch for several moments. A few bubbles caused by the spray itself are not necessarily a leak, but a growing stream of bubbles from the plug indicates that air is escaping.
If the plug remains dry and the pressure holds, check the valve stem and bead area once more. A successful plug does not prove that the tire is permanently safe; it only shows that the immediate air leak appears to be sealed.
Check your result
Before moving, confirm that the tire holds the specified pressure, the plug is not lifting out, no new bubbles form in the leak test, and the wheel area is clear of tools and loose materials.
Step 11 Drive only to a safe repair destination
Replace the tire with the spare if your vehicle has one and you know how to install it safely. Otherwise, drive cautiously and only as far as needed to reach a tire professional. Avoid high speeds, heavy loads, abrupt cornering, and long highway travel after an external plug repair.
Monitor the tire-pressure warning light and the vehicle’s handling. Pull over if the steering changes, the vehicle vibrates, the tire looks low, or the warning light returns. A plug that holds air while parked can still fail under heat, load, or road impact.
What Kind of Tire Repair Does a Kit Provide?
The word “patch” is used loosely in product names, so identifying the repair method matters. A roadside plug seals the puncture from the outside. A professional combination repair uses an internal patch with a stem that fills the puncture channel; the tire is removed from the wheel, inspected inside and out, and repaired according to the tire maker’s limits.
A plug-only repair may be useful as an emergency measure, but it is not equivalent to a professional internal repair. When someone asks how to use a tire patch kit, the safest answer depends on whether the kit contains an external plug or an actual patch that requires tire removal and demounting.

External plug kits
These kits usually contain sticky, rope-like rubber strips, a spiral reaming tool, and a slotted insertion tool. They can be used without removing the tire from the wheel, which makes them convenient at the roadside, but they provide less inspection of the tire’s interior and should not be treated as a universal or permanent solution.
Internal patches and combination repairs
An internal patch requires the tire to be removed from the wheel. The inside liner must be inspected for damage, prepared correctly, and repaired with a patch designed for tires. Because demounting a tire requires specialized equipment and knowledge, a beginner should not attempt it with household tools.
When a puncture may be repairable
Repairability depends on the puncture’s size, location, angle, and the tire’s overall condition. In general, a small, clean puncture in the central tread is more favorable than damage near the shoulder. The final decision belongs to a qualified tire professional, especially if the tire was driven while flat or nearly flat.
- Central tread location rather than sidewall or shoulder
- Small puncture with no long cut or missing rubber
- No bulge, exposed cord, bead damage, or severe uneven wear
- No evidence that the tire was driven while substantially deflated
- A tire whose age and condition otherwise meet the vehicle and tire maker’s requirements
How to Check the Repair After Installation
Checking the tire is not a single glance at the plug. Pressure retention, the leak test, the tire’s shape, and the vehicle’s behavior all provide useful evidence. Perform the first check before driving and repeat the pressure check as soon as practical after reaching a repair shop.
Use pressure as the first measurable check
Record or remember the pressure immediately after inflation. If it drops noticeably while the vehicle is parked, the repair is not holding. Do not continue adding air and driving repeatedly; fit the spare or request assistance instead.
Look for a slow leak around the plug
Apply soapy water again if the pressure changes. Growing bubbles at the plug show a leak, while bubbles at the valve stem or wheel bead point to a different problem. A plug cannot correct a damaged valve, a bent wheel, or a bead leak.
Pay attention to handling
During the short trip to service, the vehicle should not pull sharply, shake, thump, or produce unusual tire noise. These symptoms can indicate structural damage or a wheel problem even when the plug itself appears sealed.
Have the tire professionally inspected
Tell the technician where the puncture occurred, whether the tire was driven while low, and what repair you installed. Ask for an internal inspection and a repair that follows the tire manufacturer’s limits. The technician may recommend replacing the tire instead of repairing it.
Common Problems and Safer Responses
Most failed roadside repairs come from using the wrong kit, choosing an unsafe puncture location, or mistaking a temporary seal for a permanent repair. The table below helps identify what you may observe and what to do next.
| What you observe | What it may mean | Safer response |
|---|---|---|
| Air escapes immediately after insertion | The plug is not seated, the hole is too large, or the damage is not a simple puncture. | Do not stack plugs. Use the spare or call for service. |
| Bubbles continue around the plug | The plug is leaking or the puncture channel is damaged. | Do not drive on it as a repair. Seek professional inspection. |
| The puncture is near the shoulder | The tire’s flexing area may not hold an external plug safely. | Do not plug it; replace or professionally evaluate the tire. |
| The tire has a bulge or exposed cords | Internal structural damage may be present. | Replace the tire or follow qualified roadside assistance advice. |
| The tire loses pressure overnight | A slow leak remains, possibly at the valve, bead, or plug. | Inflate only to reach service if safe; arrange immediate inspection. |
Do not force a plug into an unsuitable hole
A plug that is difficult to insert is not necessarily a stronger repair. Excessive force can damage the tire, bend the tool, or cause a hand injury. If the supplied plug will not enter after the channel has been properly prepared, stop and have the tire evaluated.
Do not repair a tire that has been driven flat
Driving with very low pressure can pinch and weaken the sidewall or inner liner. The outside may look acceptable while the inside has hidden damage. A professional must inspect the demounted tire before anyone decides whether it can be repaired.
Know when to abandon the roadside attempt
Stop if traffic, weather, darkness, unstable ground, or a lack of safe lighting makes the work hazardous. Also stop if you cannot identify the leak, cannot restore pressure, or are unsure whether the tire is tubeless. A spare tire or roadside service is safer than an uncertain repair.
Beginner Questions About Tire Patch Kits
These questions address common points of confusion before and after an external plug repair.
Can I use a tire patch kit on a sidewall?
No. A sidewall puncture or cut affects a highly flexible, load-bearing part of the tire and should not be repaired with an external plug or an adhesive patch. Replace the tire or have a qualified professional evaluate it.
Is a tire plug a permanent repair?
Usually, no. A roadside plug is best treated as a temporary measure to reach professional service. A tire professional may install an approved internal combination repair if the tire passes inspection, or may recommend replacement.
Can I plug a tire without removing the nail?
No. The puncturing object must be removed so the repair material can fill the channel. Remove it only when the tire is in a safe location and the damage appears suitable; otherwise, leave it in place until roadside assistance or a tire shop can inspect it.
How do I know whether my tire is tubeless?
Most passenger vehicles use tubeless tires, and the tire sidewall or owner’s manual may identify the construction. If you are unsure, do not guess based only on appearance. A repair shop can confirm the tire type and the correct repair method.
Can I drive on a plugged tire on the highway?
That is not the safest use of an external plug. Drive only as necessary to reach a safe repair location, at a cautious speed, after confirming that the tire holds pressure. Use the spare or roadside assistance for longer travel or if pressure is changing.
Finish the Repair With a Professional Inspection
Learning how to use a tire patch kit can help you manage a small tread puncture when you are stranded, but the goal is to restore mobility safely—not to avoid inspection. Identify the damage, use the plug only in a suitable tread location, inflate to the vehicle’s specified pressure, and verify the seal with soapy water.
Keep monitoring the tire and arrange a professional inspection as soon as possible. If the damage involves the sidewall, shoulder, bead, valve, exposed cords, a large cut, or a tire driven while flat, skip the kit and use the spare or roadside assistance instead.