How to Install Tire Pressure Monitoring System: Beginner Guide
A tire-pressure warning light is easy to ignore until a tire is already losing air. A separate tire pressure monitoring system can give you actual pressure readings before a problem becomes obvious, especially on an older vehicle without factory TPMS or when you want to monitor a trailer, camper, or spare tire.
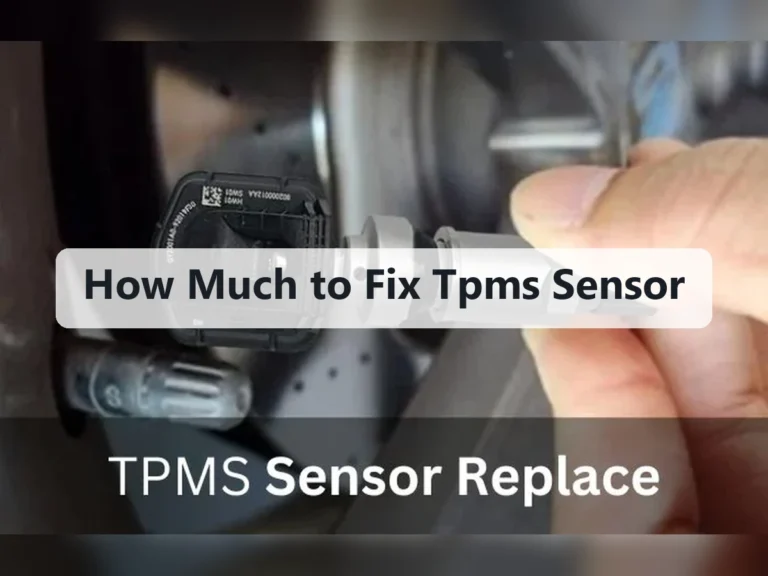
For most beginners, the safest realistic installation is an aftermarket external TPMS: small sensors screw onto the valve stems in place of the valve caps, and a display receives their readings. Installing an internal system requires removing each tire from its wheel, replacing or fitting valve-stem sensors, and balancing or relearning the system, so that version is usually better handled by a tire shop.
This guide explains how to install tire pressure monitoring system equipment using the external method, from checking compatibility and setting the correct cold pressure to pairing sensors and confirming the readings. It also explains what changes if you have an internal kit, how to recognize a bad installation, and when to stop rather than guessing.
At a glance
- Use the vehicle door-jamb placard—not the tire sidewall—as the starting point for pressure.
- External sensors must be fully seated, leak-free, and assigned to the correct wheel position.
- Verify the display against a reliable gauge before trusting it on the road.
How to install tire pressure monitoring system equipment safely
The procedure below is for a vehicle-compatible aftermarket kit with external valve-cap sensors and a separate monitor. Read the kit instructions first because pairing commands, battery types, sensor limits, and display menus vary by manufacturer. The basic process is consistent, but the vehicle should never be driven with a sensor that leaks, interferes with the valve stem, or is not rated for the wheel and tire application.
Tools you will need
- Aftermarket TPMS kit with four or more compatible external sensors and a monitor
- Reliable handheld tire-pressure gauge for checking the display
- Air compressor or access to an air station for correcting pressure
- Valve-core tool or small wrench only if the kit specifically requires one
- Optional: mild soapy water in a spray bottle for checking valve leaks
- Optional: spare sensor batteries or replacement seals if supplied by the manufacturer

Step 1 Confirm the kit matches the vehicle and wheels
Check the TPMS kit’s supported pressure range, temperature range, sensor type, valve-stem compatibility, and number of monitored positions. Confirm that the sensor threads fit standard automotive Schrader valve stems; do not force a sensor onto a nonmatching, damaged, or unusual valve assembly.
Decide whether you need four sensors or more. A fifth sensor is useful only if the kit and vehicle can monitor a full-size spare. A compact spare, temporary spare, motorcycle wheel, trailer, or dual-wheel setup may require a different sensor or may not be supported at all.
Look at the vehicle’s door-jamb label, owner’s manual, or fuel-door placard for the recommended cold tire pressure. Also check whether the vehicle already has factory TPMS. An aftermarket monitor can supplement factory TPMS, but it does not automatically replace a factory warning system or satisfy any legal requirement that applies to the vehicle.
Important
Do not install an external cap sensor if the valve stem is cracked, badly corroded, bent, or leaking at its base. Have the valve stem inspected or replaced first; adding weight or torque to a damaged stem can make the leak worse.
Step 2 Park safely and identify each wheel position
Park on a level, stable surface away from traffic, set the parking brake, and turn the vehicle off. Let the tires cool before adjusting them. “Cold” pressure means pressure measured after the vehicle has been parked long enough for the tires not to be noticeably warmed by driving or strong sun.
Stand at the driver’s seat and identify the positions as the kit does: usually front left, front right, rear left, and rear right. The labels may appear as LF, RF, LR, and RR. Write the positions down if necessary so you do not pair a sensor to the wrong corner.
Inspect each valve cap and valve stem. Remove dirt around the threads, but do not remove the small valve core unless the instructions specifically call for it. A normal external sensor replaces the valve cap; it does not replace the valve core or require tire removal.
Step 3 Set every tire to the recommended cold pressure
Remove the existing valve caps and check each tire with the handheld gauge. Add or release air until each tire reaches the pressure listed for the vehicle’s normal load. Use the front and rear values separately if the placard specifies different pressures.
The number molded into the tire sidewall is generally the tire’s maximum allowable pressure under stated conditions, not the vehicle’s recommended everyday setting. Using that number as your target can produce the wrong handling and ride characteristics. If the vehicle is heavily loaded or towing, follow the vehicle manufacturer’s loading instructions rather than improvising.
After adjusting the pressure, wait briefly for the gauge reading to settle and check again. If one tire is substantially lower than the others, look for a puncture or valve leak before installing a sensor. A TPMS can report low pressure, but it cannot repair the cause or make a damaged tire safe.
Step 4 Install the sensor seals and sensors by hand
Fit the supplied O-ring, gasket, or sealing washer exactly as shown in the instructions. Some sensors use a removable anti-theft nut or lock ring; place that part on the valve stem before threading on the sensor if the kit requires it.
Screw each sensor onto its valve stem by hand. Turn it until the seal contacts the end of the valve stem, then tighten only as far as the manufacturer specifies. Many kits require light hand-tightening rather than pliers, but the correct value depends on the design.
Over-tightening can damage the seal, valve core, or sensor housing.
Make sure the sensor does not contact the wheel, brake components, wheel cover, or any nearby suspension part. The sensor should sit straight and should not wobble. If the valve stem twists, sinks into the tire, or rotates excessively while you install the sensor, stop and have the stem checked.
Step 5 Check every sensor for an air leak
Spray a small amount of mild soapy water around the sensor-to-valve connection and the valve-stem area. Watch for a growing stream of bubbles rather than a single bubble left by the spray. No expanding bubbles should appear.
If bubbles grow, remove the sensor, inspect the seal for dirt or damage, and reinstall it according to the instructions. Recheck the pressure after correcting the connection. If the leak continues, do not keep tightening harder; the seal, valve core, valve stem, or sensor may be incompatible or defective.
Repeat the check on every installed sensor. This is an important part of learning how to install tire pressure monitoring system equipment because a display can appear to work while a poorly sealed sensor is slowly letting air out.
Check your result
A successful leak check leaves the pressure stable and shows no expanding bubbles at any sensor connection. If a tire loses measurable pressure after installation, remove that sensor and resolve the leak before driving normally.
Step 6 Power the monitor and pair each sensor
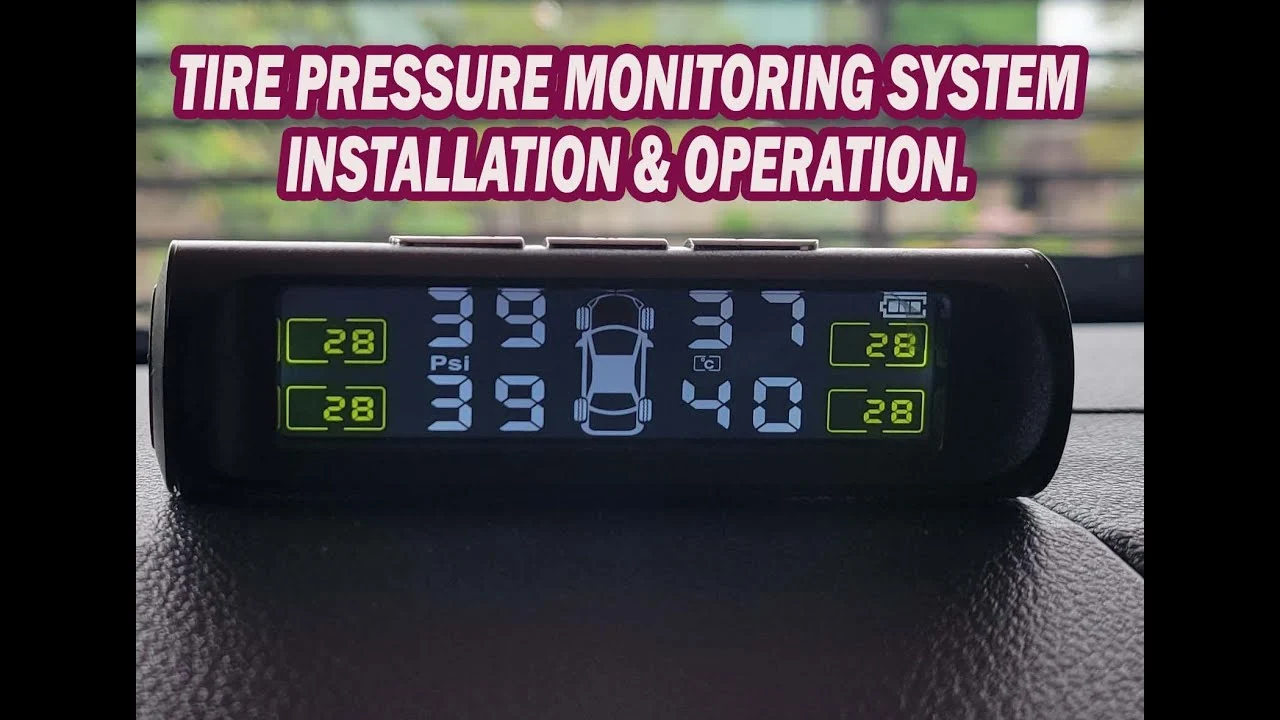
Place the monitor where it can be seen without blocking the windshield, gauges, airbag areas, or controls. Use the supplied power cable, battery, or mounting method. Do not route a cable across the steering wheel, pedals, shifter, or a place where it could interfere with an airbag.
Turn on the monitor and enter its sensor-learning or pairing mode. Most systems ask you to select a wheel position and then activate the matching sensor by installing it, pressing a sensor button, or briefly changing the pressure. Follow the kit’s exact activation method rather than repeatedly adding or removing air.
Pair one physical wheel at a time and confirm the monitor identifies the intended position. If the screen shows a pressure for the left front wheel, make sure that sensor is actually on the left front wheel. A sensor in the wrong position can provide an apparently reasonable number while making the location warning misleading.
Some kits pair automatically when the sensors are installed. Even then, check all displayed positions. If a sensor will not wake, check its battery tab, battery orientation, protective film, and compatibility.
Keep phones, metal objects, and other transmitters away only if the manufacturer says they can interfere; do not assume every failure is a radio problem.
Step 7 Configure pressure units, warning limits, and tire positions
Set the monitor to the pressure unit you understand, such as psi or bar, and select the correct vehicle or axle arrangement if the menu offers those choices. Set warning thresholds according to the kit’s instructions and the vehicle manufacturer’s recommended pressure.
A warning threshold should give you time to investigate a meaningful pressure change, but it should not be chosen randomly. Some kits calculate a low-pressure warning from a stored baseline; others let you enter separate high- and low-pressure limits. Use the manufacturer’s setup procedure and do not confuse the tire’s maximum sidewall pressure with the vehicle’s normal target.
A useful way to approach how to install tire pressure monitoring system is to check your progress after each stage.
If the monitor has a temperature alarm, leave its default setting unless the manual provides a clear vehicle-specific adjustment. Tire temperature changes with weather, speed, load, sunlight, and braking, so a temperature number is a warning aid rather than a precise diagnosis by itself.
Step 8 Drive briefly and verify the complete system
With all four pressures set, all sensors leak-free, and the display showing the correct wheel positions, take a short local drive where it is safe to observe the system. Some sensors do not transmit continuously while parked and begin reporting only after the wheels rotate.
Watch for four useful results: every installed position reports, the numbers rise gradually as the tires warm, no tire drops unexpectedly, and no sensor-fault or low-battery message appears. Do not use the monitor while moving in a way that distracts you; pull over if you need to change a setting or study the screen.
After the drive, park safely and compare the readings with the handheld gauge when the tires are cool again. The two instruments may not match exactly because of sensor tolerance and temperature, but a large or rapidly growing difference needs investigation. Record the normal cold readings so future changes are easier to recognize.
If your vehicle has factory TPMS, check its warning light separately. The aftermarket display may show pressure correctly while the original system still needs a sensor relearn, a reset, or professional diagnosis. Do not assume one system has repaired or disabled the other.
External and internal TPMS installation are different jobs
External valve-cap sensors are suitable for many beginner installations because the tire remains mounted on the wheel. They are visible, replaceable, and generally easy to move between compatible wheels, although they can be exposed to weather, theft, road grime, and damage from automatic car washes or careless handling.
Internal valve-stem sensors sit inside the tire and wheel assembly. They may provide a cleaner installation and can be appropriate for a permanent retrofit, but fitting them normally requires breaking the tire bead, replacing the valve-stem sensor, inflating the tire, and sometimes balancing the wheel. The vehicle may also require a sensor relearn procedure.

When a tire shop should do the installation
Choose professional installation if the kit uses internal sensors, the vehicle has metal valve stems or unusual wheels, the tire is run-flat or difficult to service, or you do not have safe tire-service equipment. Tire removal and inflation can be hazardous when done with unsuitable tools.
Professional help is also the sensible choice if a valve stem leaks at its base, a tire has sidewall damage, a wheel is bent or cracked, or a sensor will not seat without force. Do not try to fix a persistent leak by adding sealant, stacking washers, or tightening a sensor with pliers unless the manufacturer explicitly requires that method.
How to confirm the readings are trustworthy
Installation is not complete when numbers first appear on the screen. A useful TPMS must report the correct wheel, maintain a stable connection, and agree reasonably with an independent pressure gauge under the same conditions.
Use a consistent cold-pressure baseline
Check pressures at roughly the same point in the day and before driving whenever possible. Mark the date and cold psi for each wheel in the vehicle manual or a phone note. Seasonal temperature changes can alter pressure, so review the readings when the weather changes substantially.
Understand normal pressure and temperature changes
Pressure commonly increases as tires warm during driving. That increase alone is not a puncture. A more concerning pattern is one tire losing pressure while parked, losing pressure faster than the others, or showing a low reading that remains low after the tires cool.
A sensor may report a temperature higher than the surrounding air because it is near a warm tire or brake assembly. Temperature alerts become more meaningful when they are sudden, localized, or accompanied by pressure loss, vibration, a pulling sensation, or unusual tire odor.
Check the sensor position after tire rotation
If the tires are rotated, the physical sensor positions change. Some systems allow you to edit the wheel assignments; others learn the new positions automatically or require a relearn. Update the monitor after rotation so a warning for the front-left screen position does not actually refer to a tire now mounted elsewhere.
Troubleshoot the common installation problems
Most early problems come from a sensor that is asleep, incorrectly assigned, poorly sealed, or outside the monitor’s supported range. Compare the symptom with the likely cause before changing several settings at once.
| Symptom | First checks | Stop and seek help when |
|---|---|---|
| No reading from one sensor | Check battery tab, battery orientation, pairing mode, and sensor compatibility. | The sensor will not activate or the valve stem is damaged. |
| Pressure falls after installation | Test the seal and valve area with soapy water; compare with a gauge. | Bubbles continue or the tire has a puncture. |
| Wrong wheel location appears | Re-pair one sensor at a time and verify the monitor’s position labels. | The system cannot retain assignments after following its manual. |
| Readings differ greatly from the gauge | Compare at the same cold temperature and inspect the gauge and sensor. | The difference persists or the tire is visibly underinflated. |
The display shows dashes or a missing sensor
Some systems wait for wheel movement before displaying a reading. If a short drive does not wake the sensor, repeat the pairing process and inspect the battery tab or battery. A sensor can also be installed on a valve stem that the kit does not support, or its battery can be depleted before installation.
The monitor reports a low battery
Replace the battery only with the type and orientation listed by the manufacturer. Keep the seal, cap, and battery compartment clean and properly closed. After replacement, check whether the sensor must be paired again; some systems remember the sensor identity, while others do not.
The pressure is different from the handheld gauge
First compare both readings while the tire is cold. Check the handheld gauge on another tire or against a known reliable gauge, and remember that sensor and gauge tolerances can differ. If the TPMS reading is implausible, use the independent gauge for immediate safety decisions and replace or test the sensor rather than compensating by changing the tire pressure blindly.
The vehicle’s original warning light remains on
An aftermarket monitor normally does not reset a factory TPMS warning light. The factory system may have a failed internal sensor, an uncompleted relearn, a low sensor battery, or a stored fault. Follow the vehicle’s manual for the reset procedure; if the light flashes before staying on, professional diagnosis is especially appropriate.
Beginner questions about installing a tire pressure monitoring system
Can I install TPMS sensors without removing the tires?
Yes, if you are using external valve-cap sensors designed for your valve stems. Internal sensors require tire removal from the wheel and should generally be fitted by a qualified tire technician.
Do I need to deflate the tire before installing an external sensor?
Usually no. An external sensor screws onto the existing valve stem like a valve cap. Deflate or remove air only when the kit’s instructions specifically require it, and never remove the valve core casually.
Can I use any TPMS sensor on any car?
No. The sensor must match the valve stem, pressure range, communication system, monitor, and wheel arrangement. Check the kit’s compatibility information, especially for trailers, dual wheels, high-pressure tires, and full-size spares.
Why does the TPMS pressure rise after I start driving?
Driving warms the tire and usually raises its pressure temporarily. Compare pressures when the tires are cold, and investigate a tire that loses pressure while parked or shows an abnormal change compared with the others.
Do external sensors need to be removed for a car wash?
Follow the sensor manufacturer’s instructions. External sensors can be exposed to impact, brushes, harsh chemicals, and theft, so removing them may be advisable for some automatic washes. Reinstall them in the same positions and repeat a leak check afterward.
Finish by checking the tires, not just the screen
Learning how to install tire pressure monitoring system equipment is mainly a matter of compatibility, correct cold pressure, careful sealing, accurate wheel assignment, and independent verification. An external kit can be a practical beginner installation when the valve stems are sound and the sensors are designed for the vehicle.
Before relying on the system, confirm that every position reports, the readings are reasonably consistent with a reliable gauge, and no sensor connection leaks. Continue checking tire condition and pressure manually; TPMS is an early-warning tool, not a substitute for inspecting tread, sidewalls, valves, and punctures. If the installation involves internal sensors or anything that requires force or tire disassembly, stop and use a qualified tire service professional.