How to Remove Coolant Temp Sensor Safely on Most Modern Cars
Removing an engine coolant temperature sensor is usually a manageable repair, but it is not a part to loosen casually. The sensor sits in a coolant passage or housing, so opening it while the engine is hot can release pressurized coolant and cause serious burns. A rushed removal can also damage the electrical connector, strip the sensor hex, or leave air in the cooling system.
On many cars, the sensor is held in place by threads or by a small retaining clip. The exact location varies: it may be installed in the cylinder head, intake manifold, thermostat housing, or a coolant outlet. The basic process is the same—work on a cold engine, disconnect the wiring, remove the retainer or threaded sensor, and protect the opening from contamination.
This guide explains how to remove coolant temp sensor safely, what tools you need, how to recognize the two common mounting styles, and how to check the sensor, connector, and coolant system afterward. It covers removal for inspection or replacement; it does not recommend operating the vehicle with the sensor left out.
At a glance
- Only open the cooling system when the engine and radiator are fully cool.
- Confirm whether the sensor uses threads or a retaining clip before applying force.
- After removal, check for a damaged seal, bent terminals, leaks, and trapped air before driving.
How to remove coolant temp sensor safely on your vehicle
The safest method begins with identifying the correct sensor and reducing cooling-system pressure. Look for the electrical sensor screwed into or clipped into a coolant passage; do not confuse it with an oil-pressure switch, a radiator fan switch, or a separate coolant temperature sender for the dashboard gauge.
Tools you will need
- Vehicle service information or a reliable repair diagram, to confirm the sensor location and mounting style
- Basic socket set, ratchet, and the correct deep socket or wrench for the sensor
- Small flat screwdriver or pick, for releasing a connector lock or retaining clip
- Drain pan and clean container, to catch coolant released from the sensor opening
- Replacement O-ring, sealing washer, or sensor, if the old seal is not reusable
- Optional: scan tool or infrared thermometer, for checking sensor-related faults after reassembly
Step 1 Confirm the sensor and read the vehicle-specific procedure
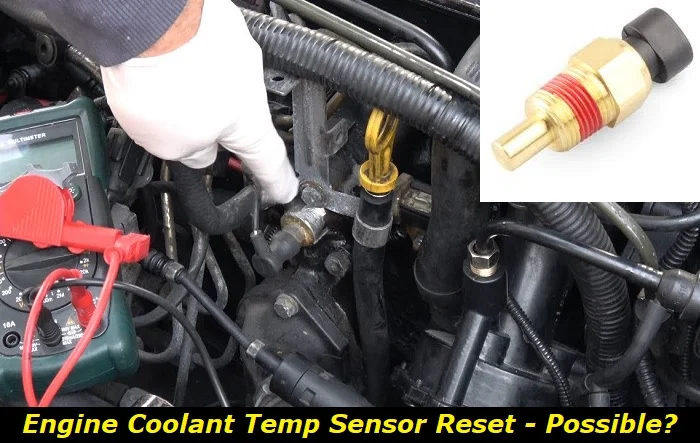
Find the engine coolant temperature sensor before disconnecting anything. It commonly has a two-wire connector and is positioned where engine coolant flows, but connector style and location differ substantially between vehicles. A service diagram, parts illustration, or vehicle-specific repair manual can prevent you from removing the wrong component.
Check whether the instructions call for draining coolant, removing an intake duct, releasing a clip, or using a particular socket. Some engines have more than one temperature sensor, and one may control the engine computer while another operates the gauge or cooling fan.
Make sure you have the correct replacement seal if you are installing a new sensor. A threaded sensor may use a crush washer or pre-applied sealant, while a clip-in sensor normally uses a rubber O-ring. Do not add thread sealant unless the manufacturer specifies it; sealant can affect sensor grounding or enter a coolant passage.
Step 2 Let the engine and cooling system become completely cold
Park on a level surface, switch off the engine, set the parking brake, and allow the vehicle to cool fully. The upper radiator hose should not feel firm from heat and pressure, and the coolant reservoir should be cool to the touch. If there is any doubt, wait longer rather than testing the system by opening the cap.
Never remove the radiator cap or pressurized expansion-tank cap on a hot engine. Hot coolant can erupt from the opening even when the engine is off. Keep your hands, clothing, and tools away from belts and fans if the vehicle must be inspected while warm.
Important
Do not proceed if the engine is hot, the cooling system is visibly swollen or leaking under pressure, or you cannot identify the correct sensor. A burn from pressurized coolant is more serious than a delayed repair.
Step 3 Disconnect the battery only when the vehicle procedure calls for it
Many sensor removals can be completed with the ignition off and the key removed, without disconnecting the battery. If the service information specifies battery disconnection, or if tools could contact nearby wiring or a starter terminal, disconnect the negative battery cable and secure it away from the terminal.
Record any settings that your vehicle may lose, such as radio presets or automatic window calibration. Battery disconnection can also erase diagnostic information, so read trouble codes first if you have a scan tool and want to preserve that information for diagnosis.
Step 4 Expose the sensor and control the coolant level
Remove only the covers, air ducts, brackets, or engine trim that block access. Put fasteners in a container and take a quick photograph before moving hoses or connectors. Avoid pulling on a wiring harness to create space; the harness may be clipped to a brittle bracket.
Decide whether the coolant level must be lowered. If the sensor sits below the coolant level in the engine, coolant will flow from the opening when the sensor comes out. Drain enough coolant into a clean pan to bring the level below the sensor, following the vehicle’s drain procedure.
If the sensor is high on the engine, only a small amount may escape, but keep the pan in place anyway.
Do not drain coolant onto the ground. Keep the liquid away from pets and children because antifreeze is poisonous and can smell or taste appealing to animals. If the coolant is clean and the correct type for the vehicle, it may be reusable in a clean, labeled container; otherwise, plan to use fresh coolant and dispose of the old fluid according to local rules.
Step 5 Release the electrical connector without damaging it
Inspect the connector closely before trying to unplug it. Many connectors have a sliding lock, a hinged secondary lock, or a flexible tab that must be pressed while the connector is pulled straight off the sensor. Release the lock first, then wiggle the connector gently by its plastic body.
Do not lever against the sensor’s plastic nose or pull on the wires. If the connector is stuck from heat or corrosion, clean dirt from around it and use a small pick only on the locking feature. A broken connector may require a replacement pigtail, and a loose terminal can create the same symptoms as a failed sensor.
After it comes off, inspect the plug for green corrosion, moisture, pushed-back terminals, cracked plastic, or damaged insulation. The connector should come away with its terminals aligned and its lock still functional.
Step 6 Remove the retaining clip or loosen the threaded sensor
Identify the mounting style before applying a tool. A clip-in sensor usually has a U-shaped metal or plastic retaining clip and an O-ring seal. A threaded sensor has a hexagonal metal or plastic base designed for a socket or wrench.
For a clip-in sensor, place a drain pan beneath it and remove the clip only after you know where it can be safely stored. Use a pick or small screwdriver to lift the clip from its slot, keeping one hand near it so it does not spring away. Once the clip is out, twist the sensor gently to break the O-ring’s grip and pull it straight from the housing.
A useful way to approach how to remove coolant temp sensor is to check your progress after each stage.
For a threaded sensor, place the correct deep socket fully over the hex. Turn it counterclockwise with steady pressure. If it will not move, stop and confirm that you are turning the sensor rather than a nearby fitting, then use an approved penetrating product only where appropriate and allow it to work.
Excessive force can crack a plastic coolant outlet or round the sensor hex.
Some threaded sensors have a copper sealing washer that may remain stuck to the housing after the sensor is removed. Make sure the old washer is accounted for before installing another sensor. Do not gouge the sealing surface while lifting it out.
Step 7 Lift out the sensor and protect the open coolant passage
Once loose, remove the sensor by hand and keep it upright over the drain pan. For a clip-in design, expect a small amount of coolant to escape as the sensor clears the O-ring. For a threaded design, remove the final threads slowly so you can respond if coolant begins flowing faster than expected.
Cover the opening temporarily with a clean, lint-free cloth or an appropriate temporary plug while you inspect the part. Do not push a rag deep into the coolant passage, and do not leave a loose object where it could fall into the engine. If the sensor will not be reinstalled immediately, use a proper replacement part or follow the service instructions for keeping the system sealed.
Set the removed sensor on a clean surface. Look for a cracked housing, damaged threads, a flattened O-ring, a missing sealing washer, or heavy deposits on the sensing tip. Deposits alone do not prove the sensor is faulty, because contaminated coolant or a cooling-system problem may be the underlying cause.
Step 8 Check the opening, install the replacement or reinstall the sensor, and restore coolant
Before installation, wipe the sealing area clean and verify that no old O-ring or washer remains. Compare the replacement sensor with the old one: connector shape, thread size or retaining groove, probe length, and seal arrangement should match. If anything differs, stop and confirm the part number rather than forcing it into the housing.
For a clip-in sensor, lubricate the new O-ring with a small amount of clean, compatible coolant unless the manufacturer says otherwise. Seat the sensor fully, align the retaining groove, and install the clip completely. The clip should sit flat and secure; do not substitute wire or a generic fastener.
For a threaded sensor, start it by hand to avoid cross-threading. Tighten it to the vehicle’s specified torque with a torque wrench if that specification is available. Some sensors have a tapered thread and should not be tightened until the hex contacts the housing, so follow the manufacturer’s instructions instead of copying a universal torque value.
Reconnect the electrical plug until its lock clicks or its secondary lock returns to the locked position. Reinstall removed brackets and ducts, then refill the coolant with the specified mixture. If coolant was drained, the system may require a particular bleeding procedure, such as opening a bleeder screw, using a fill funnel, or running the heater while the engine warms.
Step 9 Check the finished work before returning the vehicle to service
With the engine still off, inspect the sensor base, connector, nearby hoses, and drain points. The connector should be fully seated, the retaining clip or threaded joint should be secure, and no tool or cloth should remain in the engine bay.
Start the engine and watch the sensor area closely as the engine warms. A properly sealed connection stays dry, and the coolant level may drop as air moves out of the system. Do not place your hands near belts, fans, or hot exhaust components while checking for leaks.
Use the vehicle’s specified bleeding and level-check procedure, then allow the engine to cool before checking the reservoir again. Confirm that the temperature gauge behaves normally, the heater produces the expected heat, and no warning light or overheating symptom appears. A scan tool can show whether the engine computer is receiving a plausible coolant temperature signal, but it cannot replace a physical leak check.
Check your result
A successful removal and reinstallation leaves the sensor firmly retained, the connector locked, the coolant level correct, and the sensor area dry after warm-up and cool-down.
How the coolant temperature sensor and its seals work
The engine coolant temperature sensor, often called an ECT sensor, is a temperature-sensitive resistor used by the engine computer. As coolant temperature changes, the sensor’s electrical resistance changes, allowing the computer to adjust fuel delivery, ignition timing, idle behavior, cooling-fan operation, and other functions.
That sensor is different from the dashboard gauge sender on some vehicles. A vehicle may use separate sensors for the powertrain computer, gauge, fan control, or warning system. This is why a correct location and connector identification matter more than simply choosing the sensor that is easiest to reach.

Why coolant may come out during removal
The sensor is installed in a passage connected to the cooling system. If the sensor opening is below the coolant level, gravity will allow coolant to escape once the seal is broken. If the engine is warm, pressure can make the release sudden and dangerous; a cold engine reduces pressure but does not eliminate the need for a drain pan.
Air introduced during the repair can prevent the heater from working correctly or create local hot spots. Some cooling systems purge air automatically, while others require a precise bleeding process. Use the procedure for the specific vehicle rather than assuming that filling the reservoir alone is sufficient.
Understanding how to remove coolant temp sensor also means recognizing the limits of the method.
How the mounting styles differ
A threaded sensor usually seals with a washer, a tapered thread, or a manufacturer-approved coating. A clip-in sensor relies on an O-ring compressed inside a bore. These designs are not interchangeable, and a sensor that appears similar can still have a different thread, probe length, or calibration.
Never force a clip-in sensor into a threaded opening or install a threaded sensor where a retaining clip belongs. If the housing is plastic, be especially careful: twisting a seized threaded sensor can damage the entire coolant outlet.
How to verify the sensor removal and repair
Verification has two parts: confirming that the sensor itself came out without damage and confirming that the cooling system still operates correctly after the opening is sealed. A visual inspection is essential even if the engine computer later reports normal temperature readings.
Inspect the removed part and connector
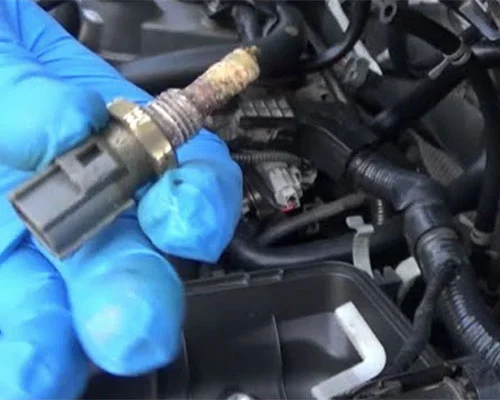
Check the sensor’s sensing tip for cracks, severe corrosion, or a heavy coating. Examine the threads or O-ring groove, and compare the old seal with the new one. A flattened or cut O-ring should not be reused, and a crushed sealing washer should be replaced unless the manufacturer specifically permits reuse.
Look into the connector without inserting a probe that could spread the terminals. Both terminals should be at the same height, clean, and firmly retained. Corrosion or coolant inside the connector can return a fault after the sensor is replaced.
Check coolant level, temperature behavior, and leaks
After the engine cools, check the level at the marked point on the reservoir or radiator, depending on the vehicle design. A changing level after the first heat cycle may indicate that air was purged, but a continuing drop usually indicates a leak that needs attention.
During warm-up, the temperature should rise gradually rather than immediately reaching the hot zone. The heater should produce steady heat, and the engine should not show an overheating warning. If the gauge climbs rapidly, the heater goes cold, or coolant boils into the reservoir, shut the engine off and let it cool before diagnosing further.
Common problems after coolant temperature sensor removal
Most difficulties come from using the wrong sensor, disturbing a brittle connector, reusing a damaged seal, or failing to remove air from the cooling system. The symptoms below help separate a sensor problem from a broader cooling-system fault.
| What you observe | Likely area to inspect |
|---|---|
| Coolant appears around the sensor | O-ring or washer, sensor seating, threads, retaining clip, or cracked housing |
| Temperature warning or fault code remains | Connector terminals, wiring, incorrect sensor, stored code, or a separate cooling-system issue |
| Gauge rises quickly or heater turns cold | Low coolant, trapped air, thermostat problem, water-pump issue, or active leak |
| Sensor will not loosen | Wrong tool, corrosion, cross-threading, or a fragile plastic housing |
When a threaded sensor is stuck
Stop if the hex begins to round or the surrounding coolant housing flexes. Confirm that the socket fits completely and that no retaining clip or secondary fastener is still holding the component. On a plastic housing, replacing the housing may be more difficult than replacing the sensor, so controlled force is important.
If the sensor remains seized, seek a repair facility rather than using a long breaker bar near a fragile outlet. A snapped sensor or cracked housing can release coolant rapidly and turn a simple service into a larger repair.
When the connector will not release
Search for a secondary lock before prying. Sliding locks often move only a few millimeters, while hinged locks may need to be lifted from one edge. Clean the area and use light pressure on the release tab; pulling harder on the harness usually makes the damage worse.
If the lock or terminal breaks, do not rely on a loose plug held in place by tape. The engine computer needs a stable electrical connection, and intermittent contact can cause hard starting, poor fuel control, or an incorrect temperature reading.
When the vehicle overheats afterward
Turn the engine off and let it cool. Do not remove the pressure cap while hot. Once cool, inspect the sensor seal, coolant level, hoses, belt-driven components, and any bleed points.
If the level is low or the leak is visible, do not continue driving simply because the temperature later drops.
Overheating after sensor service may be unrelated to the sensor. A thermostat, cooling fan, radiator, water pump, or preexisting leak can cause the same result. Professional diagnosis is appropriate when the cause is not immediately clear.
Frequently asked questions about coolant temperature sensors
Can I remove the coolant temperature sensor without draining coolant?
Sometimes. If the sensor is positioned above the coolant level, only a small amount may escape, but you should still place a drain pan underneath. If it sits low in the engine, drain coolant below the sensor first to control the flow.
How long should the engine cool before sensor removal?
Remove the sensor only when the engine and cooling system are fully cool. The coolant reservoir and upper hose should not be hot or pressurized. The exact waiting period depends on ambient temperature, engine size, and how recently the vehicle ran, so temperature is a better guide than a fixed time.
Can I drive with the coolant temperature sensor removed?
No. An open coolant passage will leak and introduce air, and a disconnected sensor can cause incorrect fueling or cooling-fan behavior. Reinstall a suitable sensor and restore the coolant level before driving.
Should I use thread tape on the new sensor?
Only if the vehicle manufacturer specifies it. Many sensors depend on a particular sealing washer, tapered thread, or factory-applied sealant. Thread tape can interfere with electrical grounding or contaminate the cooling system, so it is not a universal solution.
Why is the coolant temperature sensor still showing a fault after replacement?
Check that the correct sensor was installed, the connector is fully locked, and the terminals are not corroded or pushed back. Also check the wiring and coolant temperature data with a scan tool. A stored diagnostic code may need to be cleared after the underlying problem is fixed, but clearing it alone will not repair a wiring or cooling-system fault.
Finish the repair with a cold-system check
Learning how to remove coolant temp sensor components safely is mainly a matter of controlling heat, pressure, coolant, and force. Identify the correct sensor, wait for a fully cold engine, release the connector correctly, and determine whether the part is threaded or held by a retaining clip before removing it.
Afterward, use the correct seal, secure the sensor, refill and bleed the cooling system as required, and inspect for leaks through a complete warm-up and cool-down cycle. If the connector is damaged, the housing cracks, the sensor will not release, or the engine overheats, stop and get qualified help rather than risking a coolant burn or engine damage.